
Let’s learn how to create a multilingual WordPress site step by step with WPML!
Nowadays, due to the increasing globalization, we need to build our website with multi-language to sell our products to customers from overseas. As a result, it is essential for us to build our website as a multilingual site.
In this article, we will show you step by step to build a multilingual WordPress site with WPML – one of the most popular WordPress plugins for multi-language.
1. Install and Configure WPML
Firstly, we need to purchase WPML from the developer then install and active on the website. You can follow steps below:
- Log in to your WPML.org account.
- Go to the Downloads section and download the main WPML components: WPML core plugin, String Translation, Translation Management, and Media Translation.
- Log into your site and in the WordPress admin, go to the Plugins > Add New > Upload Plugin, select the ZIP files that you downloaded > Install Now.
- Go back to the Plugins page > Activate the newly uploaded/added plugins.
If this is the first-time installation, you need to register WPML to receive automated updates to future versions.
After the installation, you can follow WPML’s setup wizard to add languages to your site.
- Set the default language
- Add additional languages
- Specify where to display language switchers
- Register WPML
2. Translate Menus
Next, we need to translate WordPress menus and create different menus per language. You can translate menus manually, or have WPML synchronize menu content.
Option 1 – Translating Menus Manually
Go to Appearance > Menus.
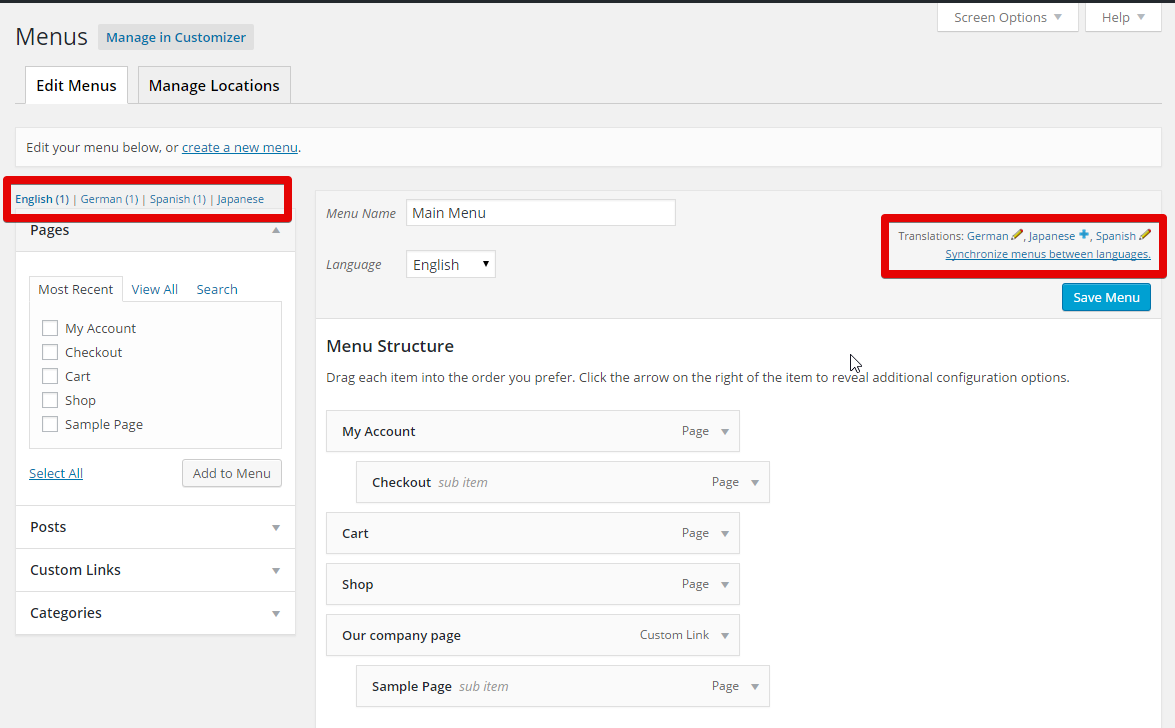
To translate this menu, click on the + icons next to the other languages. Now, you’re creating a new menu, which will be linked as the translation of this menu.
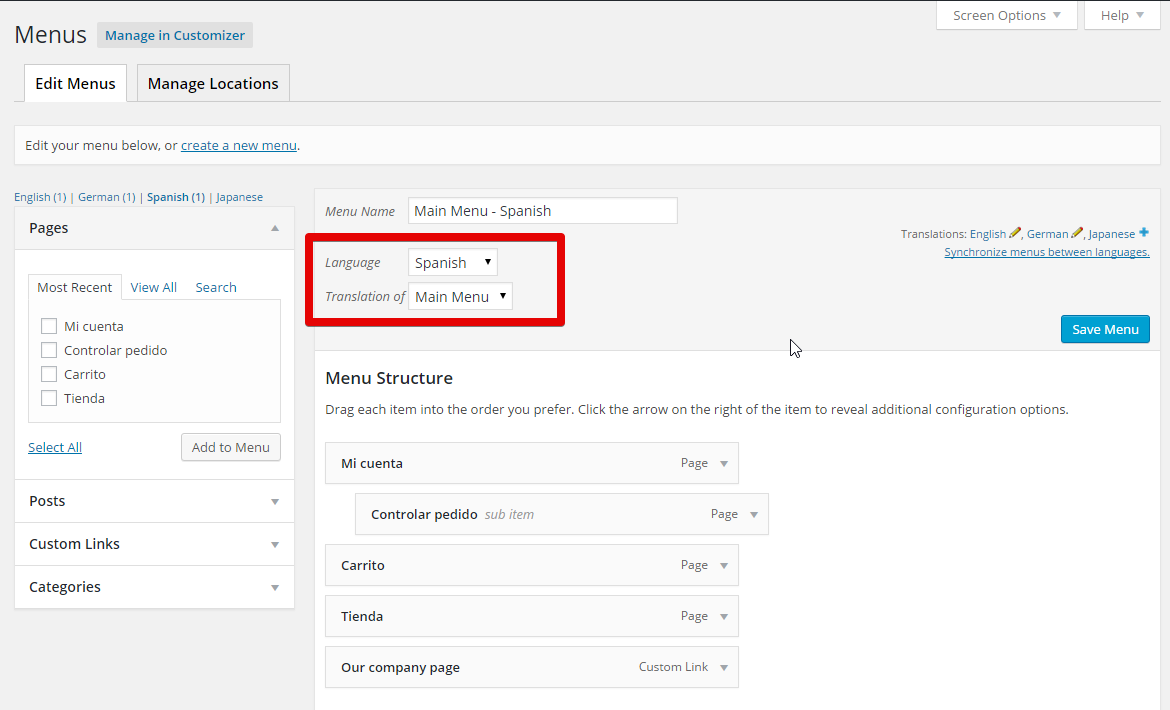
You can now add pages and categories to the translated menu.
Option 2 – Automatic Menus Sync by WPML
The menu sync tool aims to keep your menus in different languages synchronized. It does so by adding or removing items from the translated menus. This way, any manual edits that you do on the translated menus are kept through the sync process.
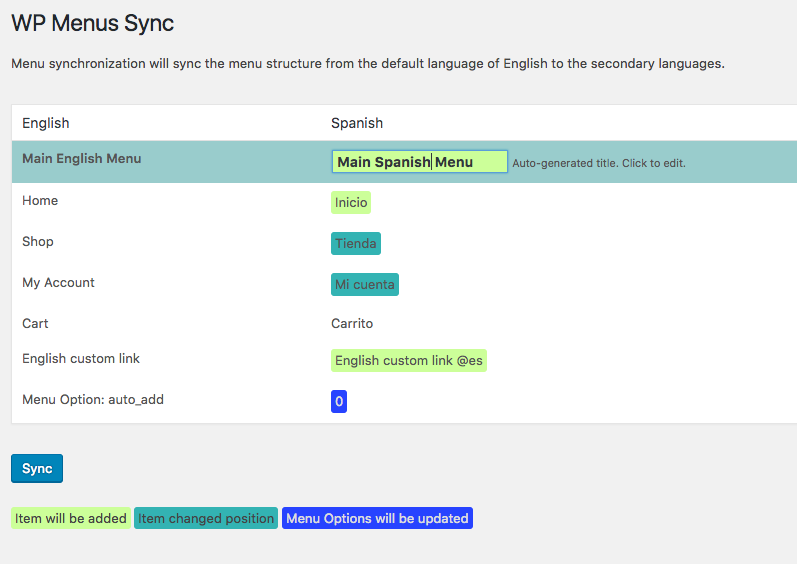
To use WPML’s menu sync, go to WPML > WP Menus Sync.
WPML will show you what it’s going to do. You’ll see which entries will be added or removed from the translated menus. Click on the Sync button to perform the selected operations. Anything you add manually to the translated menus will be preserved throughout WPML sync operation.
Translate Custom Links
If you do not install the WPML String Translation add-on, you can manually edit custom links and their labels in the translated menus.
If you have the WPML String Translation add-on active, you can take its advantage by following these steps:
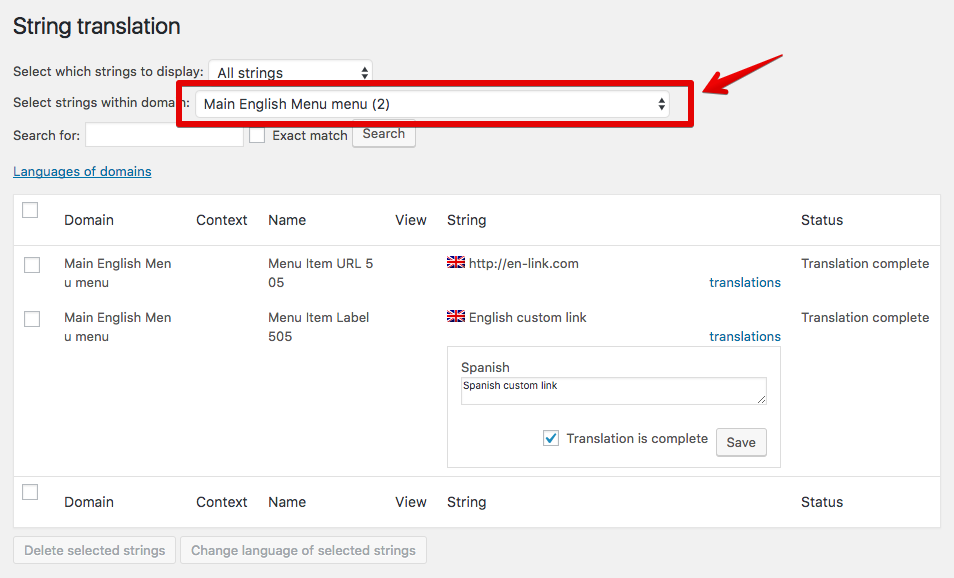
- After syncing menus, go to the WPML > WP Menus Sync page again.
- Find the link at the bottom to translate these custom menu links and labels on the WPML > String Translation page.
- Go to the WPML > WP Menus Sync page and run Sync one more time to update translated menu links and labels.
Displaying the Translated Menus
In the theme, you can specify the menu in the default language. WPML automatically hooks to the menu system and will display the correct menu in the current language.
3. Translate Widgets
WPML lets you easily translate your Widgets via the String Translation screen. This requires that the WPML String Translation module is installed. The module is available with the Multilingual CMS account type.
WordPress ships with a few default widgets and WPML will automatically register them for translation the moment you install WPML String Translation.
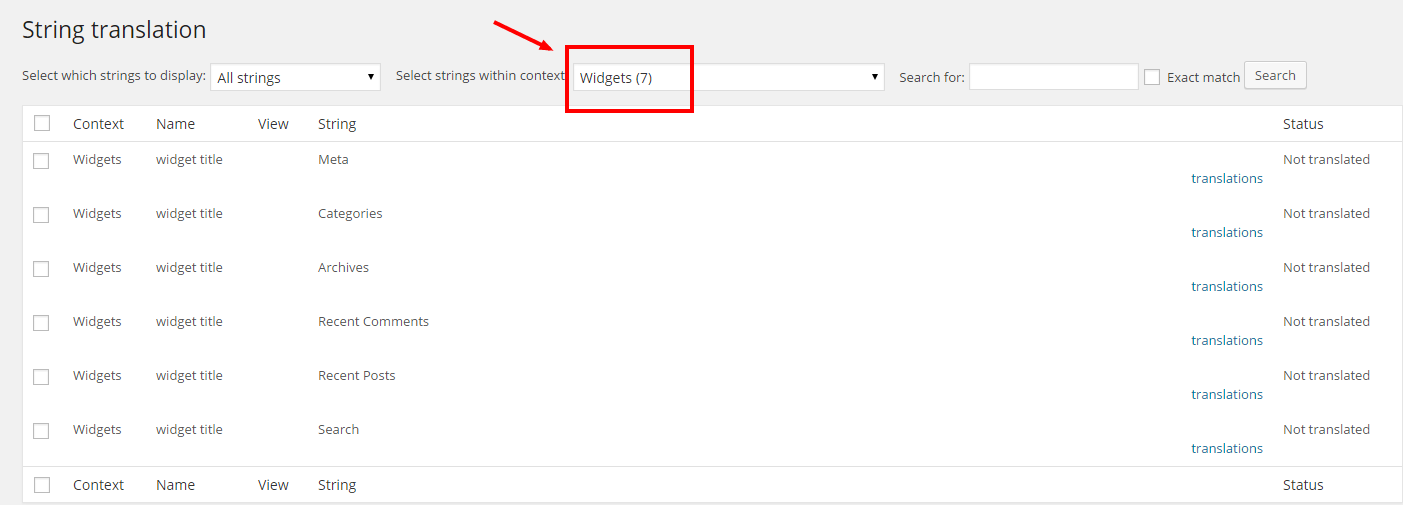
Visit the String Translation screen and you will see all the default widgets registered under the context “Widgets” ready for translation.
Often times themes and plugins provide custom widgets or you may be coding your own widgets. If this is the case, you will notice that these widgets may not always register automatically for translation; or perhaps only the widget title registers but not other widget texts.
Widget Titles
Widget titles must go through filters so that WPML can register them for translation
The code will look like this:
function widget( $args, $instance ) {
  extract($args);
  $title = apply_filters( 'widget_title', empty($instance['title']) ? '' : $instance['title'], $instance );
}
Other Widget Texts
Often times widgets provide other text fields such as textareas or input fields. There are two ways to let WPML know that these exist and to register them for translation.
- Registering widget fields for translation – The coding method
The coding method is described in detail here with examples.
The second non-coding method is described below.
- Registering widget fields for translation via String Translation
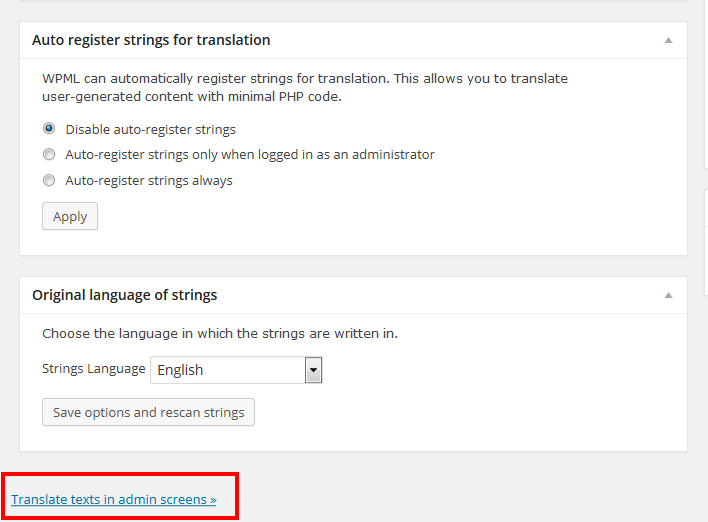
One of the advance features of String Translation is that is allows admins to select texts that are saved in the wp-options database table and register them for translation. Since WordPress widgets save their texts inside the wp-options table this means that widget also benefit from the feature.
All you need to do is visit String Translation and scroll to the bottom of the settings page. Locate “Translate texts in admin screens” and click on the link.
This will open a new screen with a tree of options. Search for your widget and click on it’s name to expand it’s fields.
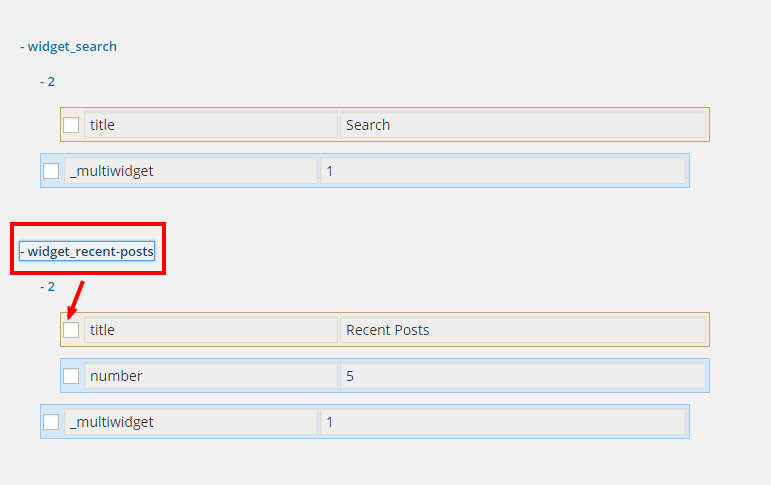
Enable the texts you want to register for translation and click “Apply” at the bottom of the screen.
Finally, visit the main String Translation settings page to translate the text.
You can see the tutorial video for Widget Translate here.
4. Translate Taxonomy
Next, we will continue translating taxonomy. We consider only the case of product categories, but any taxonomy registered with WordPress has a similar interface. You can translate taxonomy individually, from the taxonomy edit screens, or centrally.
Firstly, we need to enable the translate of the custom taxonomy. Please go to WPML > Settings >Taxonomies Translation section and set your custom taxonomy to Translate.
Option 1
- Go to Posts > Categories/ Tags and open each category or tag.
- Click on Add button to create a new category/tag linked directly to your original category/tag.
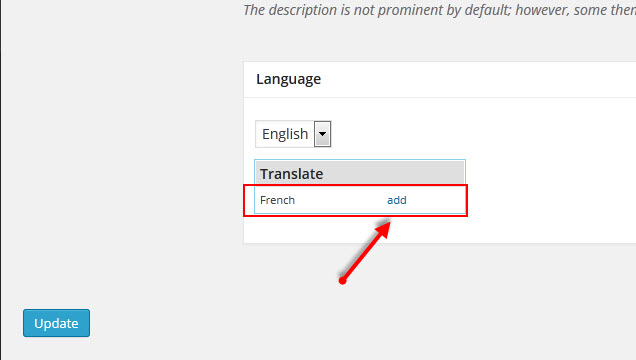
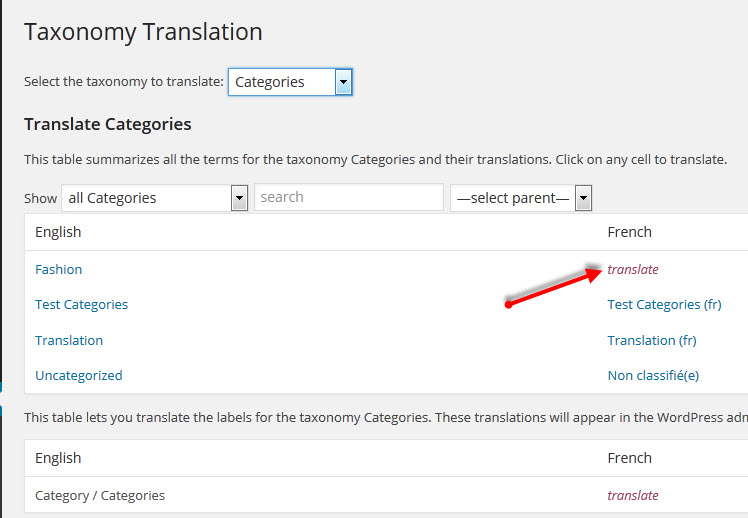
Option 2
- Navigate to WPML > Taxonomy Translation and select taxonomy to translate.
- All your categories/ tags are listed here. You can determine which are not translated. Just click on “translate” to convert.
5. Translate Pages, Posts and Custom Posts
Translation of posts and pages has the same application. Going to each post or page in detail, you can find the translation control table easily. It is also easy for you to translate the main content in two ways:
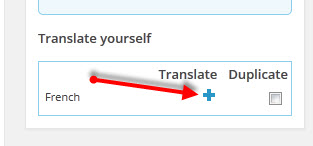
Option 1 – Translating Manually
Click on the + icon and add your new content in the new post. This new post is the translation of your original post.
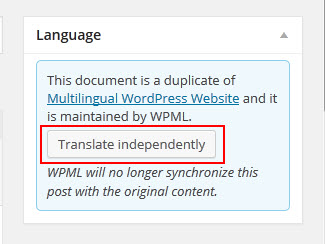
Option 2 – Automatic Sync by WPML
- You duplicate your original post
- Click “Show” to open a new post just created in the previous step.
- Choose “Translate independently” to start to translate your article.
6. Theme and Plugins Localization
Currently, all our WordPress themes and plugins are compatible with WPML. When using our theme, you can easily translate your site into multi-languages.
For more detail information about this issue, you can refer to the WPML Documentation here.


Leave Your Comment