This guide will help you to know how to configure a post in SW WordPress themes
Post is an important elements in any WordPress website. It makes your blog a blog by servings of content that are listed in reverse chronological order on your blog’s front page.
In this article, we will help you to know How to configure a post in SW WordPress Themes.
To configure a post in SW WordPress Themes, please follow the steps below:
Step 1 – Navigate to Posts in your WordPress admin sidebar.
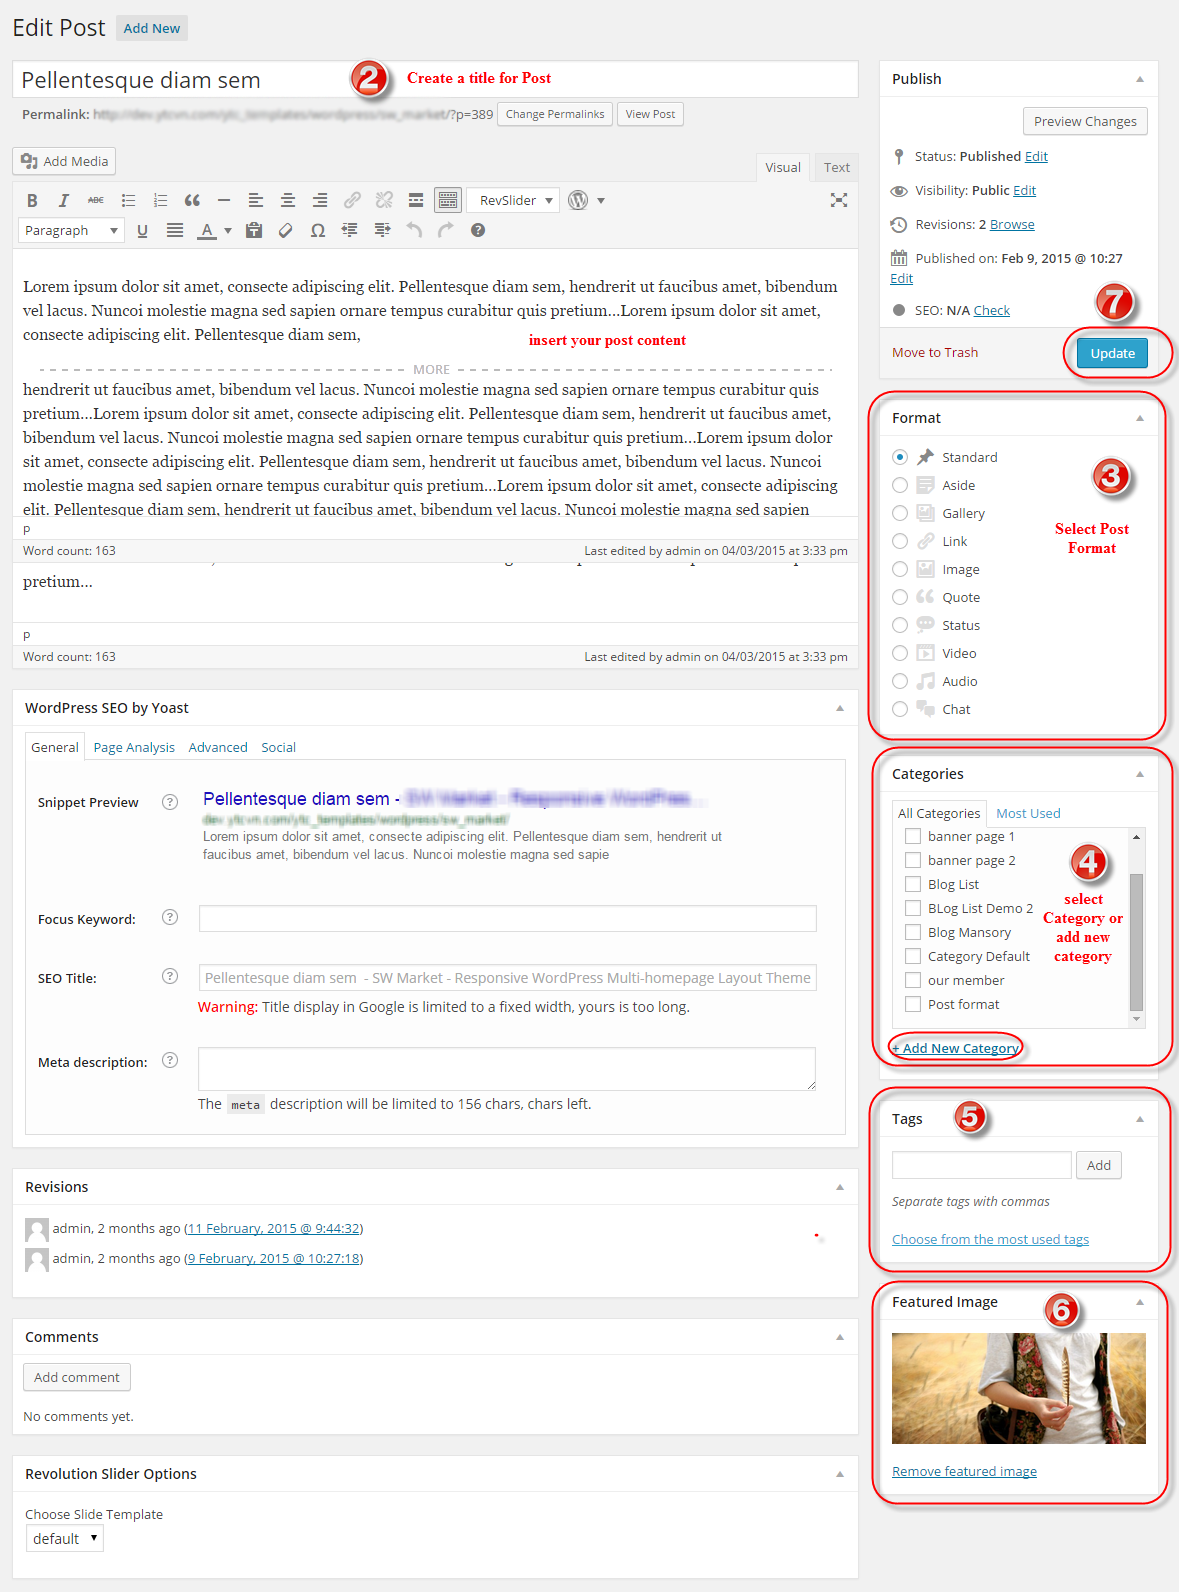
Step 2 – Click on the Add New option to make a new post. Create a title, and insert your post content in the editing field. You can use visual composer or Ya shortcodes elements inside the post.
Step 3 – Select Post Format from the right side.
Step 4 – Add Categories from the right side. To assign it to the post, check the box next to the Category name.
Step 5 – Add Tags from the right side. Type the name of the tag in the field, separate multiple tags with commas.
Step 6 – For a single image, click the first Featured Image Box, select an image and click the Set Featured Image button.
Step 7 – Once you are finished, click Publish or Update to save the post.
Here Is A Screenshot That Shows The Various Areas Of The Post Page Described Above.

3HOW TO GET SUPPORT?
- REFERENCE – To have more detail about these configuration in WordPress, you can refer to WordPress Post Configuration.
- SUPPORT – If you have any questions that are beyond the scope of this documentation, please feel free to send us via: Our Support post
- FAQs – Go to Here to view more the Frequently Asked Questions.
