To completely change a website into your language, we need to translate some strings on themes then it will be easier for your target customers to access your store.
Though there are many ways for us to do, in this article, we provide simple steps by steps on how to translate WordPress themes and plugins into a new language with Loco Translate – a free plugin.
How to install Loco Translate plugin
To install Loco Translate, please go to Dashboard > Plugins > Add New then find this plugin and click Install and Activate.

After the installation, we can continue to translate the website.
How to translate theme and plugin with Loco Translate
Now, we can continue to translate the theme and plugins in the website following the steps as below:
Step 1: Choose the theme/plugin you want to translate
Now, you can go to Loco Translate area in the Dashboard and choose the theme or plugins you want to translate.

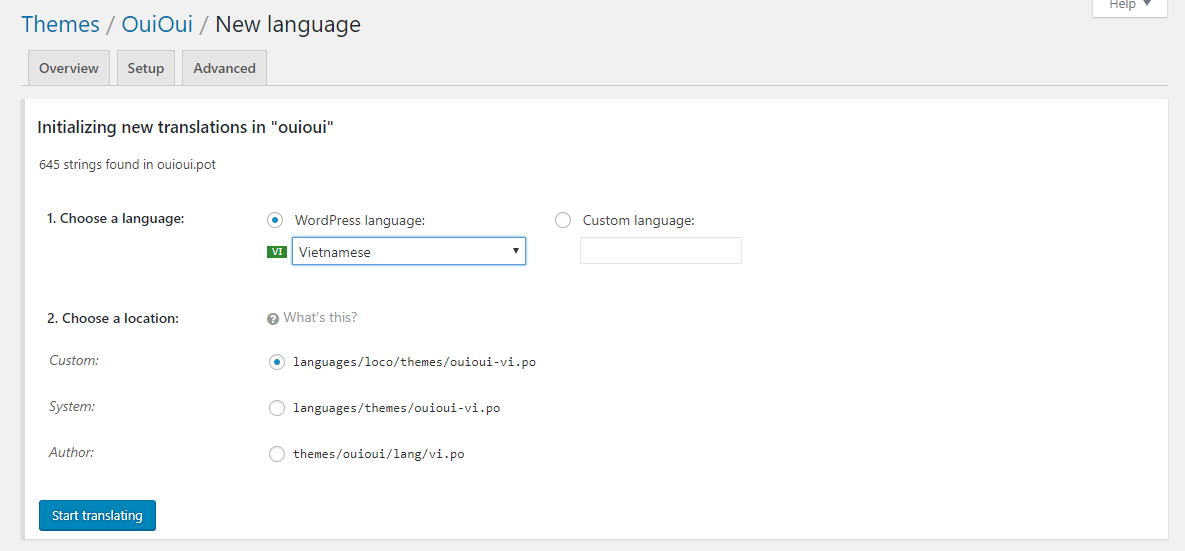
Step 2: Add and Configure a New language
After choosing theme or plugin, you need to choose to create New language. In this step, you are able to select your target language to create your new PO file in.

For options in Choose a location, you are recommended to select one the first two options including Custom or System in order to keep the translations files safe after theme update.

Step 3: Translate the theme
After creating the file for new language, we can start to translate the theme.
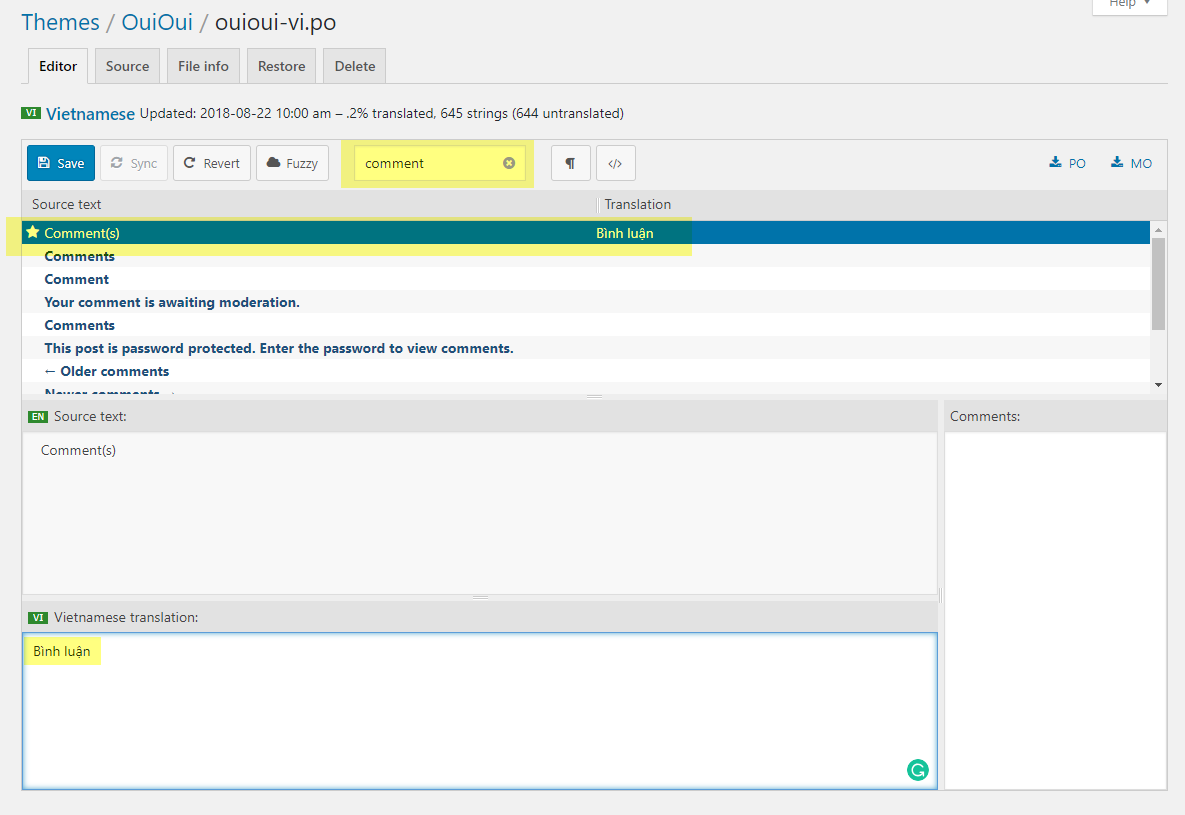
- In the new window, you will enter the term you want to translate in the Filter Box.
- After that, click on it to select and this term will appear in the Source Text box.
- Now, you can add the translation for this term on Translation box in your target language.
- Finally, click on Save button to save your translation.

If you find that some translations are not working correctly, select to synchronize translations by clicking on Sync button on the translation edit screen.
Step 4: Change website language
After translating all the strings for theme and plugins, you can configure to change your site into your language.
Please go to WordPress Dashboard > Settings > General then change the Site Language to your target language and Save Changes. In case your site is already set up in your desired language, you can skip this step.

At the end of the day, you can check your website in the frontend and enjoy your work.
Above are the simple steps on how to translate WordPress theme and plugins with Loco Translate. If there is any difficulty, you can contact us at our Official Support in WordPress platform area then our technical team will help you.
Currently, all our WordPress themes and plugins support Loco Translate. After installing the theme or plugin, you can translate normally following the steps in this article.
Top Premium WordPress Themes 2021:
Below are our best-selling WordPress themes compatible with Loco Translate plugin.
BROWSE ALL WORDPRESS THEMES
See our theme collections:
- See Best Elementor WooCommerce WordPress Themes 2020
- See Best-selling WordPress themes on Themeforest 2020
- See Best free and premium WordPress themes 2020
- See Best multi-vendor marketplace WordPress themes 2020
- See 12+ Best Auto Parts Shop WordPress Themes 2020
- See 15+ Best Clothing & Fashion Shop WordPress Themes 2020
- See 20+ Best Electronics Store WooCommerce Themes 2020
- See 15+ Best Selling Furniture Store WordPress Themes 2020
Our Support Help Desks:
Documentation: Find documentation for themes and frequently asked questions on our Documentation channel.
Ticket System: Submit a ticket about your problem on WPThemeGo Support to get help from the support team. All your information will be kept confidential.
Email Support: Contact us via email for presale questions about our themes and service via contact@wpthemego.com.


Leave Your Comment