
1GETTING STARTED
1.1 Introduction
First of all, I would like to thank you for purchasing this theme, your support is truly appreciated.
SW Clickboom is a modern and beautiful WordPress Theme. Both developers and non-trained users can use it easily. This document covers the installation and use of this theme, reveals some answers to common problems and issues. We encourage you to read this document throughtly if you are experiencing any difficulties. If you have any questions that are beyond the scope of document, please feel free to contact us via our Support Tickets System.
1.2 System Requirements
At the basic level, this theme will require the following conditions:
- PHP version 5.6 or greater
- MySQL version 5 or greater
- WordPress 4.1 or higher (Please note that it has the best performance on the latest version of WordPress)
Note: Recommended PHP Configuration Limits In several cases, you may deal with problems related to low PHP configuration limits, such as: white screen, demo content fails when importing, empty page content and other similar issues. The solution is to increase the PHP limits. You can do this on your own by editing the following lines in php.ini file in your root directory. This is not a file that comes with WordPress so if you are unfamiliar with it you should contact your web host about increasing those limits to a minimum as follows:
- max_execution_time 360
- memory_limit 128M
- post_max_size 32M
- upload_max_filesize 32M
2INSTALLATION
There are two ways to install a WordPress Theme:
- Quickstart Installation: Suitable if you have your first installation and want to get a whole new fresh site as our Demo.
- Manual Installation (including Theme Installation): Suitable if your store is full with content that you don’t want to overwrite.
2.1 Files Structure
At first, you need to download the package to your computer and then unzip it. The package includes files listed as follows:
Data files, including:
- plugins:
js_composer.zip,one-click-install.zip,revslider.zip,sw-core.zip,sw_woocommerce.zip,sw-responsive-post-slider.zip - revslider:
slideshow1.zip,slideshow2.zip,slideshow3.zip,slideshow4.zip,slideshow5.zip,slide6.zip media.xml
Theme Installation files, including:
sw_clickboom_quickstart_vx.x.x.zipfor quickstart installationsw_clickboom-child-theme.zipsw_clickboom_theme_vx.x.x.zipfor manual installation
Note:
- Please note that this file
sw_clickboom_quickstart_vx.x.x.zipis not included in the Themeforest package. You can contact Support Page if you need any help.- The child theme allows you to modify or add to the functionality of the parent theme instead of modifying the core theme files directly, which makes it easy to update the parent theme without erasing your changes. If you plan on making any updates or additions to this theme, you will definitely need to set up this child theme on your site)
To have more information about this topic, please go Here for more detail.
2.2 Quickstart Installation:
We provides SW Quickstart package for each theme which aims to ease the installation for users. Please note that with Quickstart, all your existing data will be overwritten. Thus, if you plan to start your site from the beginning, it will help you save much time of installing and configuring.
Please follow the steps in the Quickstart Installation Instruction for WordPress Theme .
2.3 Theme Installation
When you are ready to install a theme, you must first upload the theme files and then activate the theme itself. The theme files can be uploaded in two ways:
- FTP Upload
- WordPress Upload
Note: If the theme files’ size is larger than 8M, please upload via FTP (File Transfer Protocol).
2.3.1 Theme Installation via FTP
To add the new Theme to your WordPress installation, follow these basic steps:
- Download the Theme archive and extract the file named themename_version.zip, for example here: sw_clickboom_theme_v1.0.0.zip. You may need to preserve the directory structure in the archive when extracting these files.
- Load your FTP client, such as FileZilla.
- Use your FTP program to access your host web server, create a directory to save your Theme in the wp-content/themes directory provided by WordPress.For example, the theme named SW Clickboom Version 1.0.0 should be in wp-content/themes/sw_clickboom_theme_v1.0.0. The theme may provide this directory as part of the archive.
- Upload the Theme files to the new directory on your host server
To select the Theme for your site:
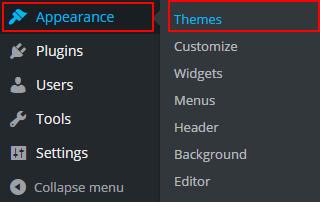
- Log in to the WordPress Administration Panels
- Select the Appearance panel, then Themes to find the new theme uploaded.
- From the Themes panel, roll over the Theme thumbnail image for the Theme you are interested in to see options for that theme.
- You can view more information about any theme by clicking Theme Details.
- A live preview of any Theme (using your blog’s content) can be seen by clicking Live Preview.
- To activate the Theme click the Activate button.
Your selection will immediately become active.
Note: If the Theme preview is blank, do not activate the new Theme without investigating further. Your site may not be displayed correctly, otherwise.
2.3.2 Theme Installation via WordPress Admin Panel
Step 1 – Open the wp-admin panel (Navigate through web browser to the folder where you have installed the WordPress, for example: www.your_domain.com/wp-admin/).
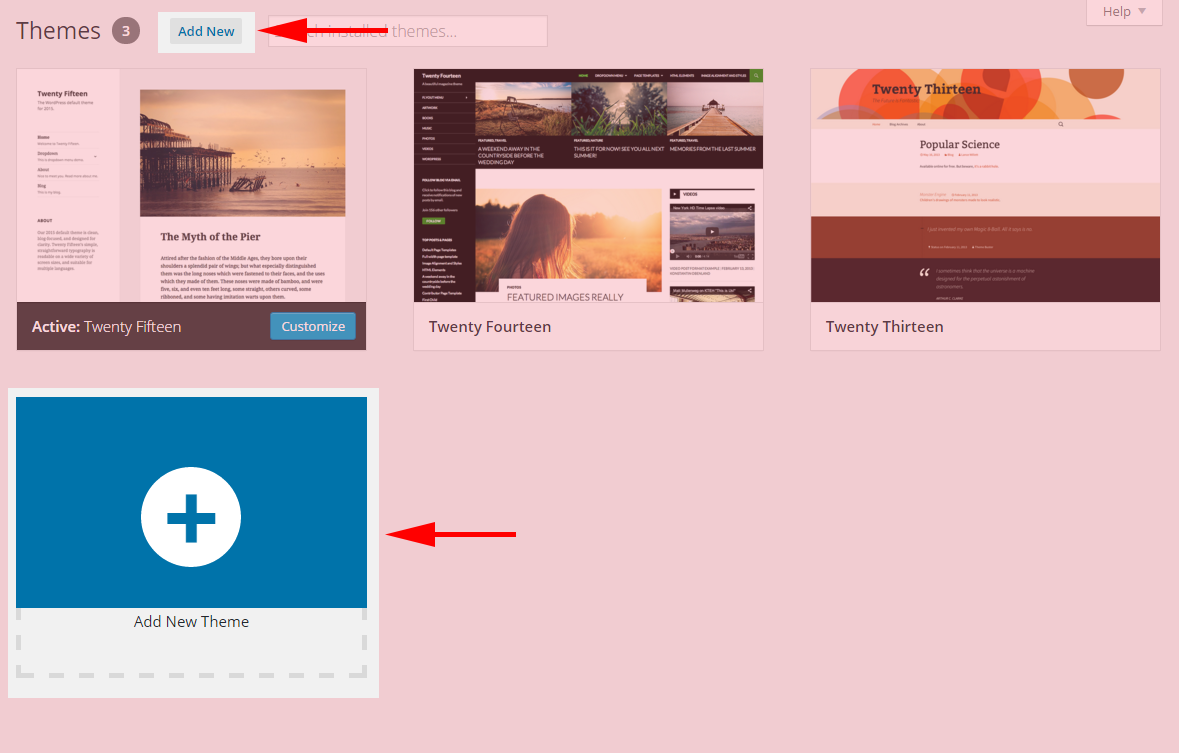
Step 2 – Login to your WordPress Dashboard and go to Appearance >> Themes.
Then, click the Add New button or Add New Theme button
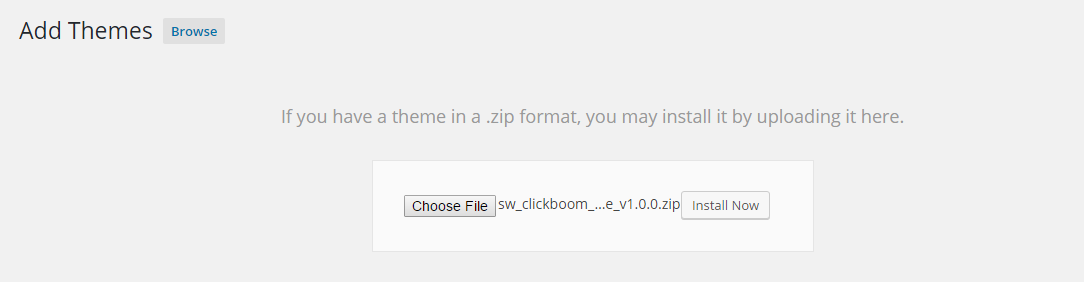
Step 3 – Click the Upload Theme button >> Choose File to import the theme from your computer. Select your sw_clickboom_theme_v1.0.0.zip file and click Install Now.
Step 4 – You have a few minutes to wait till you see the message announcing that Theme installed successfully.
Step 5 – After that, you will be able to activate the theme.

Step 6 – Press “Save Changes” to complete the theme activation.
Once theme is installed, you need to install Required Plugins to get full features working.
2.4 Required Plugins Installation
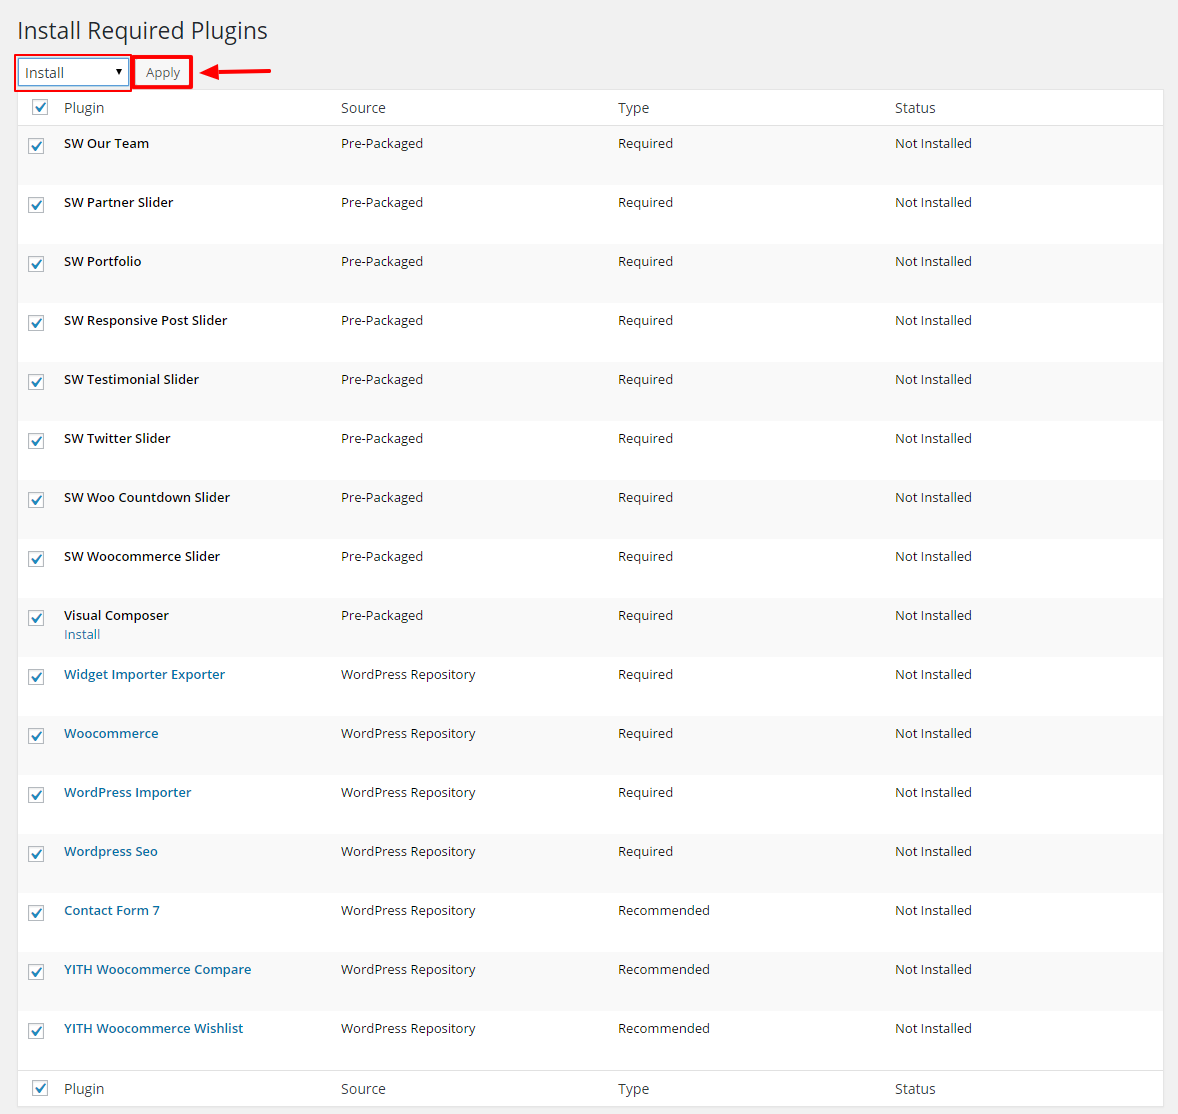
- After installing and activating the theme you will see a yellow popup at the top of the page. The message says that: “This theme requires the following plugins…”, and you need to click the ‘Begin Installing plugins’ link.

You will be redirected to ‘Install Required Plugins’ page, here you will find all of the theme required plugins. To install them just check all of them. In the dropdown menu, select Install to activate them.
-
Note: When installing plugins, if you see a notice that some plugins have unsuccessful installation, please choose each plugin to install again. This case usually occurs as you select all plugins to install at once.
2.5 Import Media file
Step 1 - In the Administrator page, please go to Tools >> Import.
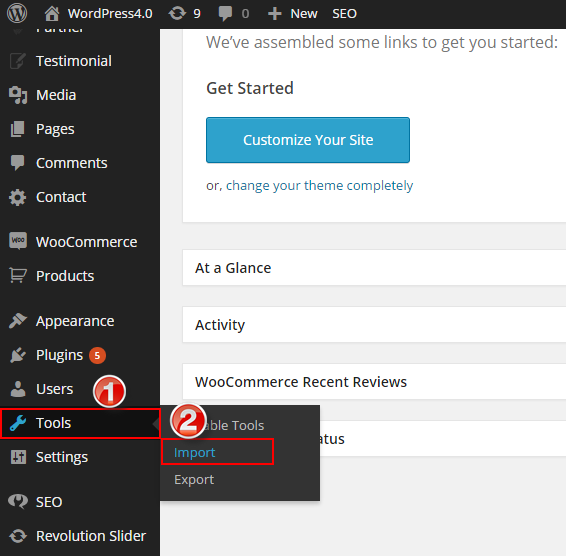
Step 2 - Please choose “WordPress” to import.
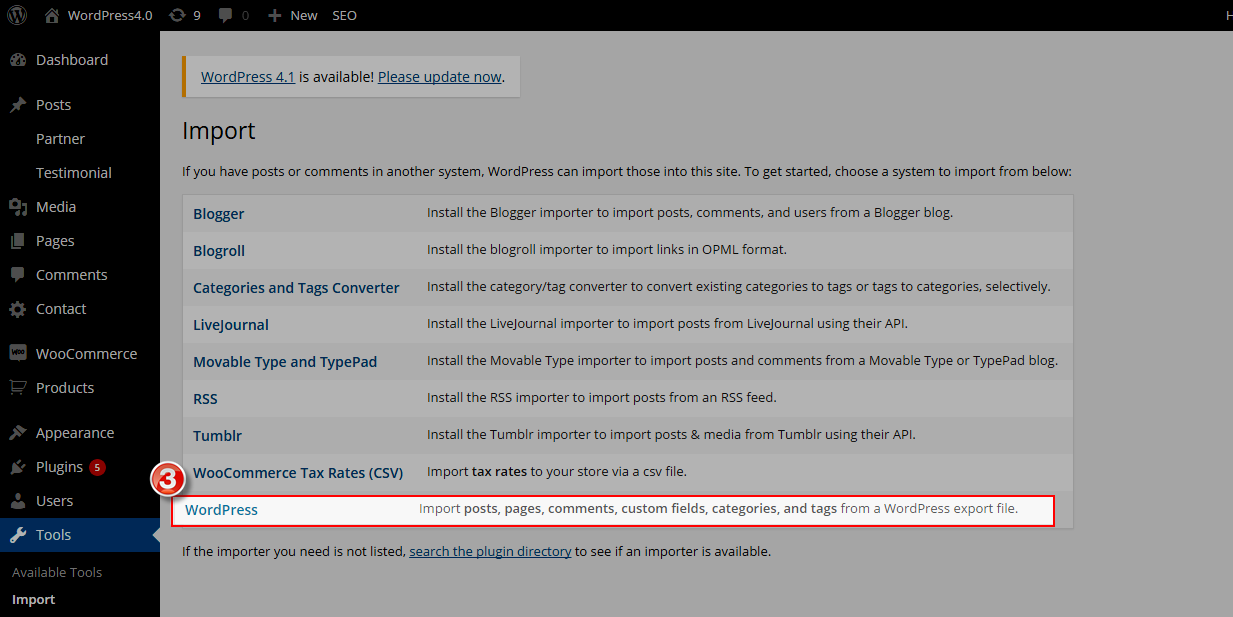
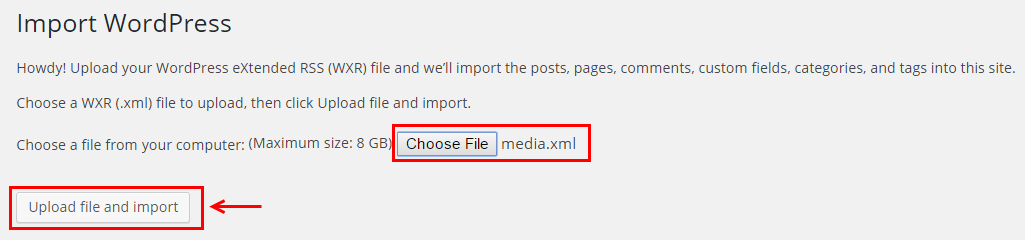
Step 3 - In Import WordPress page, click “choose file” button to select file “media.xml” to upload.
2.6 Import Revolution Slider
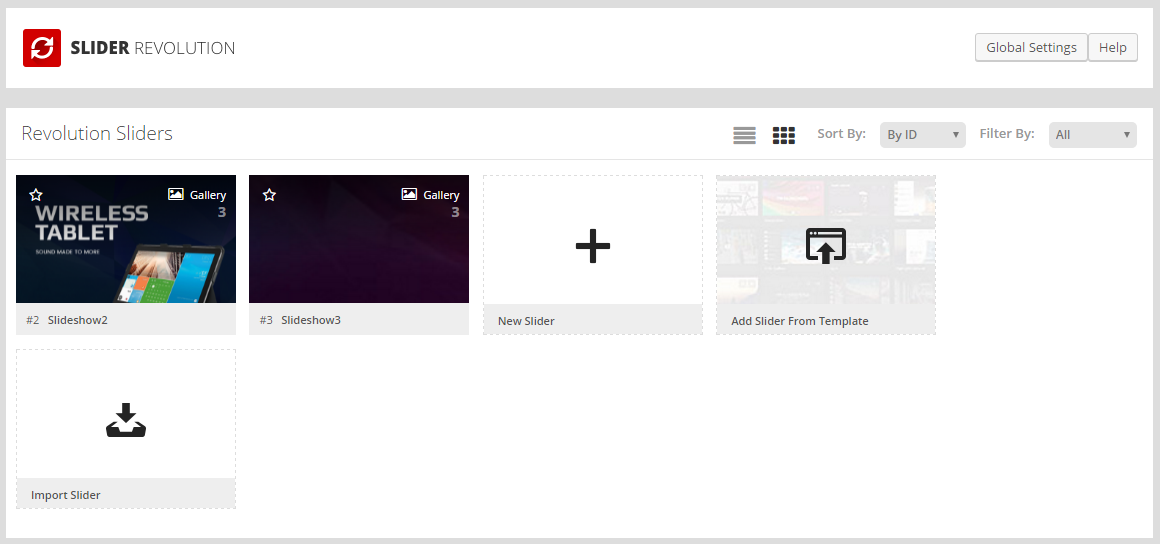
Step 1 – In the Administrator page, please go to Revolution Slider >> Revolution Slider and click Import Slider button.

Step 2 – You will have a pop-up window like the following image:
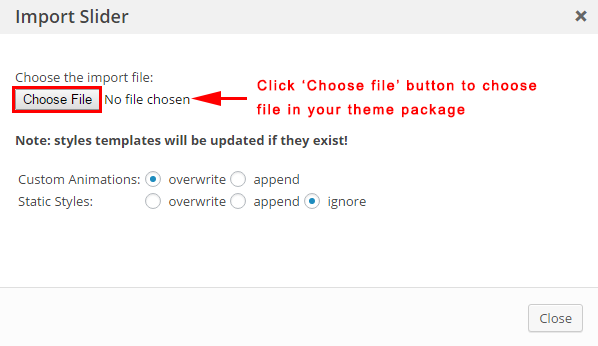
Step 3 – In the window, please choose the “slider_home1.zip” file (in the “data\Slider revolution” folder) and click on “Import Slider“ button.
Note: Do the same to import “slider_home2.zip” file. After importing sliders completely, you could see the result like this:
2.7 MailChimp for WordPress
SW Clickboom This theme uses MailChimp Plugin.
Frontend Appearance

Backend Settings
1. In your Administrator page, please go to MailChimp for WP >> Forms
- Form Fields: Please click to see the Backend Settings.
Copy the code here to the form mark-up field in the page.
|
1 2 3 4 5 6 |
<div class="newsletter-form"> <p> <input type="email" name="EMAIL" placeholder="Subscribe to our newsletter..." required /> <input type="submit" value="Subscribe" /> </p> </div> |
- Form Messages Please click to see the Backend Settings.
- Form Settings Please click to see the Backend Settings.
- Form Appearance Please click to see the Backend Settings.
You can click Here to read more about this plugin.
3MENU CONFIGURATION
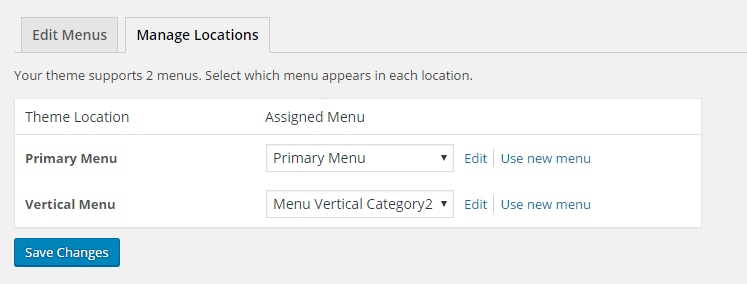
The SW Clickboom supports two menus: Primary menu and Vertical menu.
Step 1: Go to Appearance > Menus
Step 2: In the Manage Locations area, choose an assigned menu, which appropriates to Theme Locations. Click Save Changes
Step 1: Go to to Appearance > Menus
Step 2: Click Create a new menu. Enter a menu’s name and click Create Menu
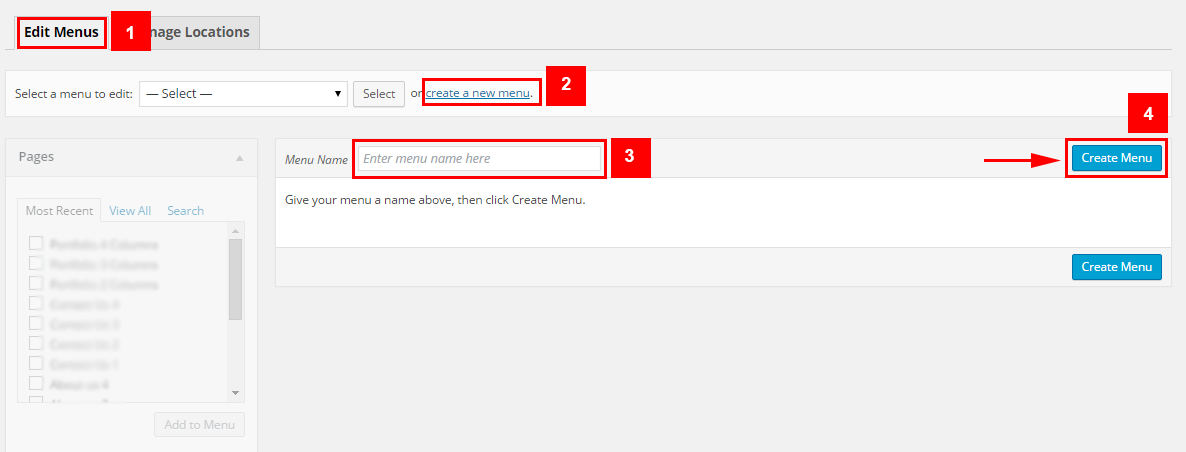
Step 3: Check the menu item in the boxes in the left column, click Add to Menu to add items to the menu and drag/drop to arrange them.
Step 4: Click Save Menu
Step 5: Now assign the created menu to the appropriate location
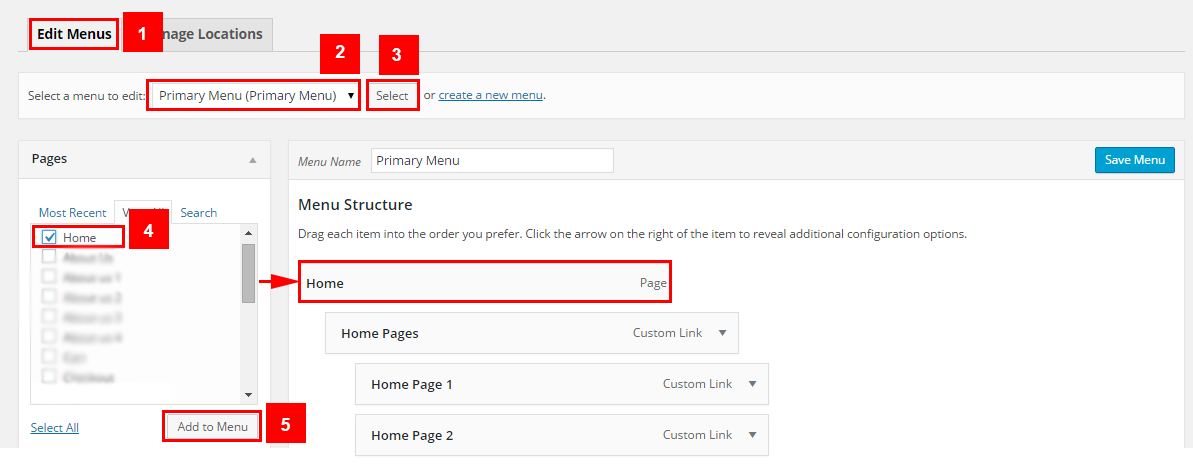
Step 1: Go to to Appearance > Menus
Step 2: Click Edit Menus. Select a menu’s name in the dropdown menu and click Select to choose a menu to edit.

Step 3: Edit the menu and its items in Menu Structure

Step 4: Click Save Menu to save your changes
Note: When editing items in these menus, the items (in a menu) having same level could have same configuration. Therefore, we encourage you read throughtly and find out the item’s level to configure it without any errors.

In your Administrator Page, please go to Appearance > Menus and select the menu to configure its structure.
The Frontend Appearance:
The Backend Settings:
1. We call Parent Level Menu Level 0. Then, next levels are Level 1, Level 2,etc.
2. Click on the first Menu Level 0 (Parent Level Menu ) item and select Dropdown Size = “2″ in the selection box.

3. Click “Save” button
Description of parameters in Advanced Menu Configuration:
- Active mega menu: Allow to activate/inactivate Mega Menu
- Icon: Using icon-* class to display Icon for any menu item with intergrated Font Awesome.
- Dropdown Size: Set the width of dropdown menu. (ex: min = 1 (= 150px); max = 6 (= 900px)).
- Dropdown Align
- Only for menu items level 0 – If you need a dropdown align by right direction, configure it to “Right” instead of “Left” or “Default” – “Default” means that no class can be added to dropdown, everything follows the default css. – “Left” / “Right”: add to dropdown an utility class and float it left/ right, make it align as your desire .
- Show Description as Subtitle
- Show a short description – It is an essential attribute of a menu item. You may need to select to show it in the metabox screen.
- Hide Title
- When you would like to hide the title of menu, please select “Yes” value. In this case, you need to configure Icon, Subtitle or Advanced Content.
- Disable Link: Allow to disable link.
- Advanced:
- Several advanced functions are placed here. – “Default”: NOOP, do nothing. Sure, it is not advanced – “Use as Divider”: Show any icon, title, subtitle, content. Divider style only. – “Append Advanced Content”: Append content after menu title block (icon+title+subtitle) – “Append Advanced Content with Shortcode”: as above, but “do_shortcode” with this before append.
The Frontend Appearance:
 Here for more detail
The Frontend Appearance:
The Backend Settings: Please click Here for more detail
4THEME OPTIONS
In your Admin Panel, go to Appearance >> Theme Options to configure.
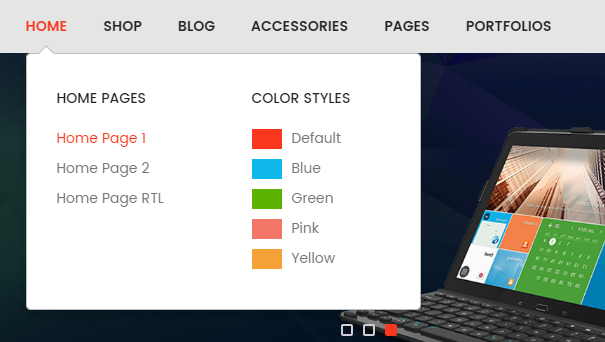
4.1 General
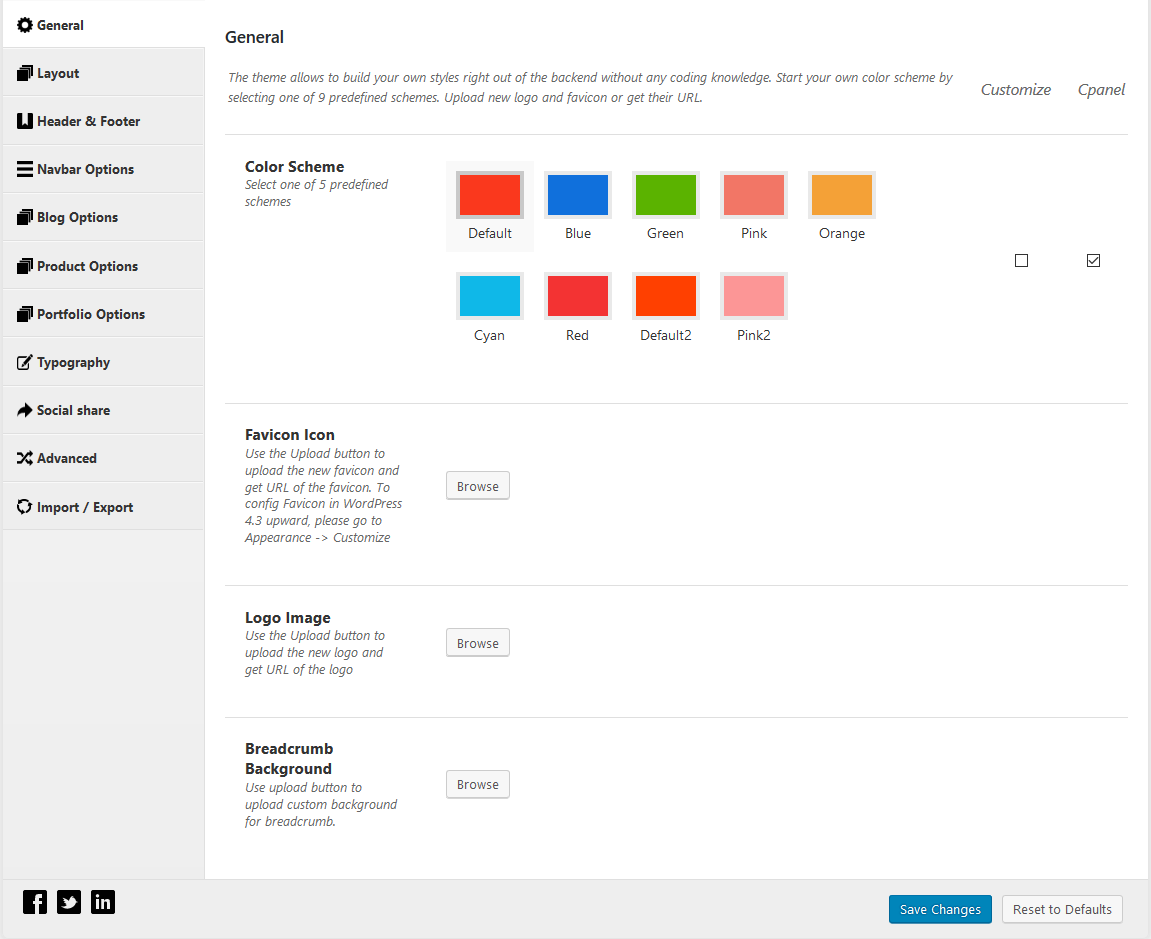
- Color Scheme – Choose your desire color
- Background Image – Browse to select image file to be your website’s background image.
- Color Option – Choose a color validation in the field type
- Background Repeat – Choose to repeat background image or not (Used for boxed layout).
- Favicon Icon - Use the Upload button to upload the new favicon and get URL of the favicon.
Note:This option is compatible with one for WordPress Version 4.2 or previous versions. To add a Favicon in WordPress 4.3 or later versions, please go to Appearance >> Customize >> Site Identity >> Site Icon to set a favicon icon
- Responsive Support – Support responsive layout (If you do not want to use this function, please uncheck)
- Logo Image - Use the Upload button to upload the new logo and get URL of the logo. You could browse to the wp-content/themes/sw_clickboom/assets/img folder to get the image named logo-default.png like the demo. logo-default.png
4.2 Layout
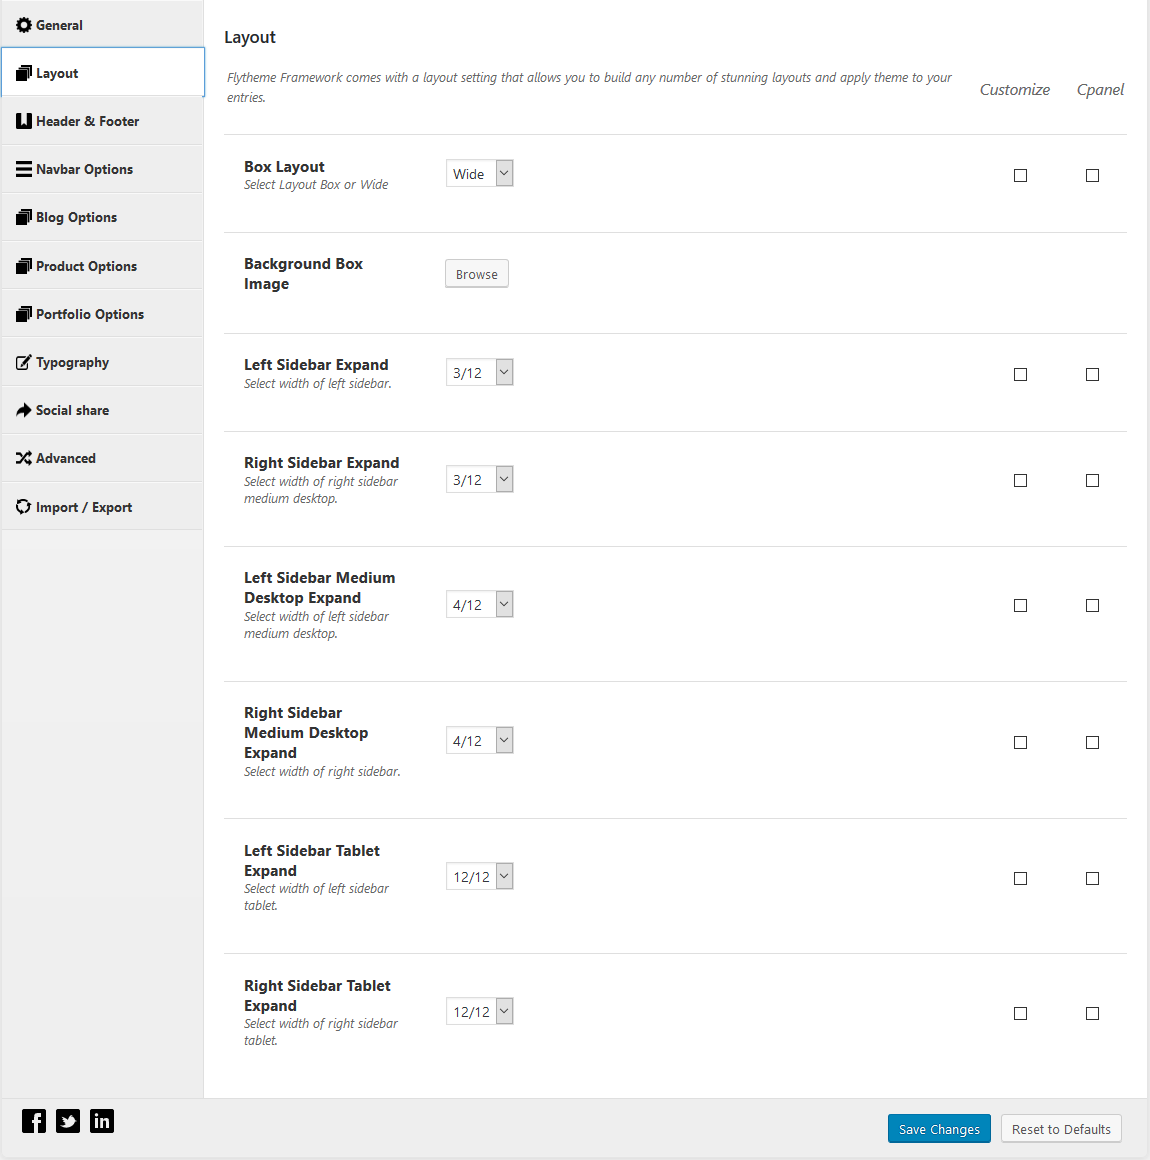
- Box Layout – Select Layout Box or Wide.
- Background Box Image – Browse to select image that you want. You could browse to the wp-content/uploads/2015/10 folder to get the image named new-york-540807_1920.jpg like the demo.
- Left Sidebar Expand – Select width of left sidebar.
- Right Sidebar Expand – Select width of right sidebar medium desktop.
- Left Sidebar Medium Desktop Expand – Select width of left sidebar medium desktop.
- Right Sidebar Medium Desktop Expand – Select width of right sidebar.
- Left Sidebar Tablet Expand - Select width of left sidebar tablet.
- Right Sidebar Tablet Expand – Select width of right sidebar tablet.
4.3 Header
These options enable you to change page appearance with Header and Footer Style. In addition, SW Destino allows you to customize your Phone Number, Email and Copyright text in your footer.
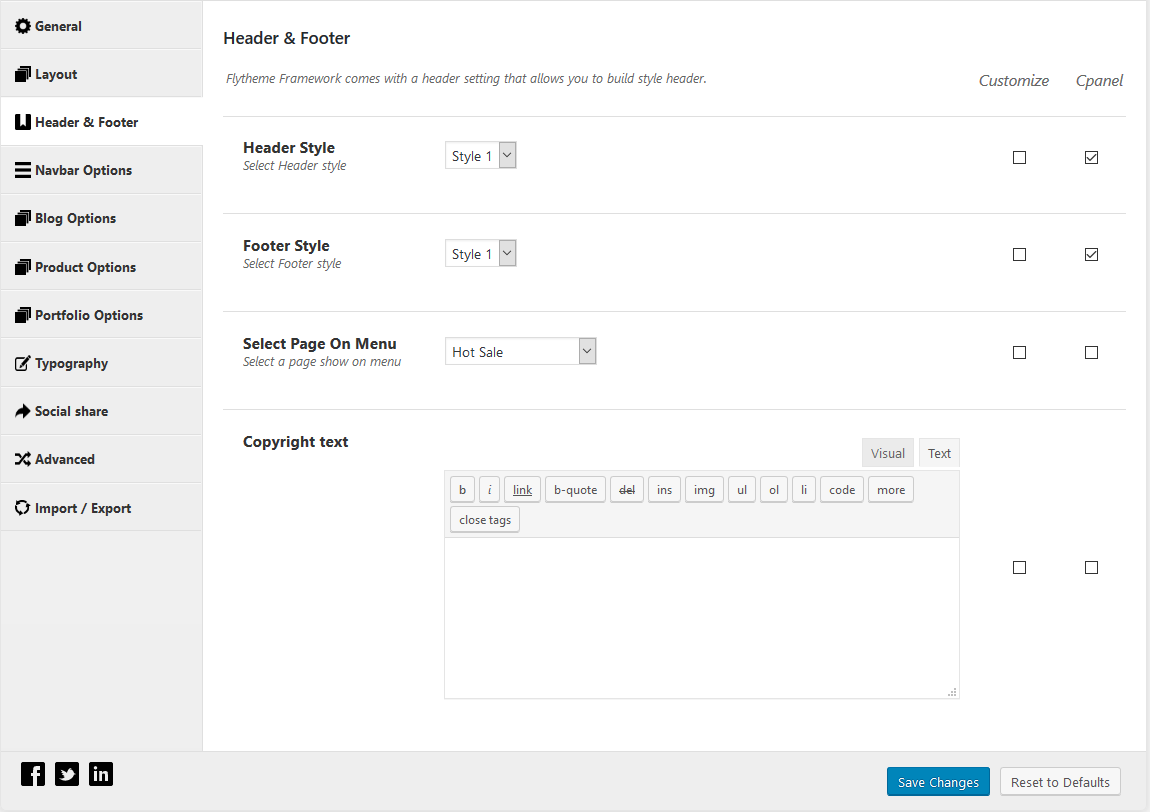
- Header Style: Currently, this theme supports 06 Header Styles ( Header Style 1/ Header Style 2/ Header Style 3/ Header Style 4/ Header Style 5/ Header Style 6) .
- Footer Style: Currently, this theme supports 06 Footer Styles (Footer Style1 / Footer Style 2 / Footer Style 3/ Footer Style 4 / Footer Style 5/ Footer Style 6).
- Copyright text: It lets you to change the Copyright text. If there is no change here, the demo data will be applied.
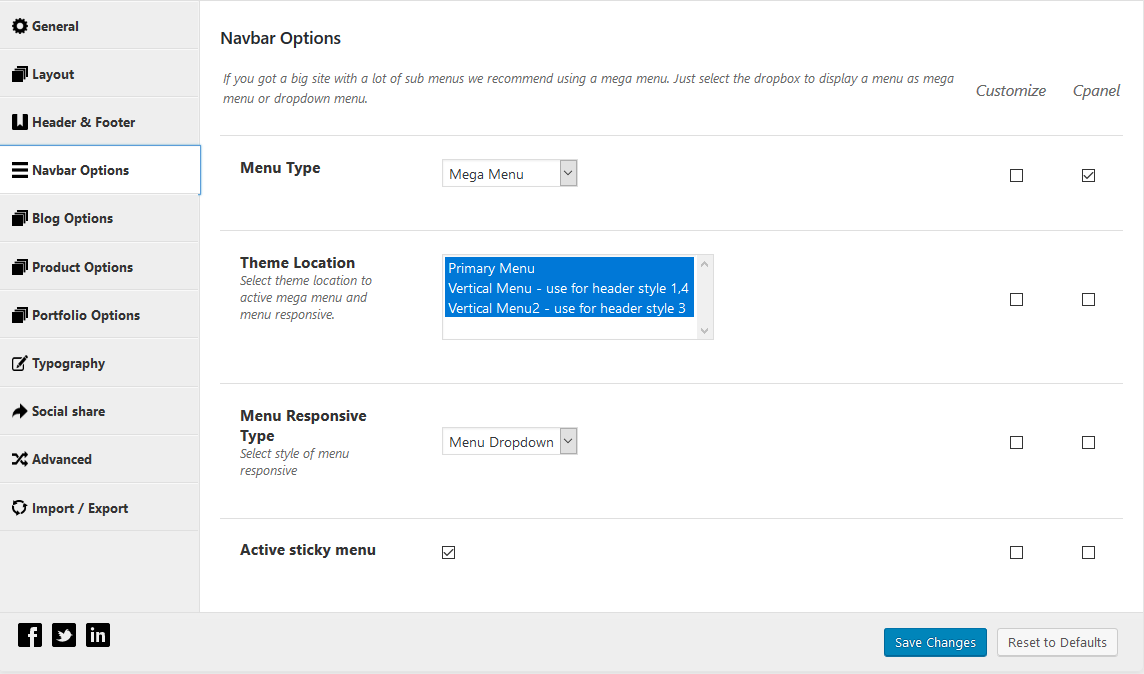
- Menu Type – Select “Mega Menu” or “Dropdown Menu” type.
- Theme Location – Select theme location to active mega menu.
- Responsive Menu Type – Select style of menu responsive.
- Active sticky menu- Allow to hide or show active sticky menu.
4.5 Blog Options
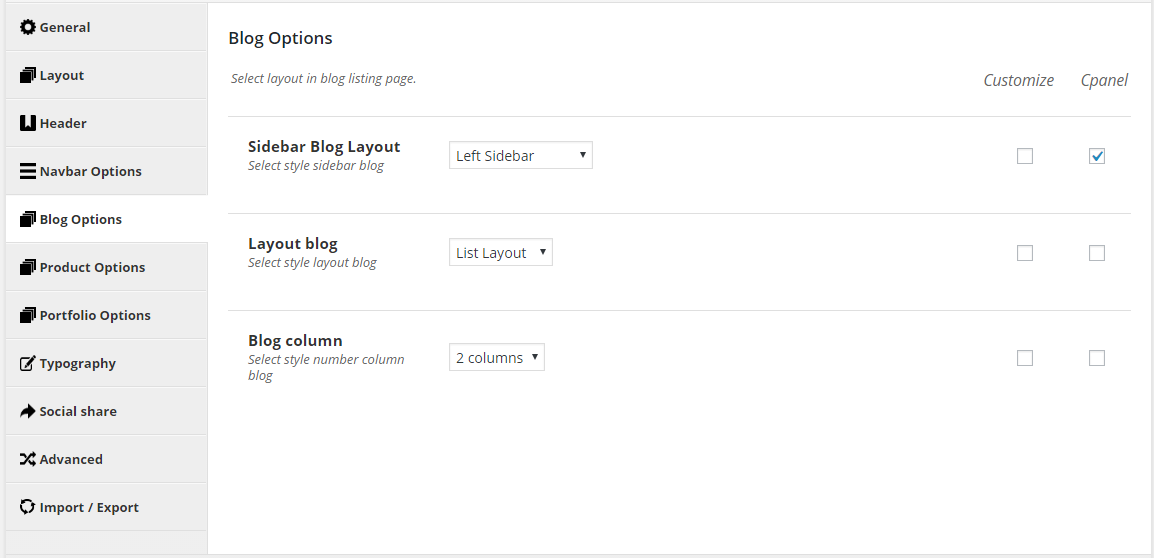
- Sidebar Blog Layout – Select style sidebar blog: Full Layout / Left Sidebar / Right Sidebar / Left Right Sidebar.
- Layout blog – Select style layout blog: Default / Right Sidebar / Grid Layout.
- Blog column – Select style number column blog: 2 colums / 3 columns / 4 columns.
4.6 Product Options
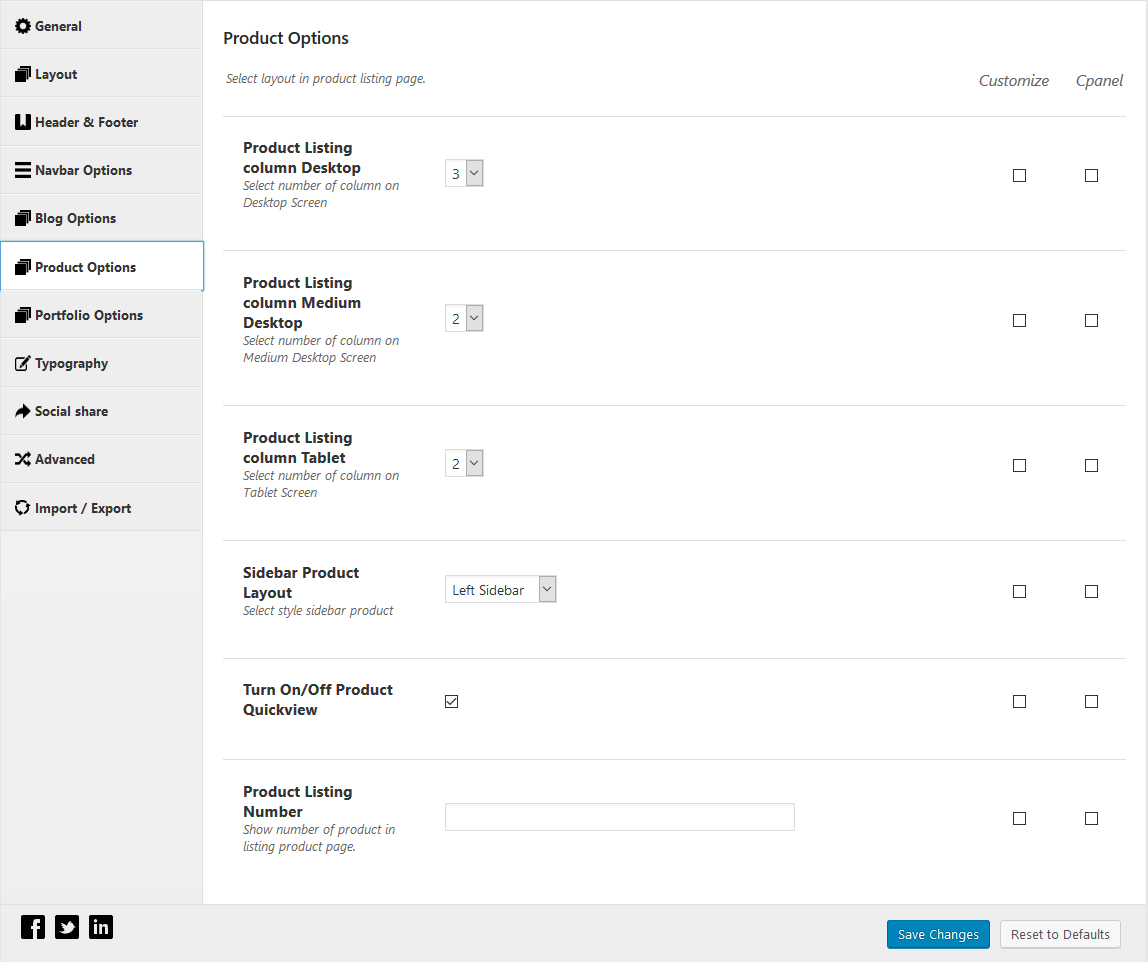
- Product Listing column Desktop – Select number of column on Desktop Screen.
- Product Listing column Medium Desktop – Select number of column on Medium Desktop Screen.
- Product Listing column Tablet – Select number of column on Tablet Screen.
- Sidebar Product Layout – Select style sidebar product.
- Quickview – Turn On/Off Product Quickview
4.7 Portfolio Options
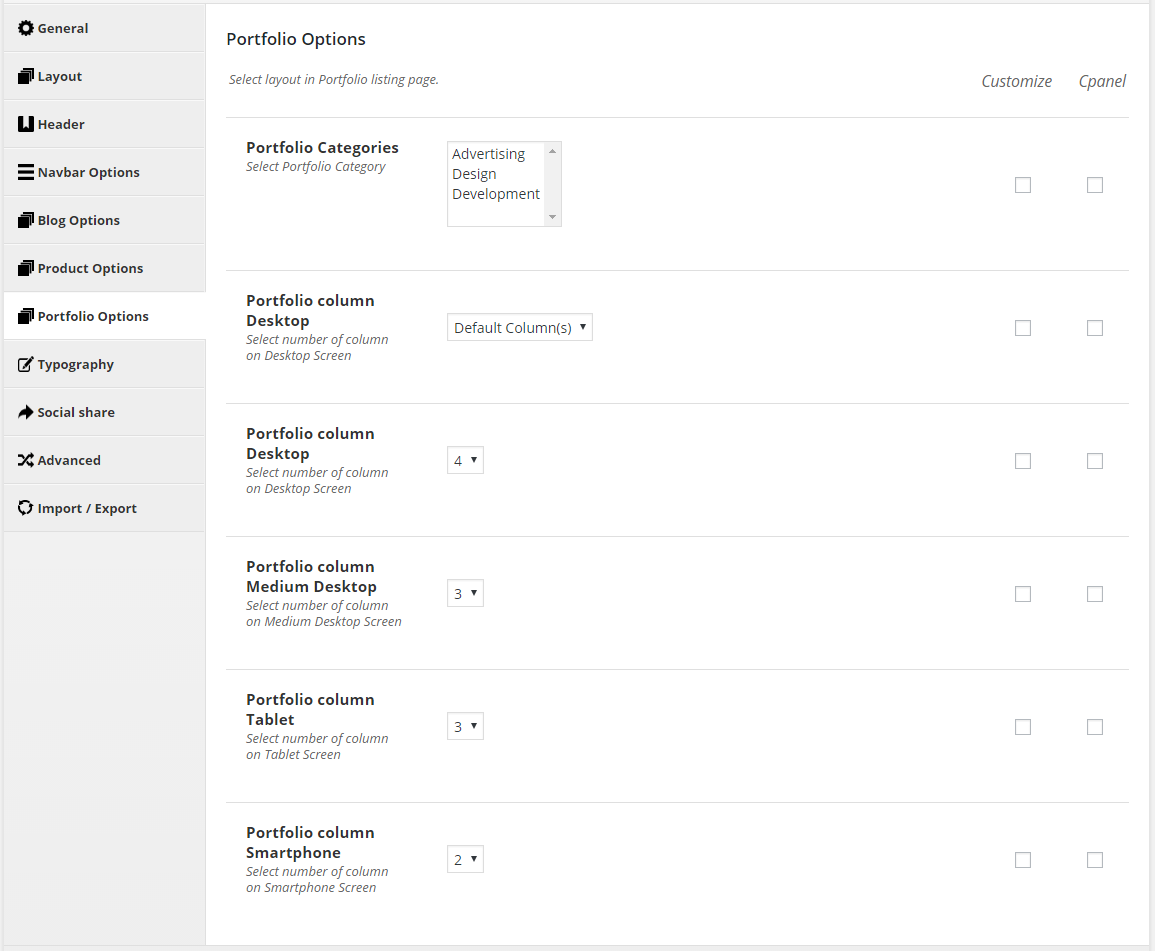
- Portfolio Categories – Select Portfolio Category.
- Portfolio column Desktop – Select number of column on Desktop Screen.
- Portfolio column Medium Desktop – Select number of column on Medium Desktop Screen.
- Portfolio column Tablet – Select number of column on Tablet Screen.
- Portfolio column Smartphone – Select number of column on Smartphone Screen.
Note: The settings is for archive portfolio pages.
4.8 Typography

- Use Google Webfont – Insert font style that you actually need on your webpage.
- Webfont Weight – For weight, see Google Fonts to custom for each font style.
- Webfont Assign to – Select the place will apply the font style headers, every where or custom.
- Webfont Custom Selector – Insert the places will be custom here, after selected custom Webfont assign.
Turn on/turn off sharing buttons appearing in Home page
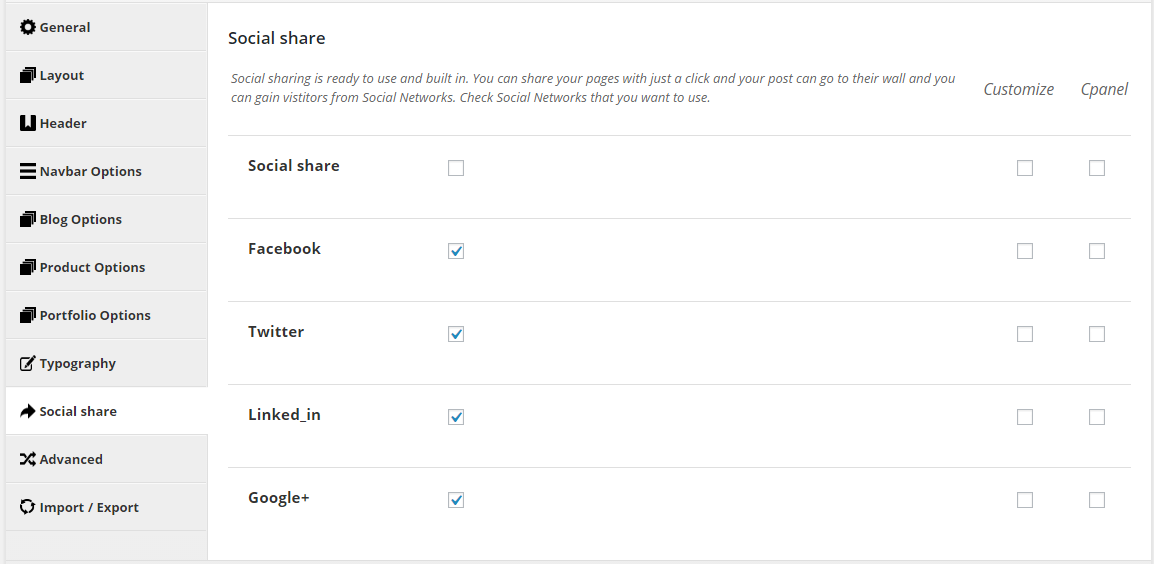
- Social share – Enable Social share button.
- Facebook – Enable Facebook Share button.
- Twitter – Enable Twitter Share button.
- Linked_in – Enable LinkedIn Share button.
- Google+ – Enable Google+ Share button.
4.10 Advanced
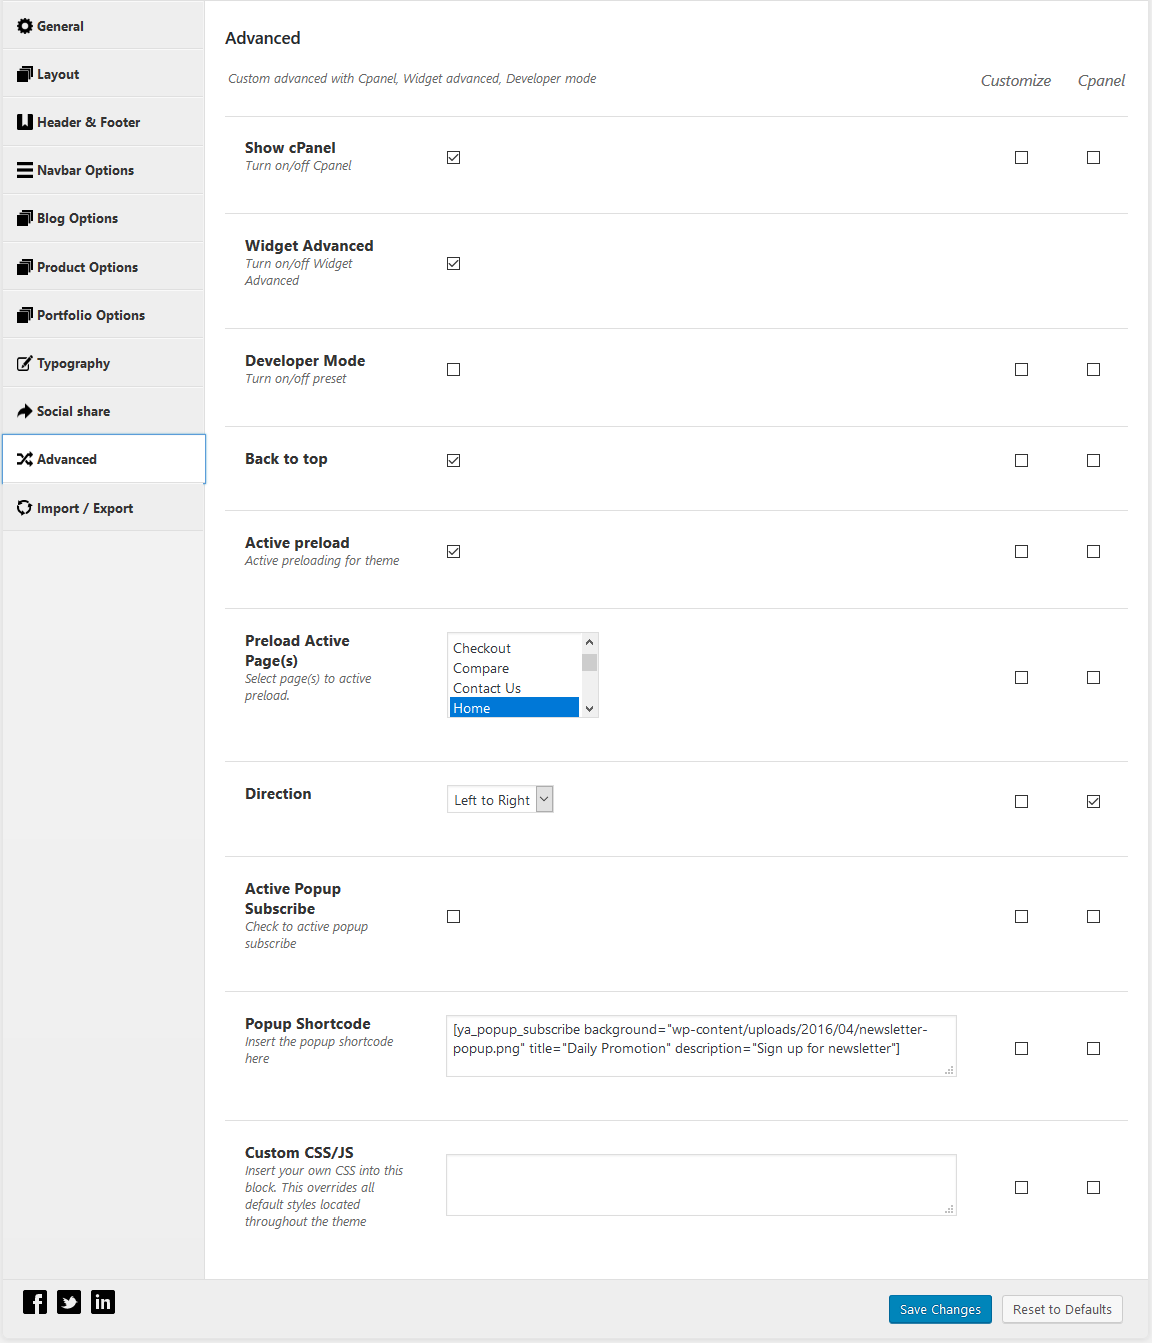
- Show cPanel – Turn on/off Cpanel.
- Widget Advanced – Turn on/off Widget Advanced.
- Developer Mode – Turn on/off preset.
- Back to top - Turn on/off back to top
- Direction – Left To Right / Right To Left.
- Active Popup Subscribe – Check to active popup subscribe .
- Popup Shortcode – Insert the popup shortcode here .
- Custom CSS/JS – Insert your own CSS into this block. This overrides all default styles located throughout the theme.
4.11 Import/Export Options
Turn on/turn off sharing buttons appearing in Home page
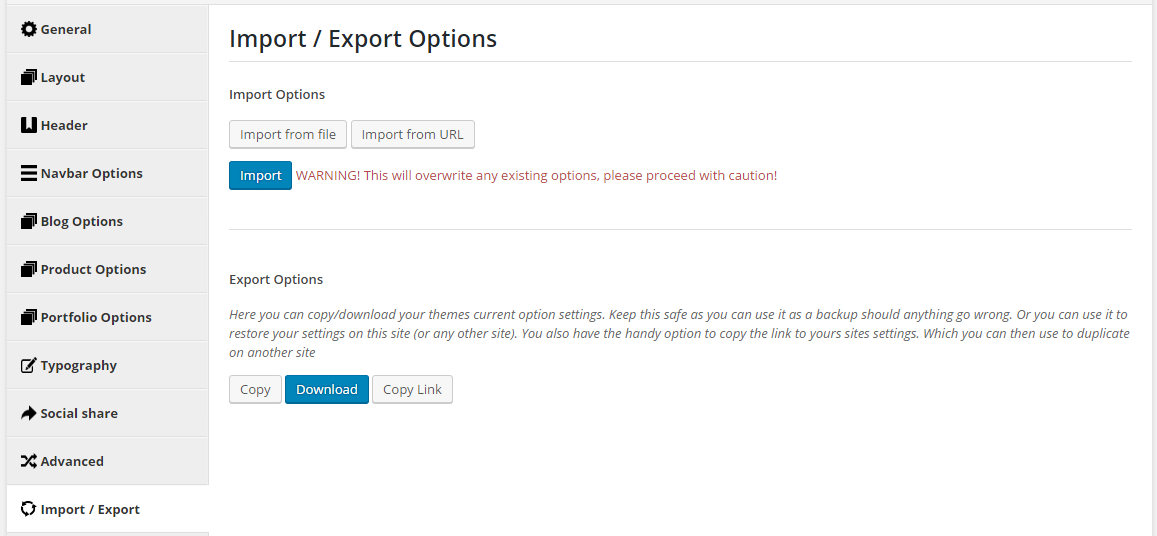
- Import Options- This will overwrite any existing options, please proceed with caution!
- Export Options- Here you can copy/download your themes current option settings.
5PAGES
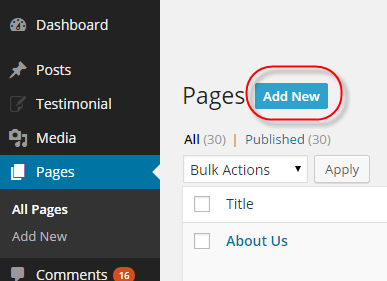
5.1 How To Create A New Page
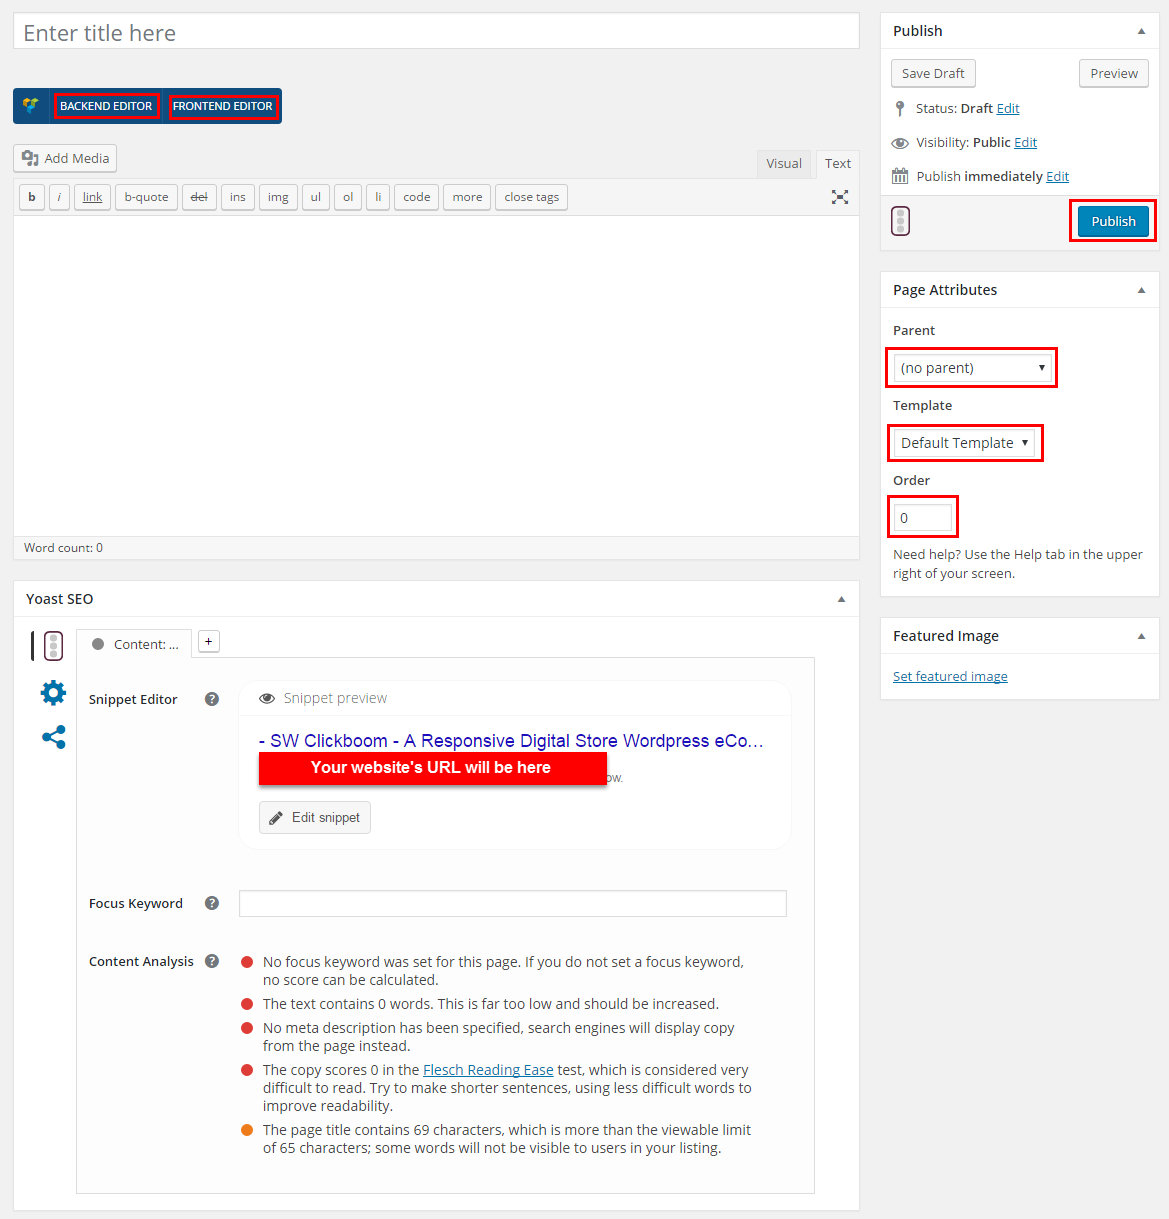
Here is a screenshot that shows you the various areas and descriptions of the page settings described above.
5.2 Setting Up Home Page
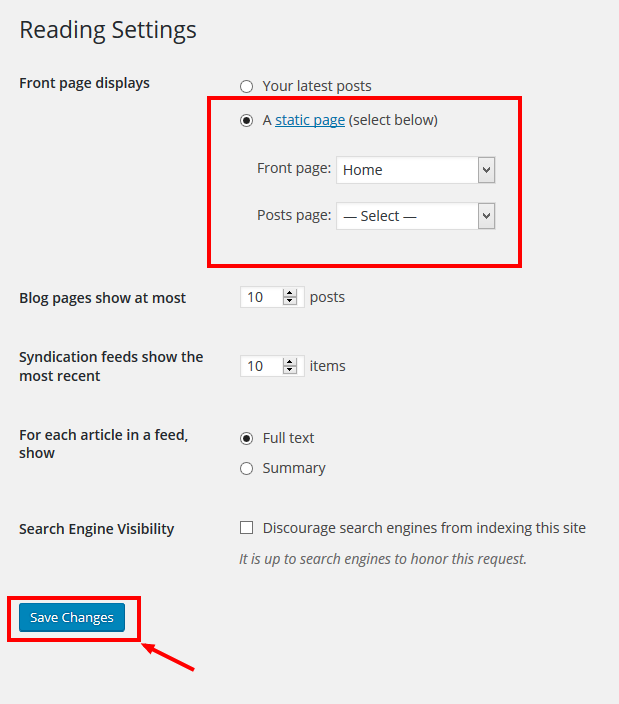
Setting up your home page is the same as setting up any other regular pages, except that you need to specify in the settings which page will be your Main Home Page.
How To Set Your Home Page
5.3 Edit Page with Visual Composer
The SW Clickboom Theme uses the Visual Composer Plugin. The most powerful feature of the Visual Composer is that it gives you an easy drag and drop page builder that can be used from the standard WordPress page/post edit area or directly from the frontend.
For example:
- Step 1: you click “Edit with Visual Composer” link at the View Demo.

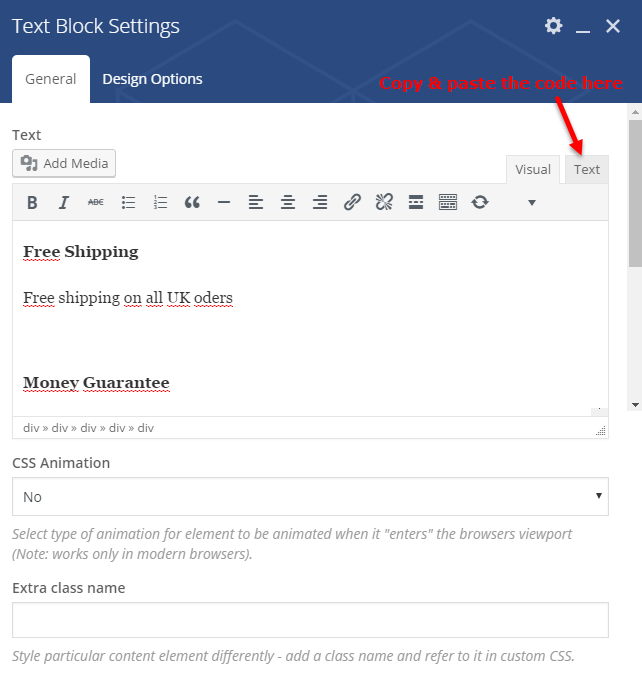
- Step 2: Edit Text Block by click “pencil” icon.
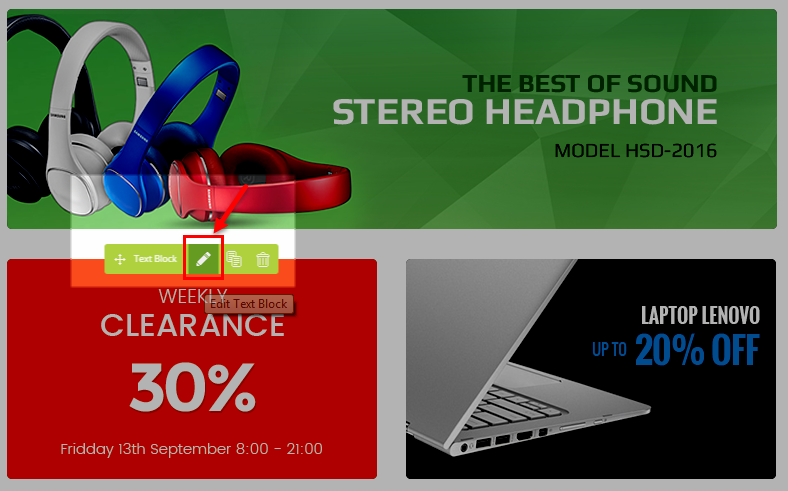
- Step 3: Edit content as you want at General tab of Text Block Settings.

6WOOCOMMERCE
SW Clickboom Theme is fully compatible with WooCommerce plugin. WooCommerce is external plugin and all info about this awesome plugin you can find plugin’s author page. Below you have all friendly links that will be useful:
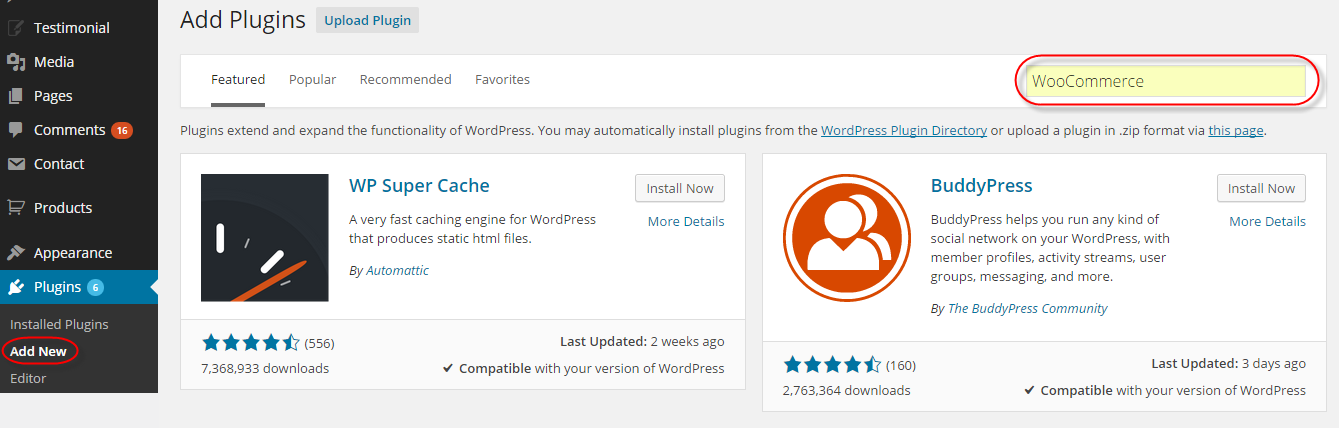
6.1 How to install WooCommerce
At first please go to Plugins > Add new section and type “WooCommerce” into search field. Then press “enter”".
After that you will results and what you need to do is click on “Install now” button next to “WooCommerce – excelling eCommerce” plugin.
After that plugin will be installed and please click “Activate plugin” link.
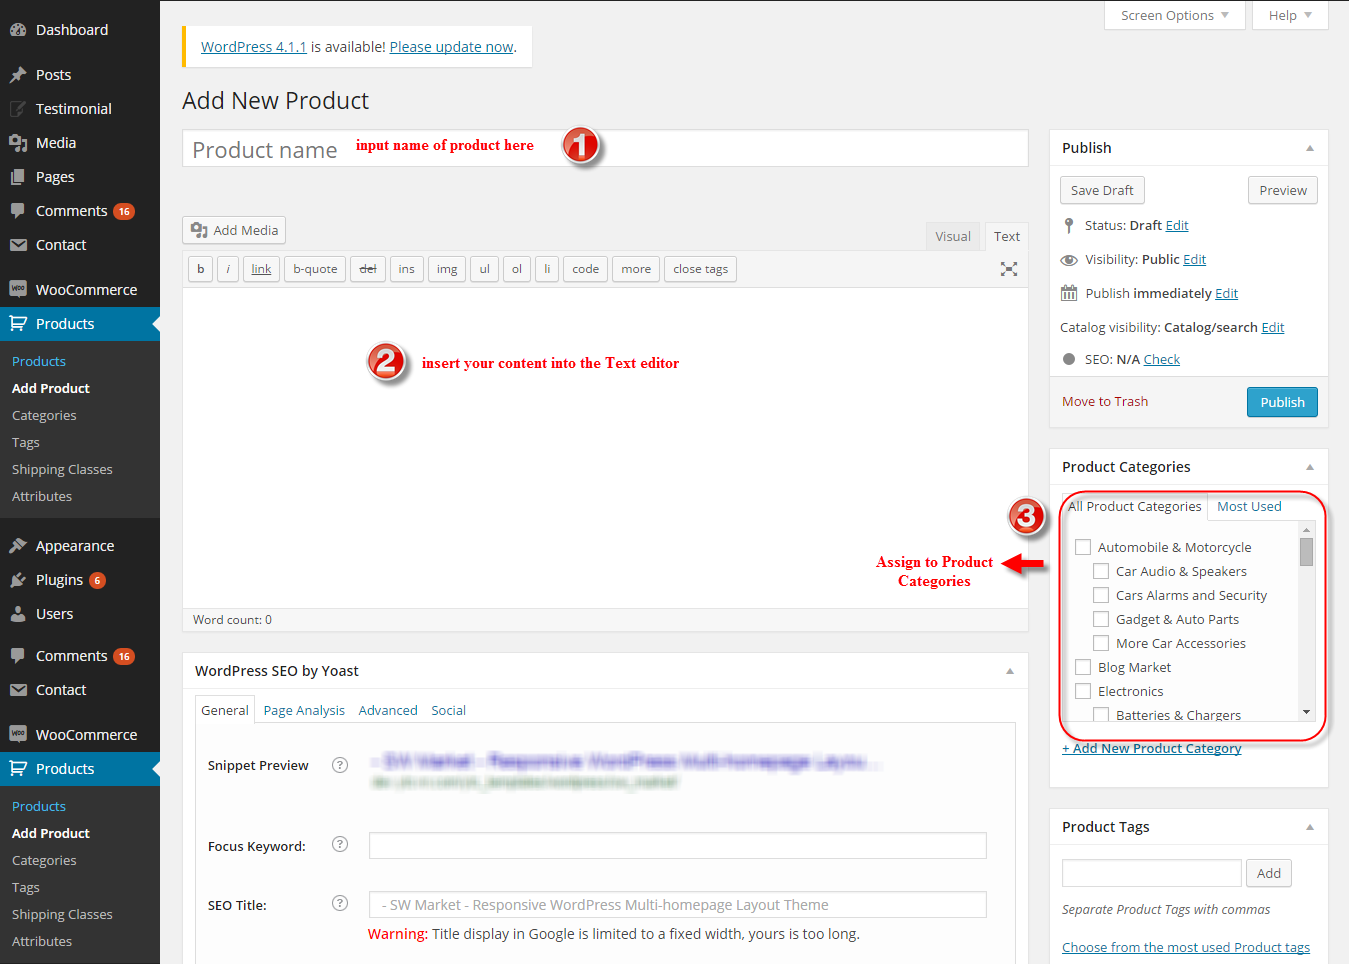
6.2 How to add new product
Go to Products >> Add product section. After that you will see page wich looks like below and all you need to do is fill those fields with own values.
All info about adding new product you can read on http://docs.woothemes.com/document/managing-products/
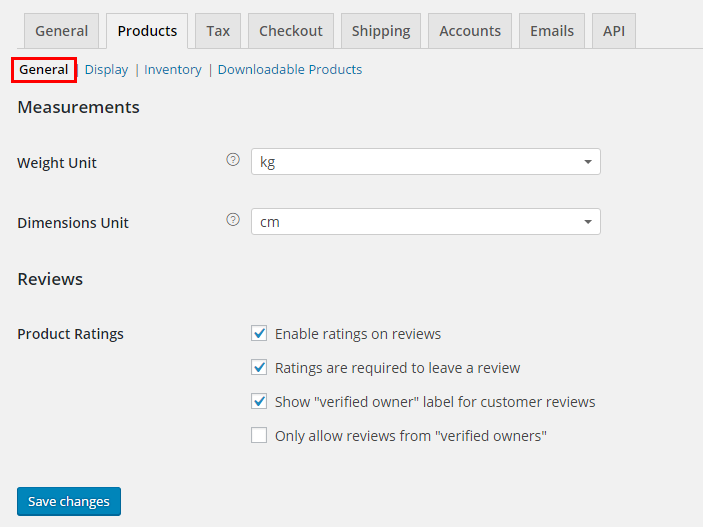
6.3 Change Product Settings
You can change the general settings in “Woocommerce > Settings > Products > General” section.
You can change the image size in “Woocommerce > Settings > Products > Display” section.
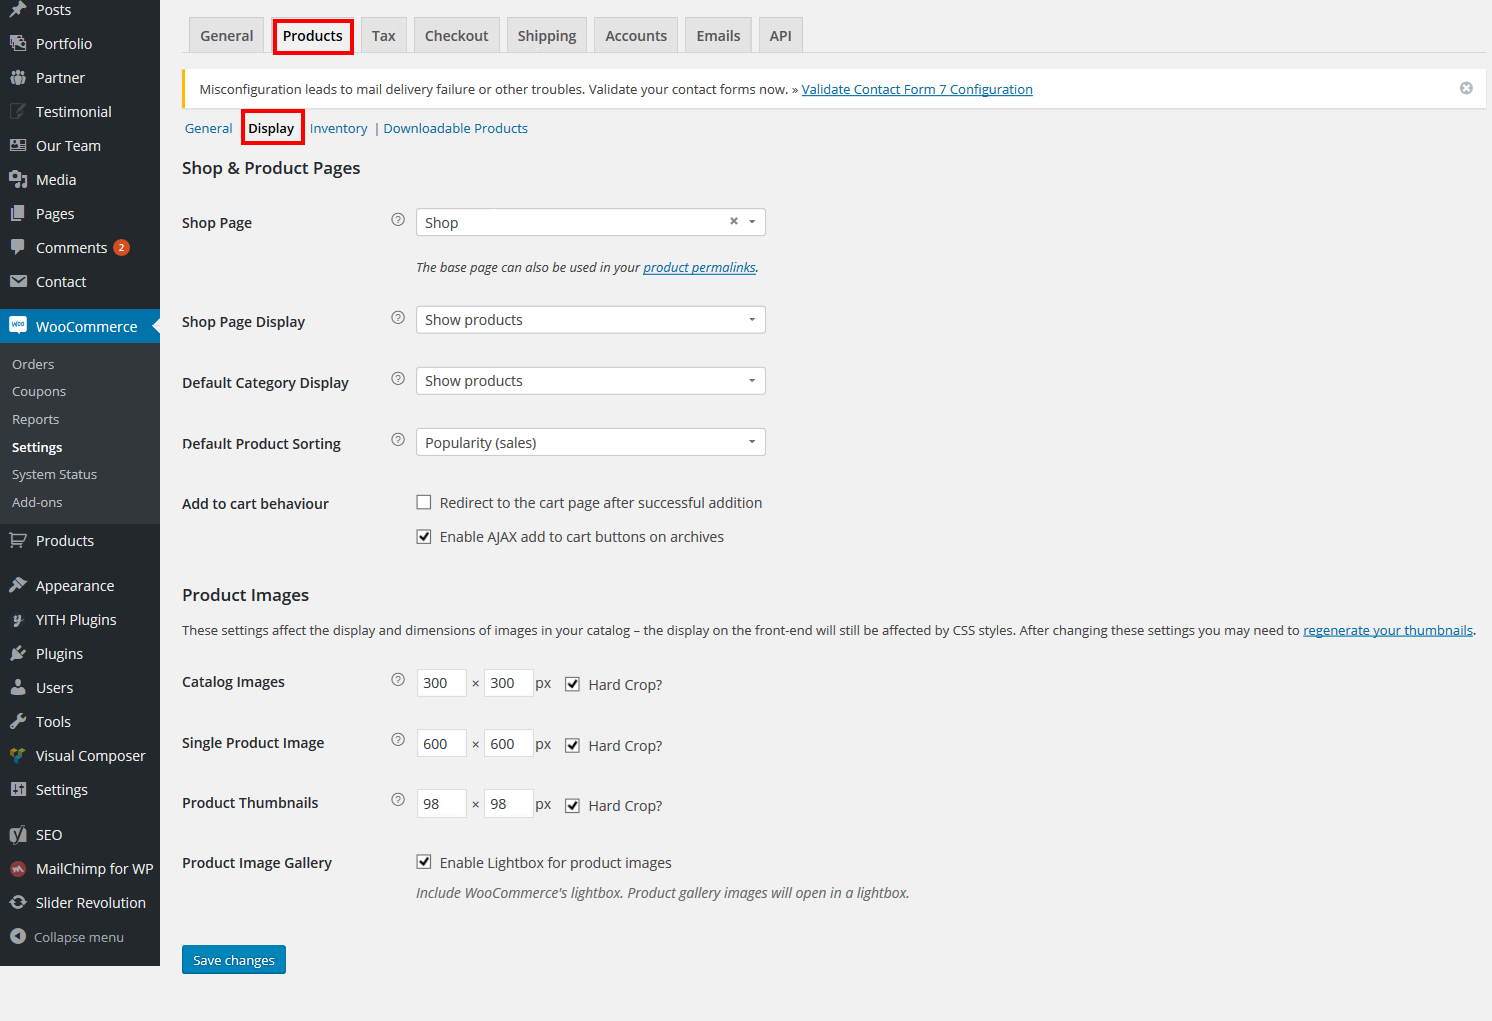
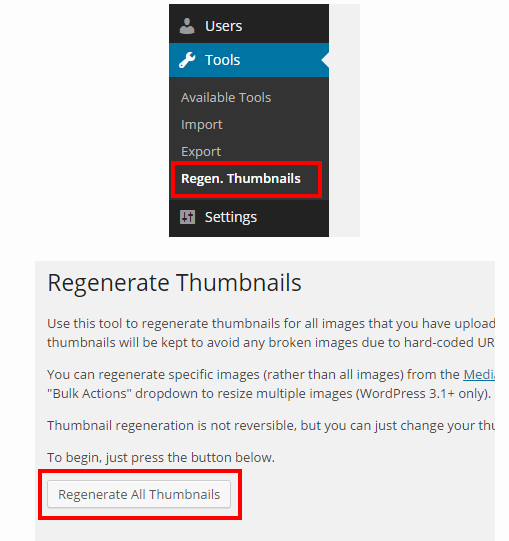
After change the images sizes, you should regenerate all the thumbnails. For this, you should install and activate “Regenerate Thumbnails” plugin.
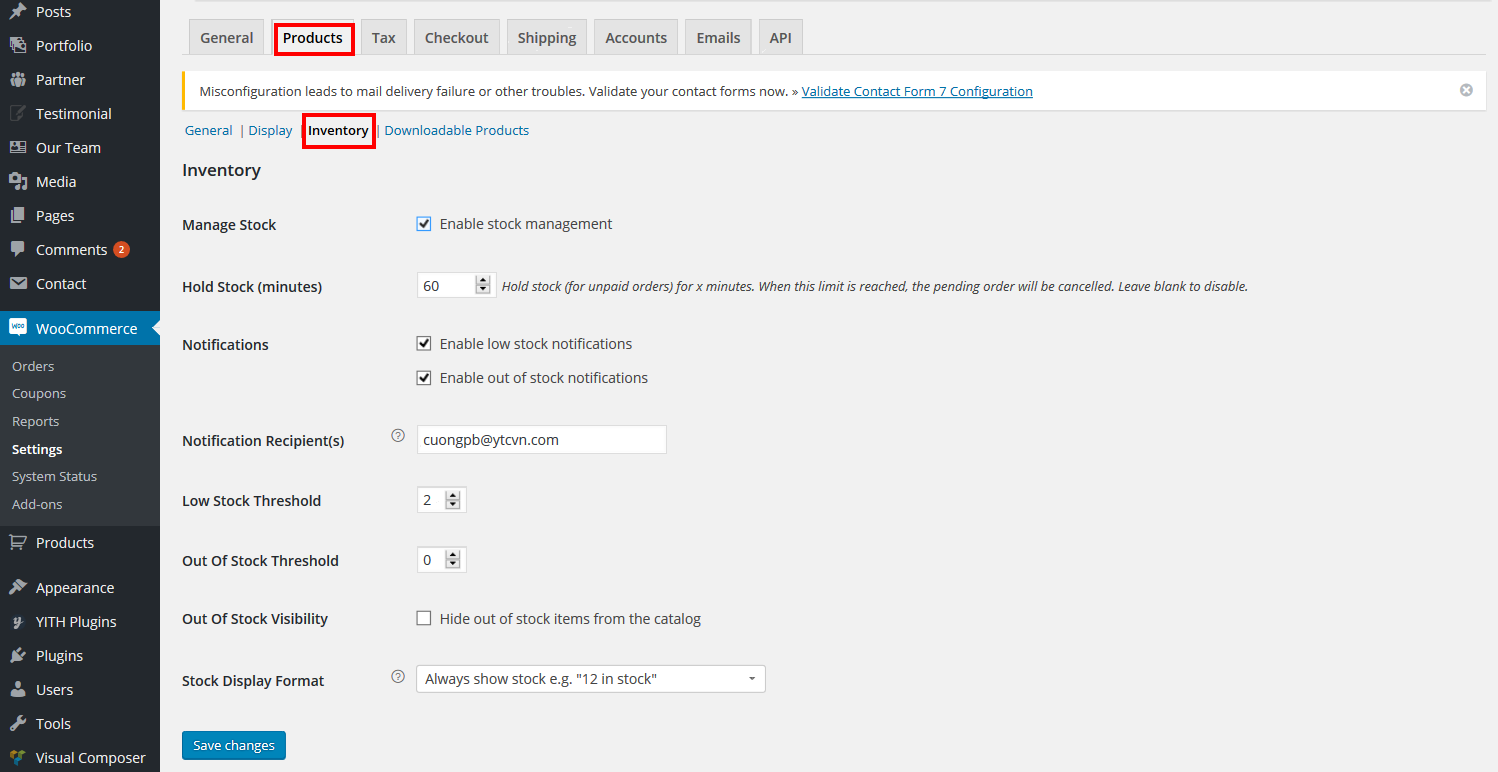
You can change the inventory settings in “Woocommerce > Settings > Products > Inventory” section.
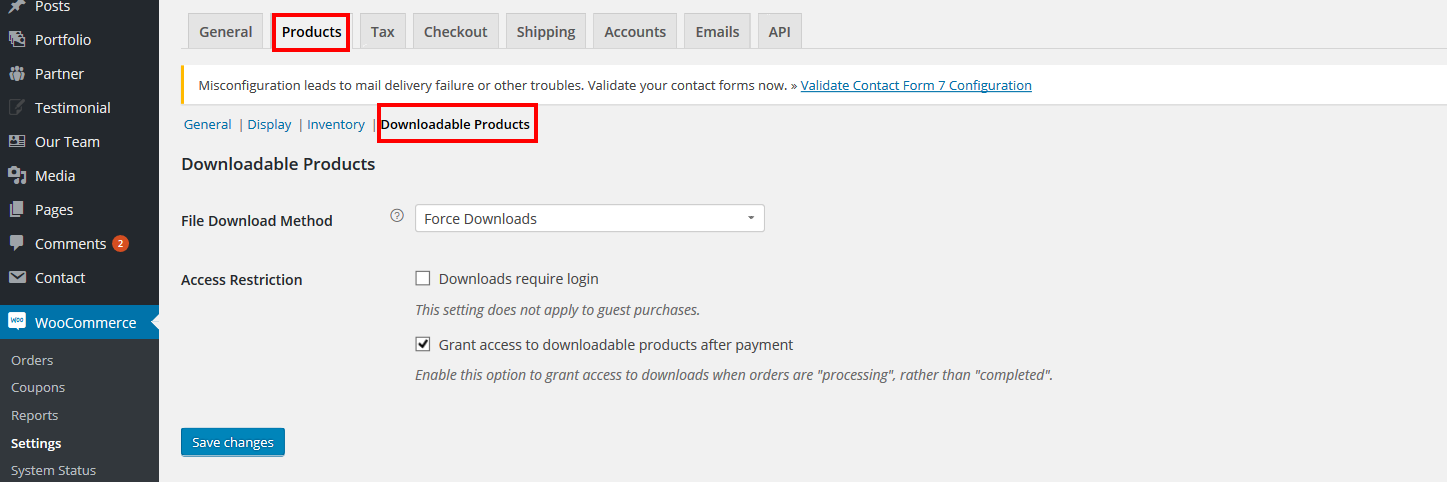
You can change the settings downloadable products in “Woocommerce > Settings > Products > Downloadable Products” section.
6.4 Registration Options
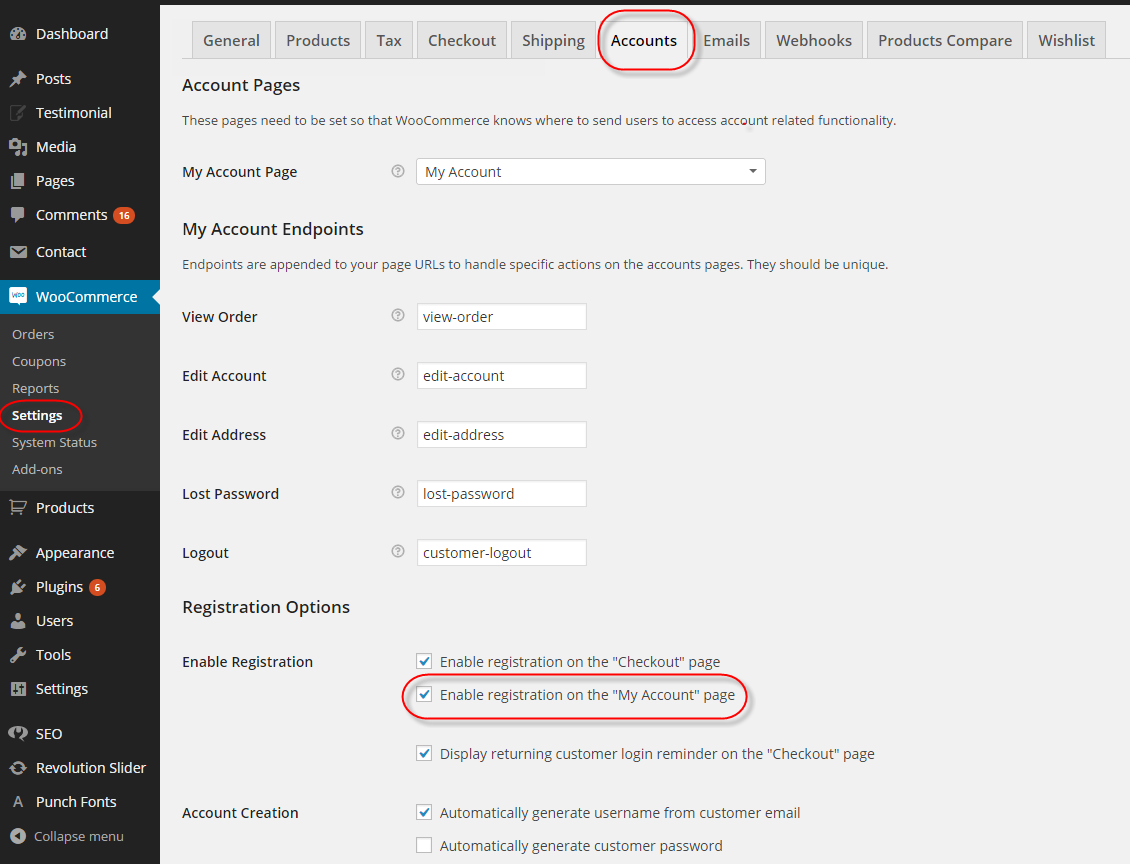
You need to show registration form on My Account page, you should check “Enable registration on the “My Account” page” in “Woocommerce > Settings > Products > Accounts” section.
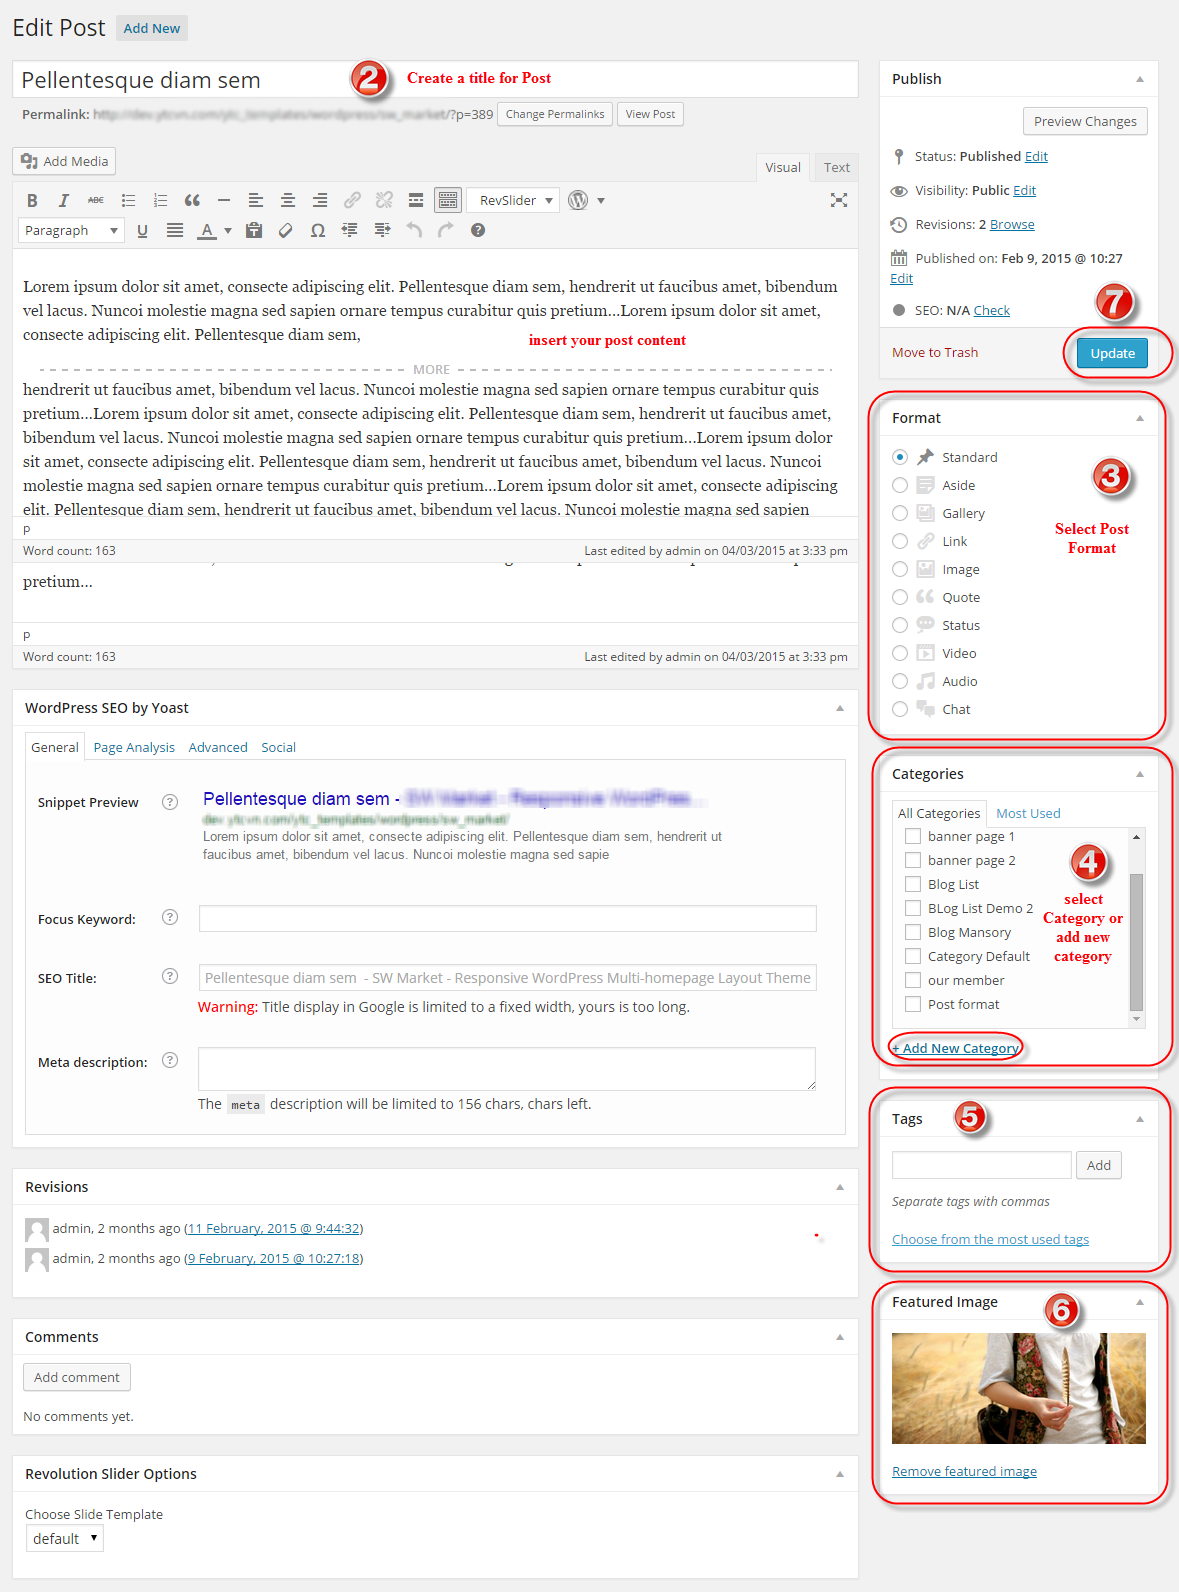
7POST
7.1 Creating/Editing Posts
Step 1 - Navigate to Posts in your WordPress admin sidebar.
Step 2 - Click on the Add New option to make a new post. Create a title, and insert your post content in the editing field. You can use visual composer or Ya shortcodes elements inside the post.
Step 3 - Select Post Format from the right side.
Step 4 - Add Categories from the right side. To assign it to the post, check the box next to the Category name.
Step 5 - Add Tags from the right side. Type the name of the tag in the field, separate multiple tags with commas.
Step 6 - For a single image, click the first Featured Image Box, select an image and click the Set Featured Image button.
Step 7 - Once you are finished, click Publish or Update to save the post.
Here Is A Screenshot That Shows The Various Areas Of The Post Page Described Above.
8THEME CONFIGURATION
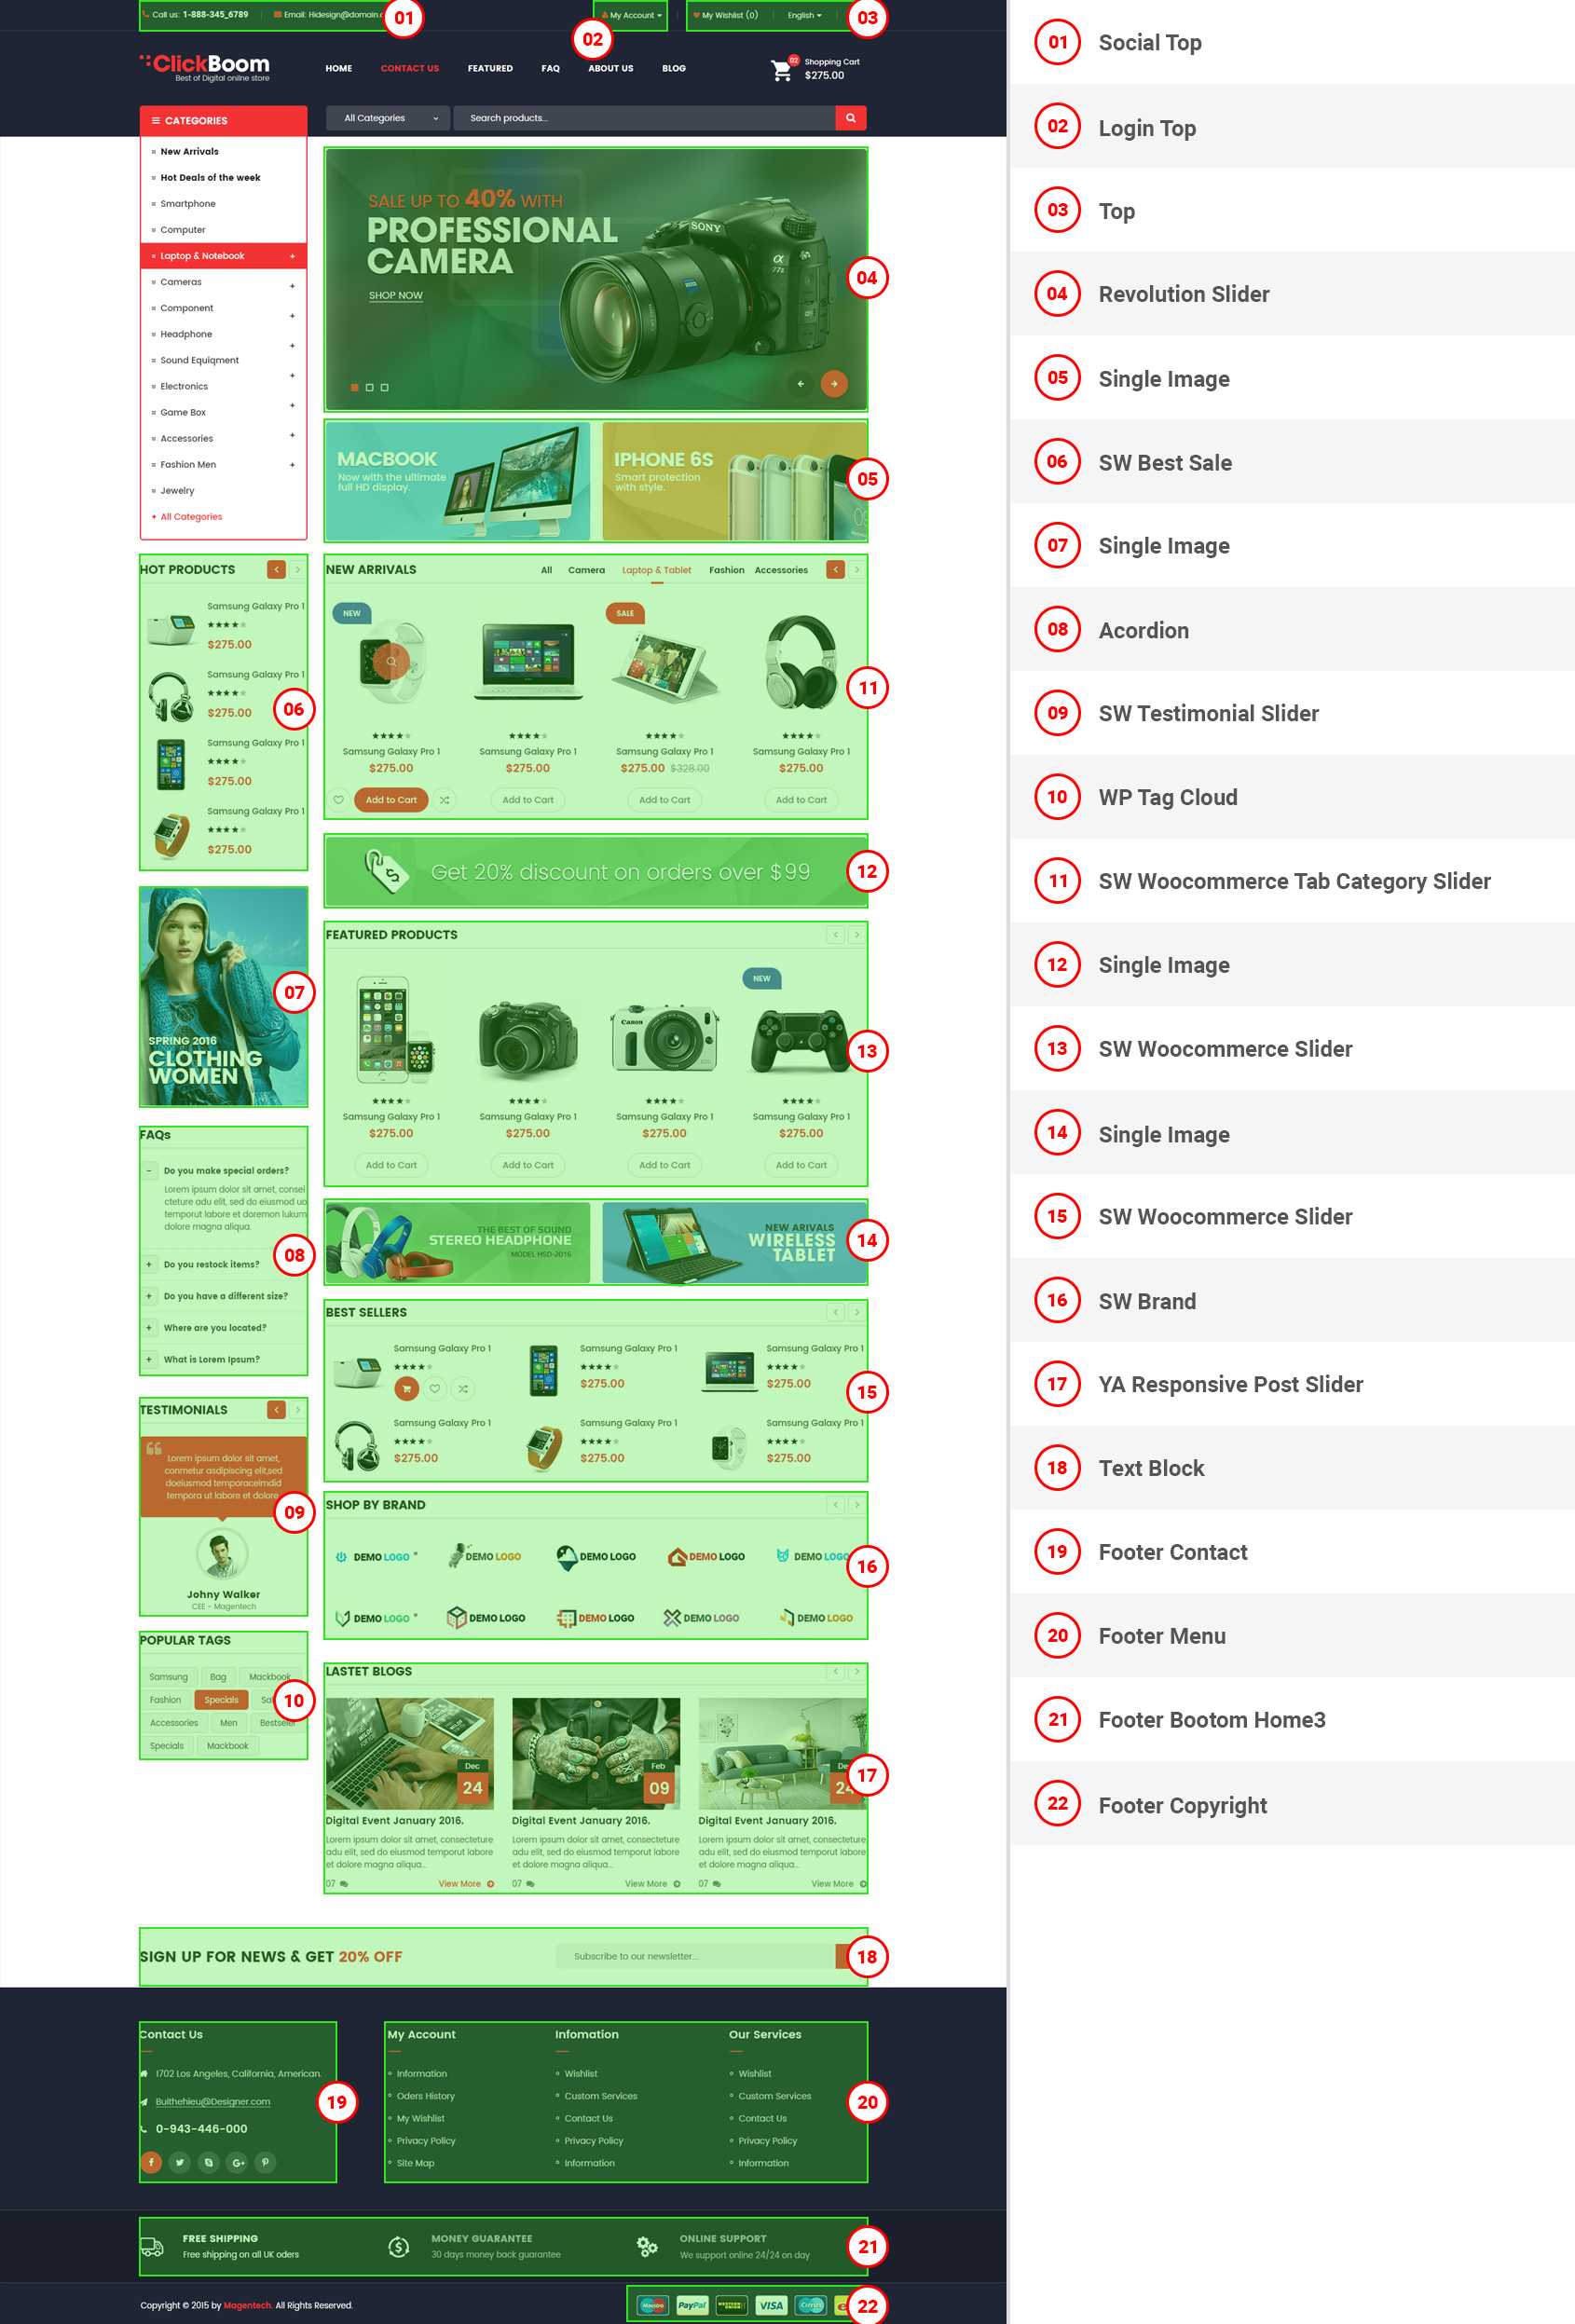
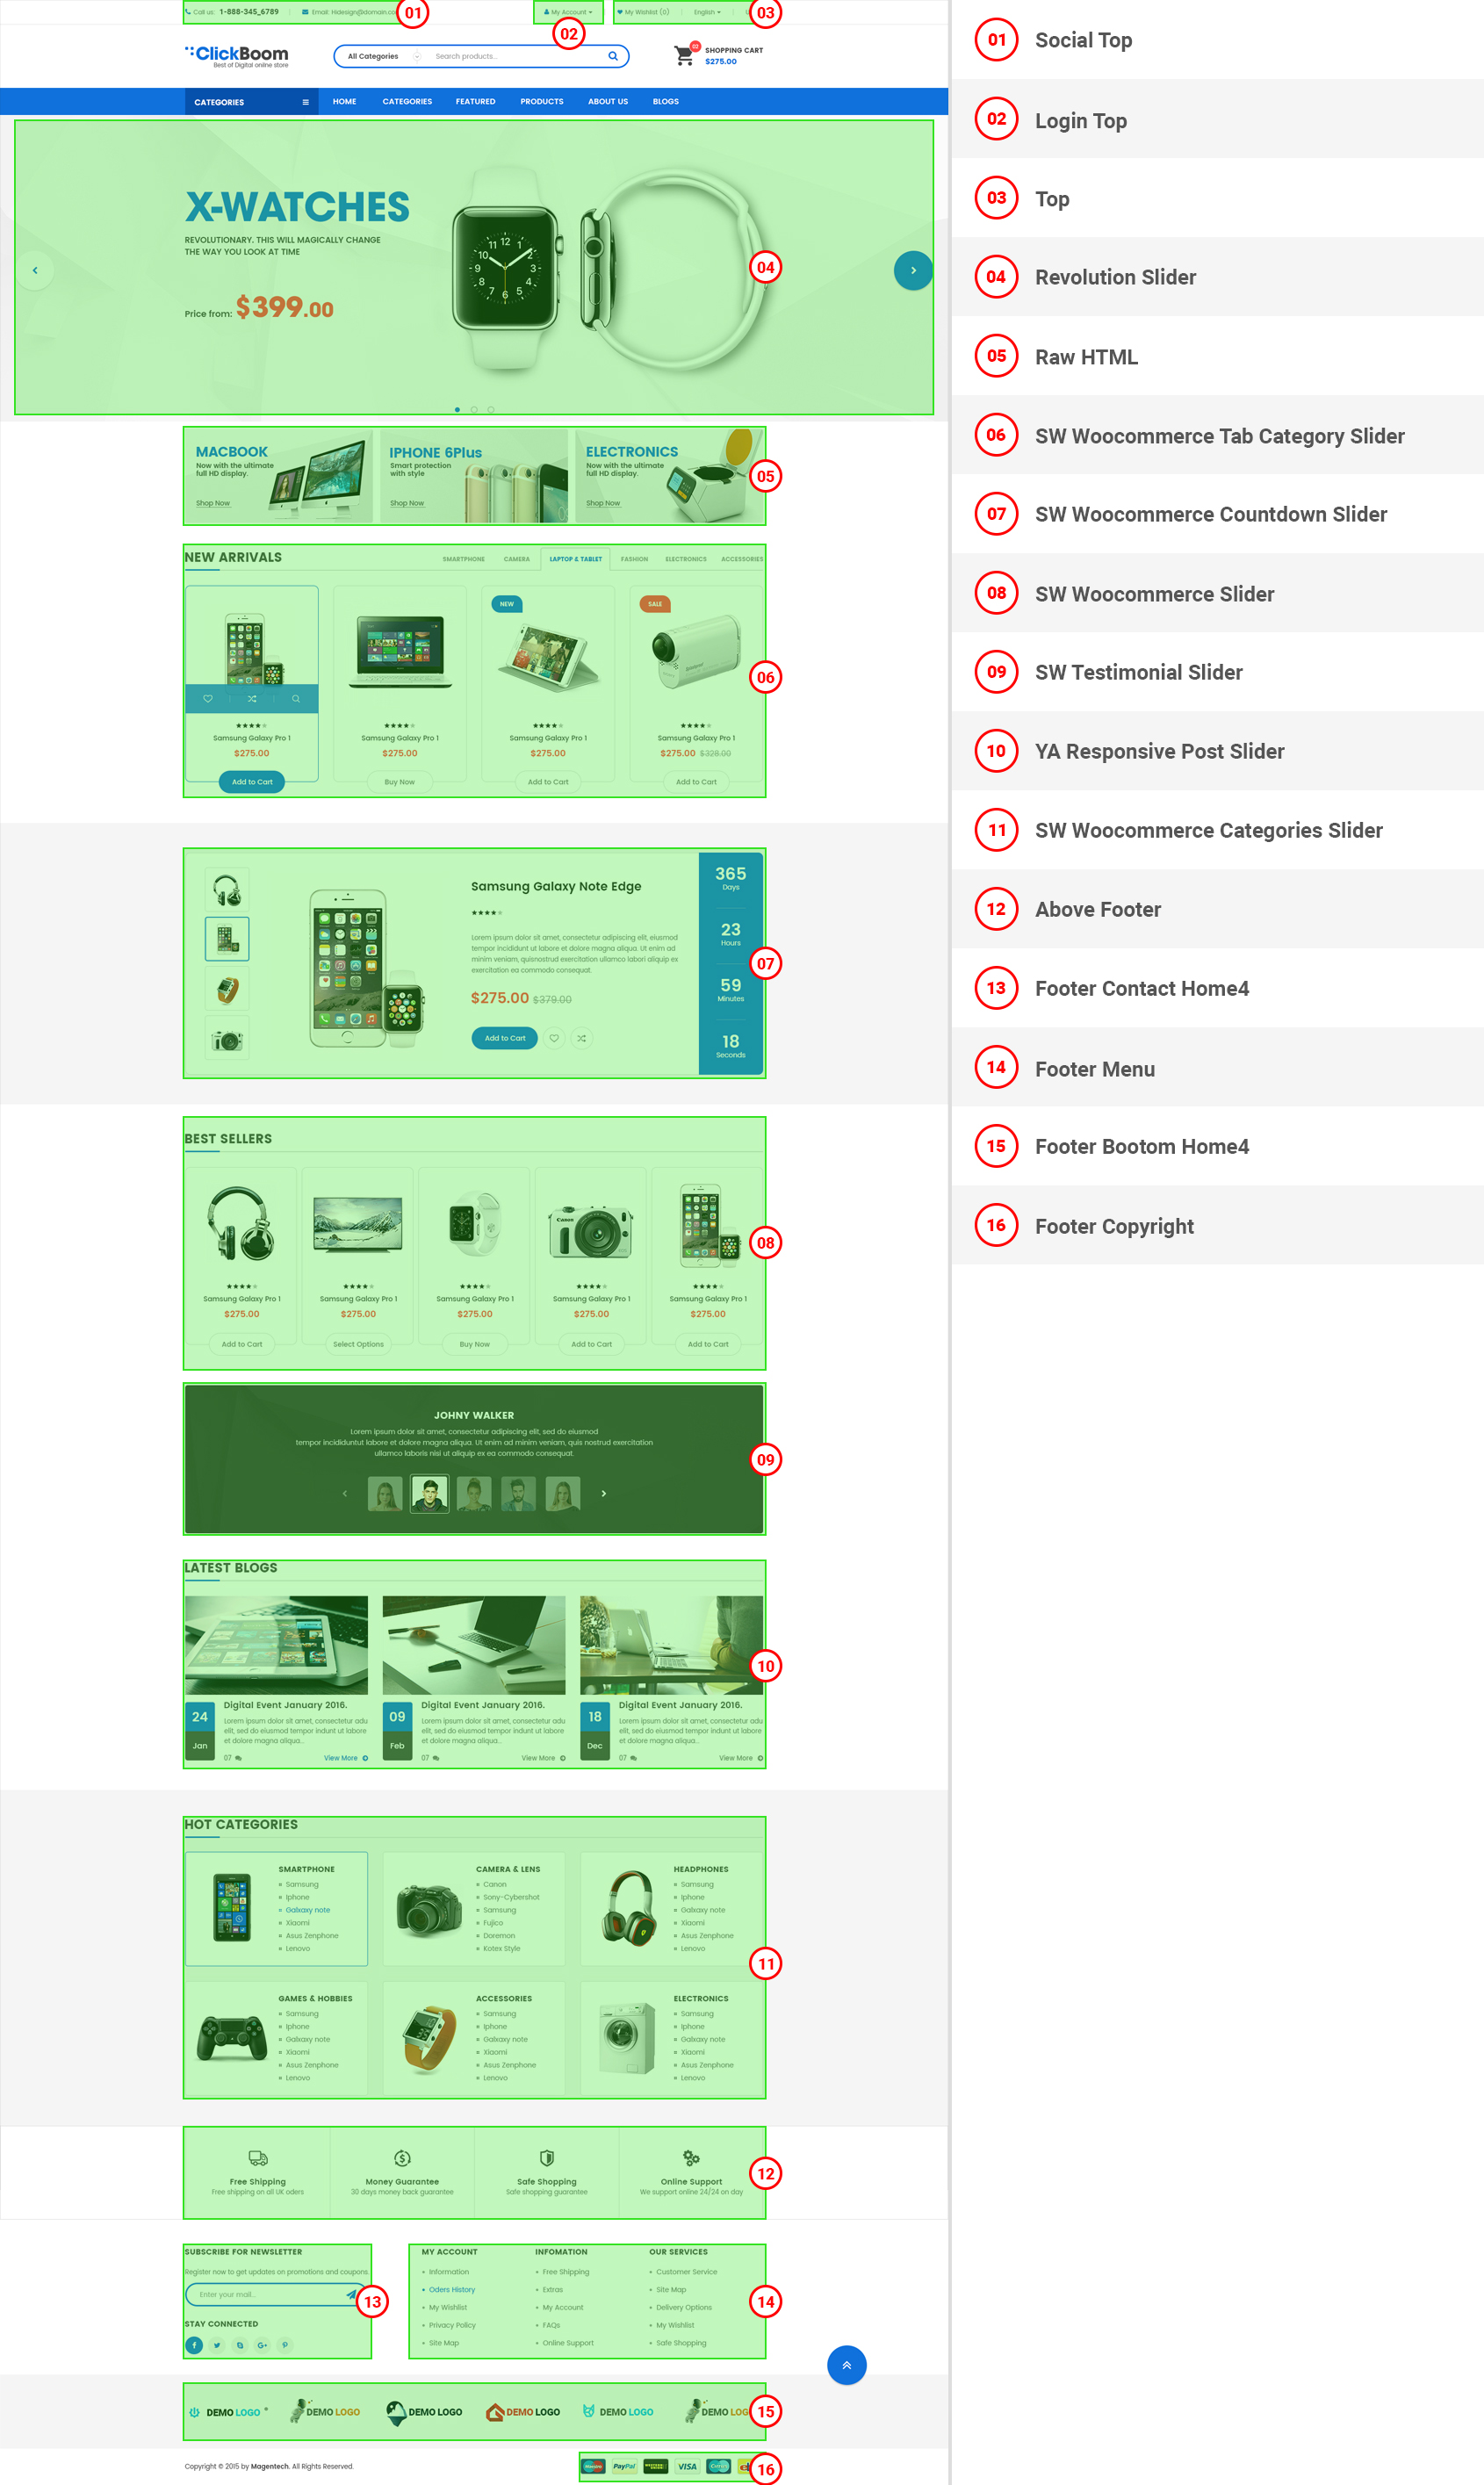
8.1 SW Clickboom Style 1
Socials Top

In your Administrator Page, please go to Appearance > Widgets and select the menu to configure its structure.
The Backend Settings: Please click Here for more detail.
Copy & Paste the code into your editor:
|
1 2 3 4 5 6 7 8 9 10 11 12 13 14 15 16 17 18 19 20 |
<div class="socials-header"> <ul> <li> <a href="https://www.facebook.com/flytheme" title="Facebook"><span class="fa fa-facebook"></span></a> </li> <li> <a href="https://twitter.com/Flytheme" title="twitter"><span class="fa fa-twitter"></span></a> </li> <li> <a href="https://www.linkedin.com/in/flytheme" title="linkedin"><span class="fa fa-linkedin"></span></a> </li> <li> <a href="https://plus.google.com/u/0/b/102399087761949580069/102399087761949580069/posts" title="GooglePlus"><span class="fa fa-google-plus"></span></a> </li> <li> <a href="#" title="behance"><span class="fa fa-behance"></span></a> </li> </ul> </div> <div class="block-text"><span class="fa fa-phone"></span>Call us: <span class="number-phone">1-888-345-6789</span></div> |
Login Top

In your Administrator Page, please go to Appearance > Widgets and select the menu to configure its structure.
The Backend Settings: Please click Here for more detail.
Top

In your Administrator Page, please go to Appearance > Widgets and select the menu to configure its structure.
The Backend Settings: Please click Here for more detail
Copy & Paste the code Content of text here:
|
1 2 3 4 5 6 7 8 9 10 11 12 13 14 15 16 17 18 19 20 21 22 23 24 |
<div id="lang_sel"> <ul class="nav"> <li> <a class="lang_sel_sel icl-en" href="#"> <img class="iclflag" title="English" alt="en" src="wp-content/themes/Clickboom/assets/img/en.png"> English </a> <ul> <li class="icl-en"> <a href="[bloginfo]?page_id=6&header_style=style1&footer_style=default&direction=ltr"> <img class="iclflag" title="English" alt="en" src="wp-content/themes/Clickboom/assets/img/en.png"> English </a> </li> <li class="icl-ar"> <a href="[bloginfo]?page_id=6&header_style=style1&footer_style=default&direction=rtl"> <img class="iclflag" title="Arabic" alt="ar" src="wp-content/themes/Clickboom/assets/img/ar.png"> Arabic </a> </li> </ul> </li> </ul> </div> |
Hot Sale
In your Administrator Page, please go to Appearance > Widgets and select the menu to configure its structure.
The Backend Settings: Please click Here for more detail.
Copy & Paste the code into Content of Text:
|
1 |
<div class="hot-sale"><a href="[bloginfo]?post_type=product&sidebar_product=left&product_col_large=3" title="Hot Sale">Hot Sale</a></div> |
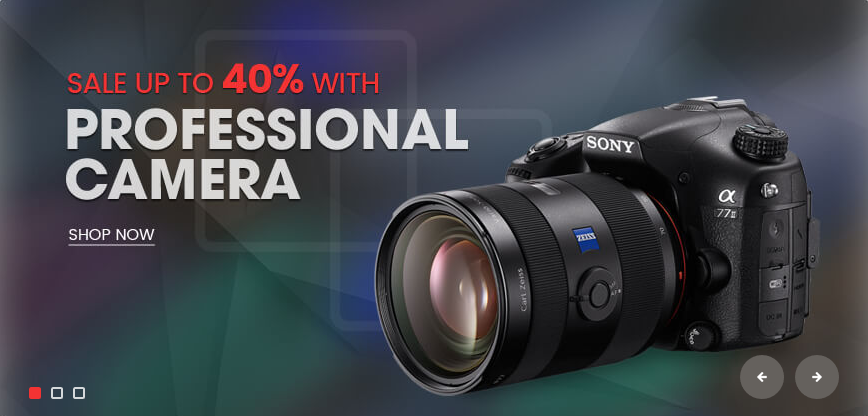
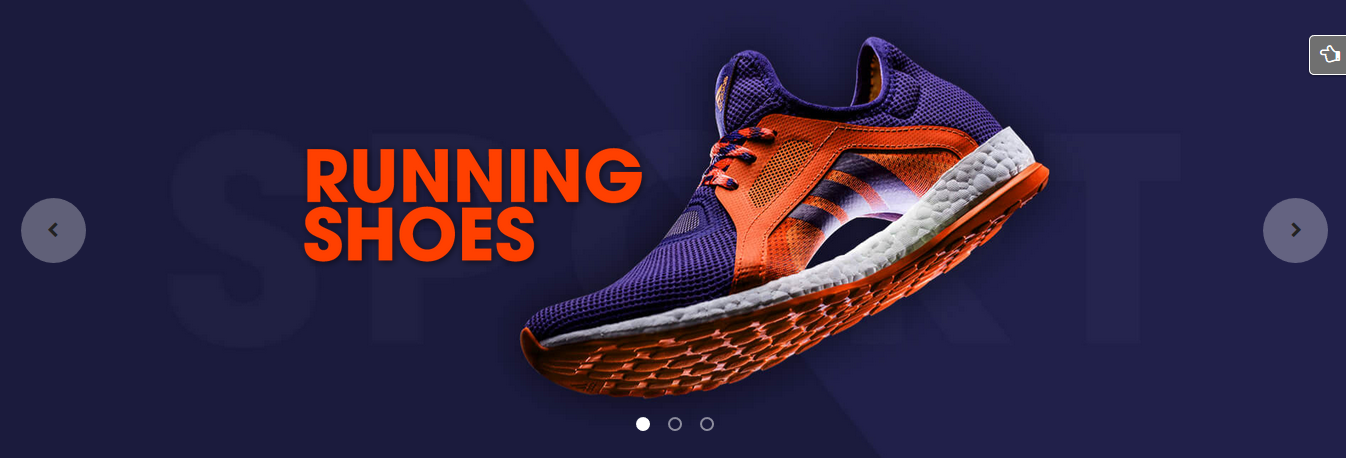
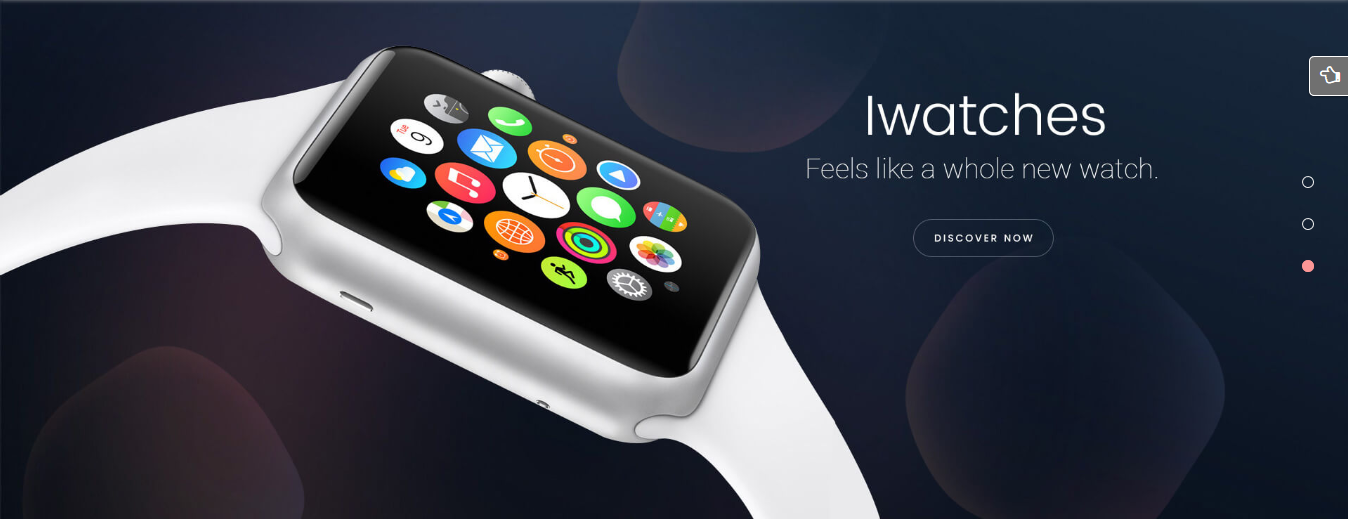
Revolution Slider
View Demo – After opening the homepage with Visual Composer, click on “pencil” button  at center of this part to configure its backend settings

The pop-up window will display the backend settings , so you can configure the item as you want:
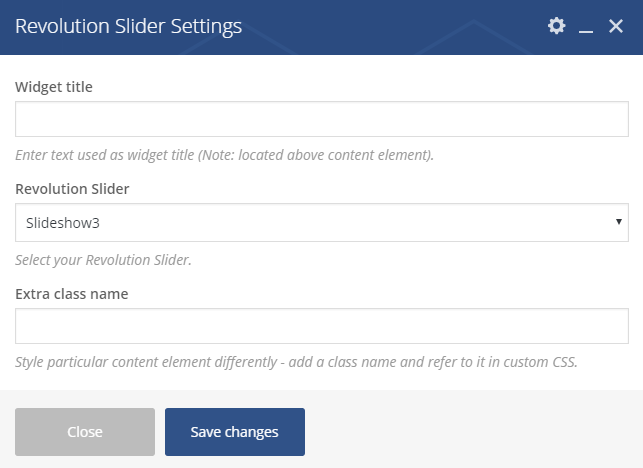
To configure these slides in this page, you need to follow these steps:
- Step 1: In your Administrator Page, please go to Revolution Slider > Revolution Slider, click on “pencil” symbol

.
- Step 2: After opening Slide Editor Panel, you could configure your slides such as Images, Text and Animation.
Let’s see the Backend Settings for more details. - NOTE:
About this Slider Revolution plugin, you can refer to the Slider Revolution Documentation and Slider Revolution Tutorial Videos for more detail.
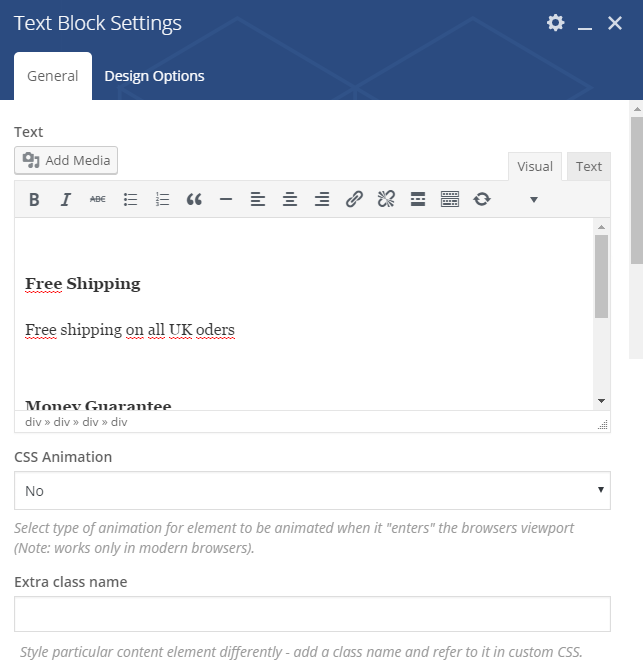
Text Block
View Demo – After opening the homepage with Visual Composer, click on “pencil” button at center of this part to configure its backend settings
1. Text Block 1

The pop-up window will display the backend settings, so you can configure the item as you want:
Copy & Paste the code into your editor:
|
1 2 3 4 5 6 7 8 9 10 11 12 13 14 15 16 17 18 19 20 21 22 23 24 25 26 27 28 29 30 31 32 33 34 35 36 |
<div class="block-text-index"> <div class="row"> <div class="item-block free-shipping col-lg-3 col-md-3 col-sm-6 col-xs-6"> <div class="item-content"> <div class="item-wrap"></div> <h4>Free Shipping</h4> Free shipping on all UK oders </div> </div> <div class="item-block money-guarantee col-lg-3 col-md-3 col-sm-6 col-xs-6"> <div class="item-content"> <div class="item-wrap"></div> <h4>Money Guarantee</h4> 30 days Money back </div> </div> <div class="item-block safe-shopping col-lg-3 col-md-3 col-sm-6 col-xs-6"> <div class="item-content"> <div class="item-wrap"></div> <h4>Safe Shopping</h4> Safe shopping guarantee </div> </div> <div class="item-block online-support col-lg-3 col-md-3 col-sm-6 col-xs-6"> <div class="item-content"> <div class="item-wrap"></div> <h4>Online Support</h4> We support online 24/24 </div> </div> </div> </div> |
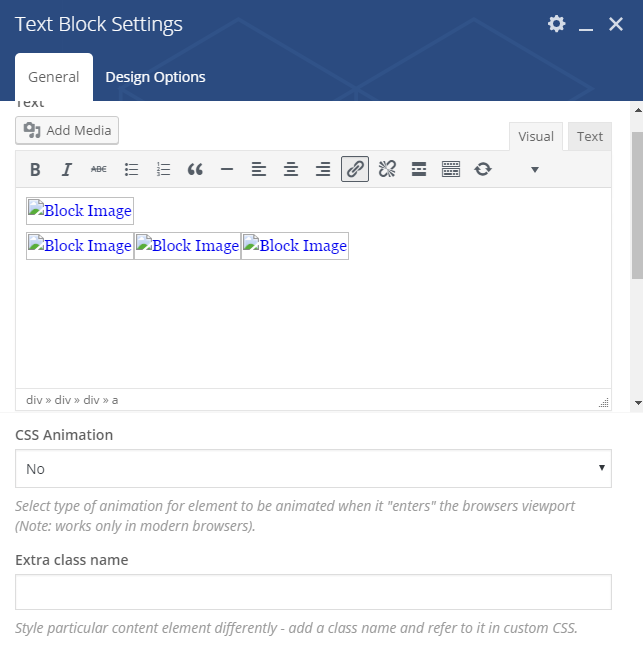
2. Text Block 2

The pop-up window will display the backend settings, so you can configure the item as you want:
Copy & Paste the code into your editor:
|
1 2 3 4 5 6 |
<div class="image-block"> <div class="row"> <div class="col-lg-4 col-md-4 col-sm-12 col-left"><a title="Banner Image" href="#"><img src="wp-content/uploads/2016/03/banner1-index.png" alt="Block Image" /></a></div> <div class="col-lg-8 col-md-8 col-sm-12 col-right"><a class="banner-first" title="Banner Image" href="#"><img src="wp-content/uploads/2016/03/banner2-index.png" alt="Block Image" /></a><a class="banner-second" title="Banner Image" href="#"><img src="wp-content/uploads/2016/03/banner3-index.png" alt="Block Image" /></a><a class="banner-last" title="Banner Image" href="#"><img src="wp-content/uploads/2016/03/banner4-index.png" alt="Block Image" /></a></div> </div> </div> |
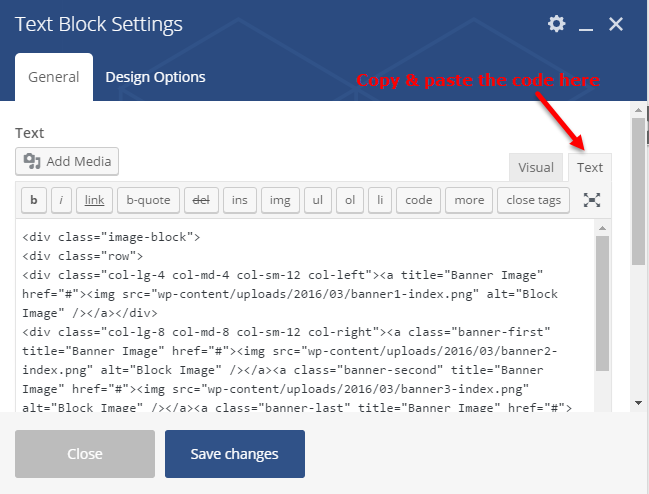
3. Text Block 3

The pop-up window will display the backend settings, so you can configure the item as you want:
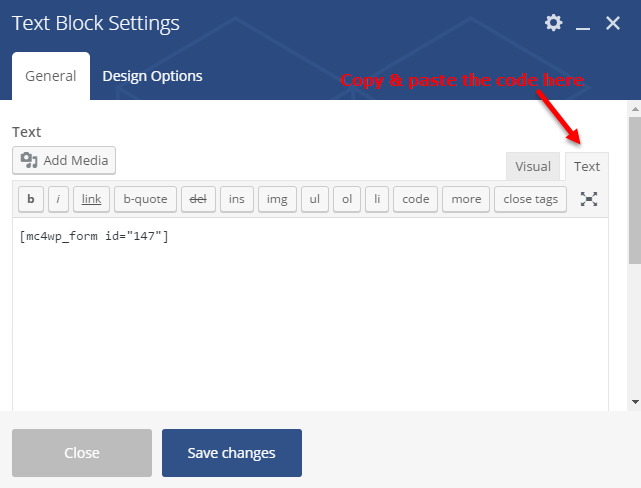
Copy & Paste the code into your editor:
|
1 |
[mc4wp_form id="147"] |
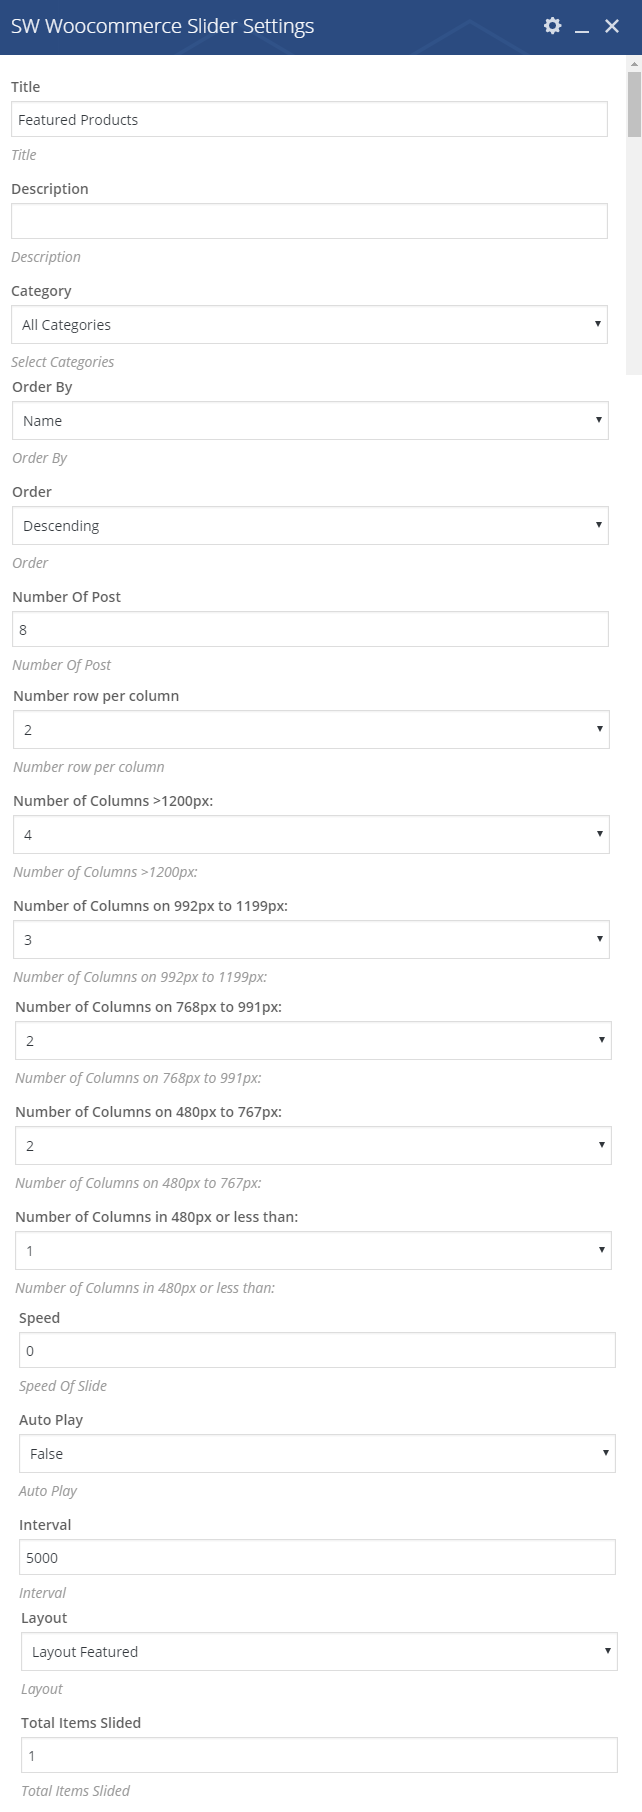
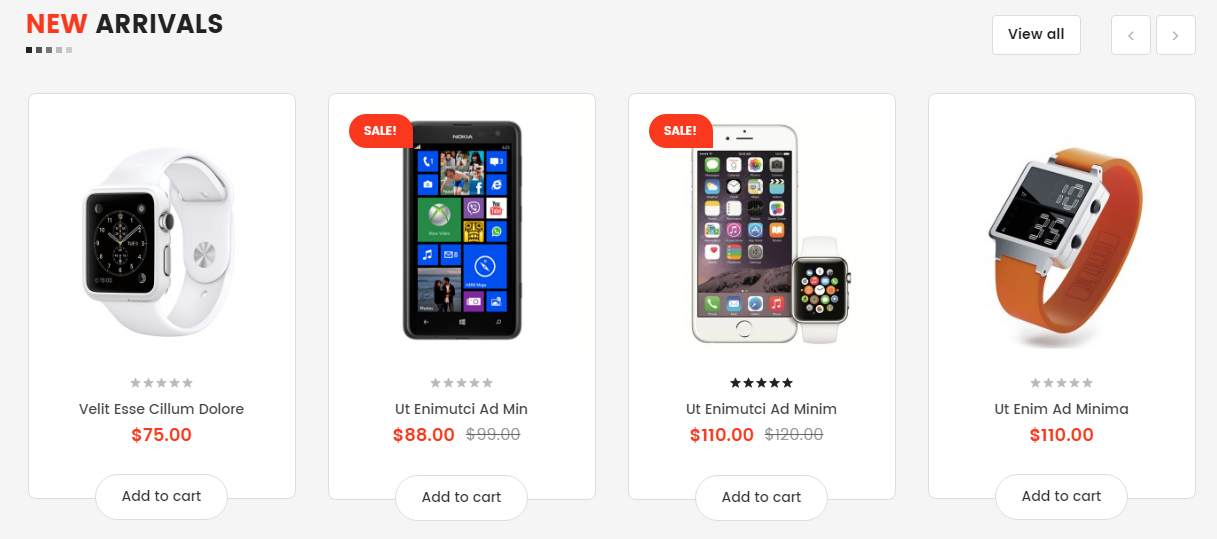
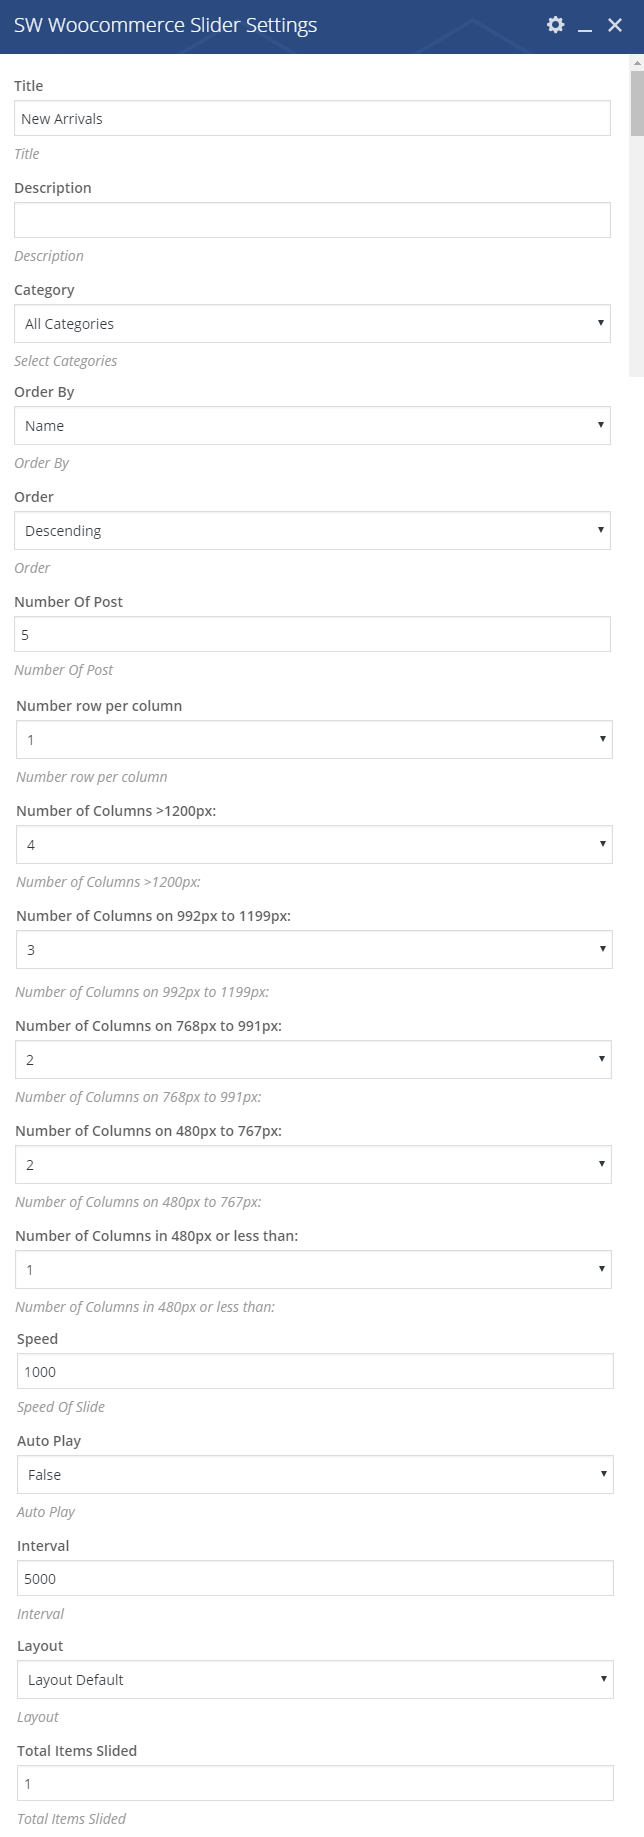
SW Woocommerce Slider
View Demo – After opening the homepage with Visual Composer, click on “pencil” button at center of this part to configure its backend settings
The pop-up window will display the backend settings, so you can configure the item as you want:
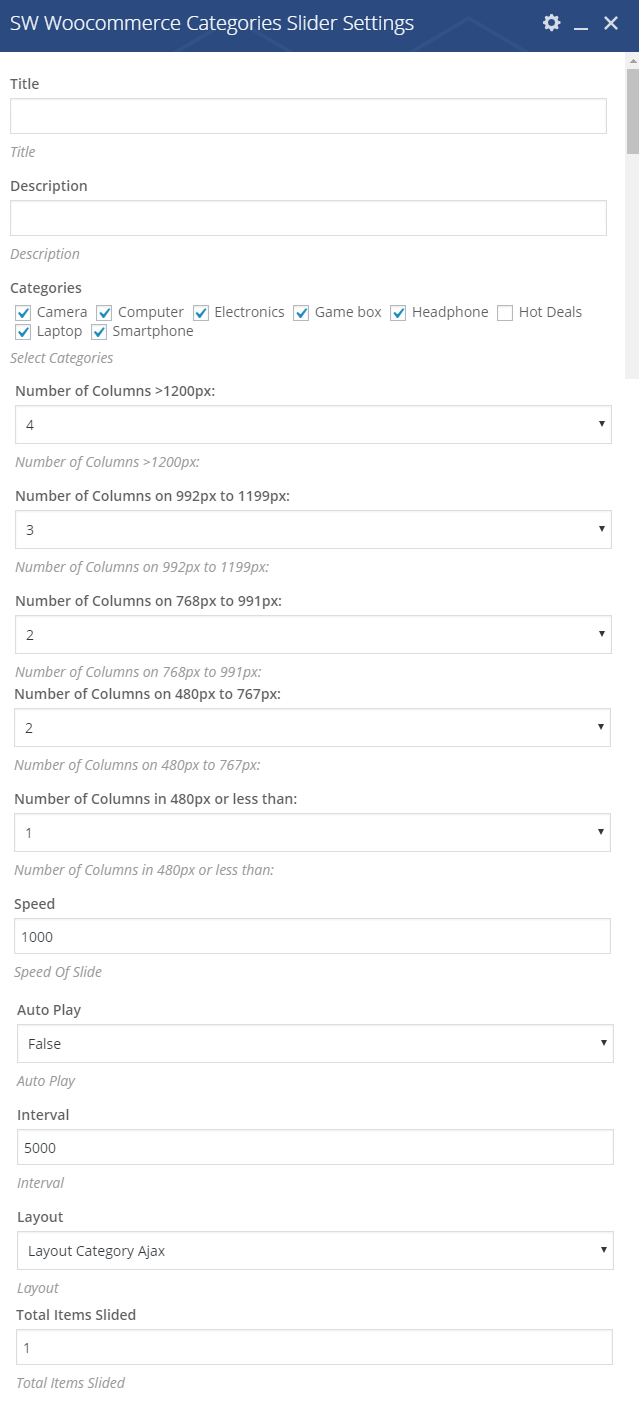
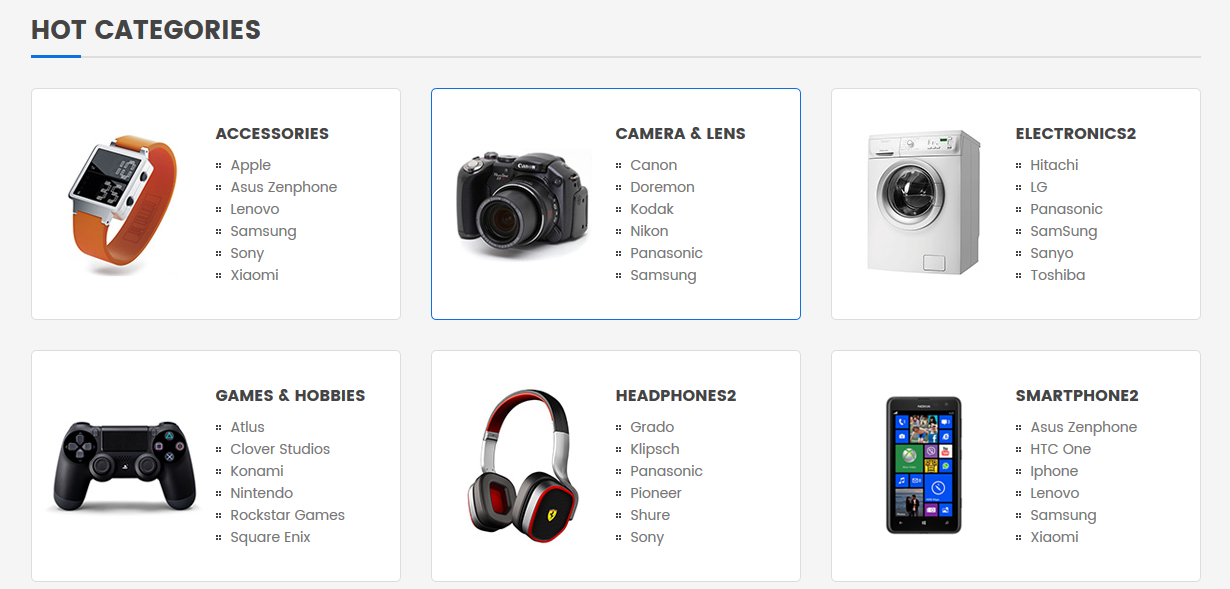
SW Woocommerce Categories Slider
View Demo – After opening the homepage with Visual Composer, click on “pencil” button at center of this part to configure its backend settings
The pop-up window will display the backend settings, so you can configure the item as you want:
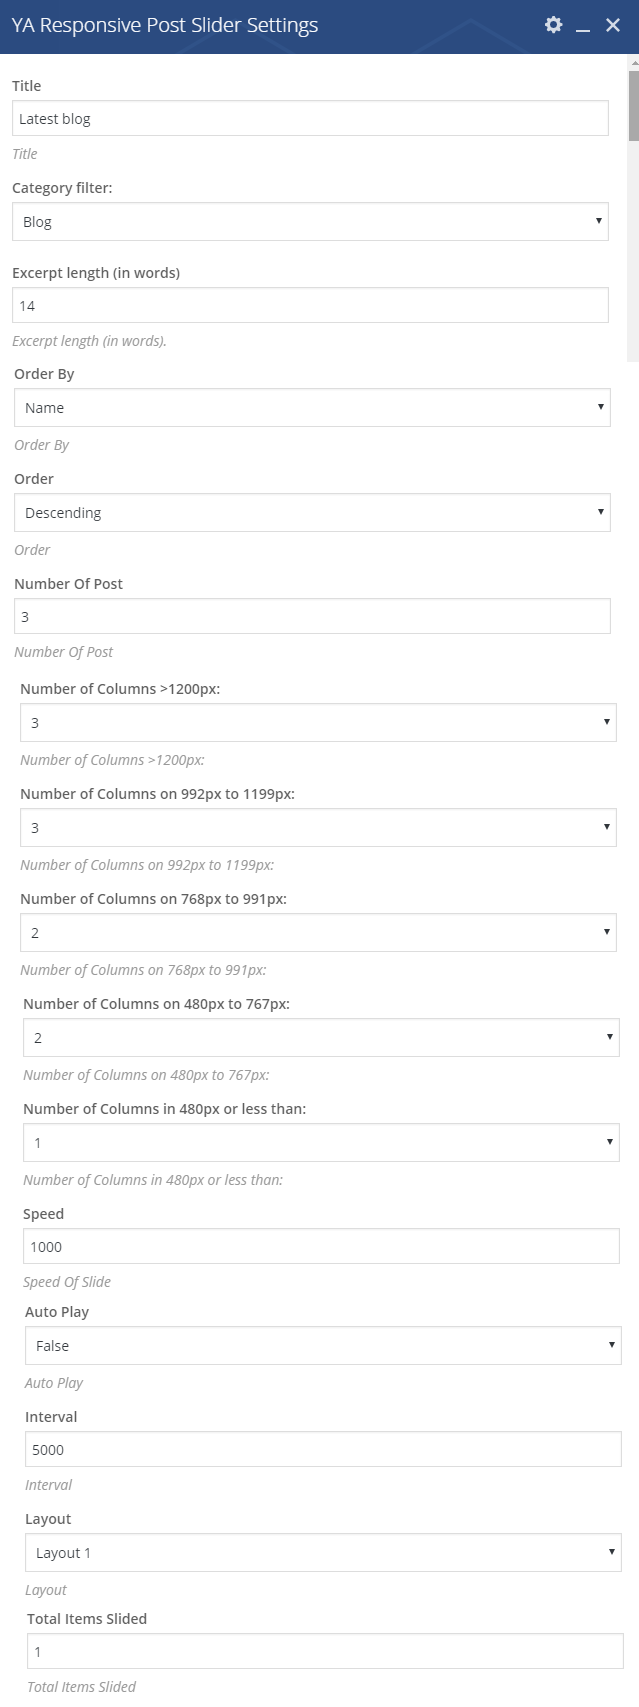
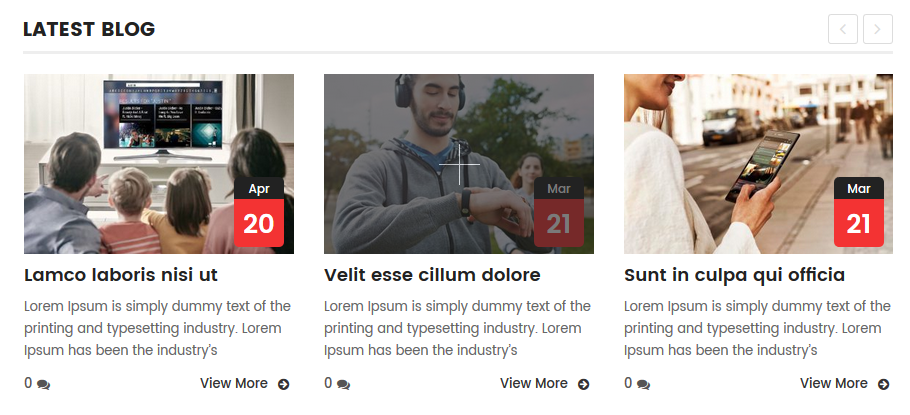
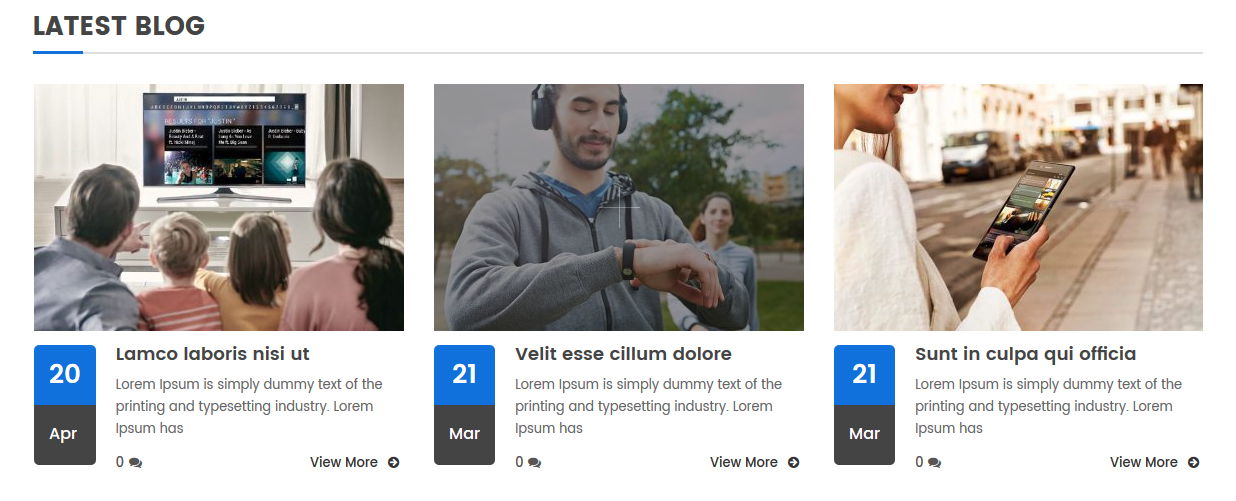
YA Responsive Post Slider
View Demo – After opening the homepage with Visual Composer, click on “pencil” button at center of this part to configure its backend settings
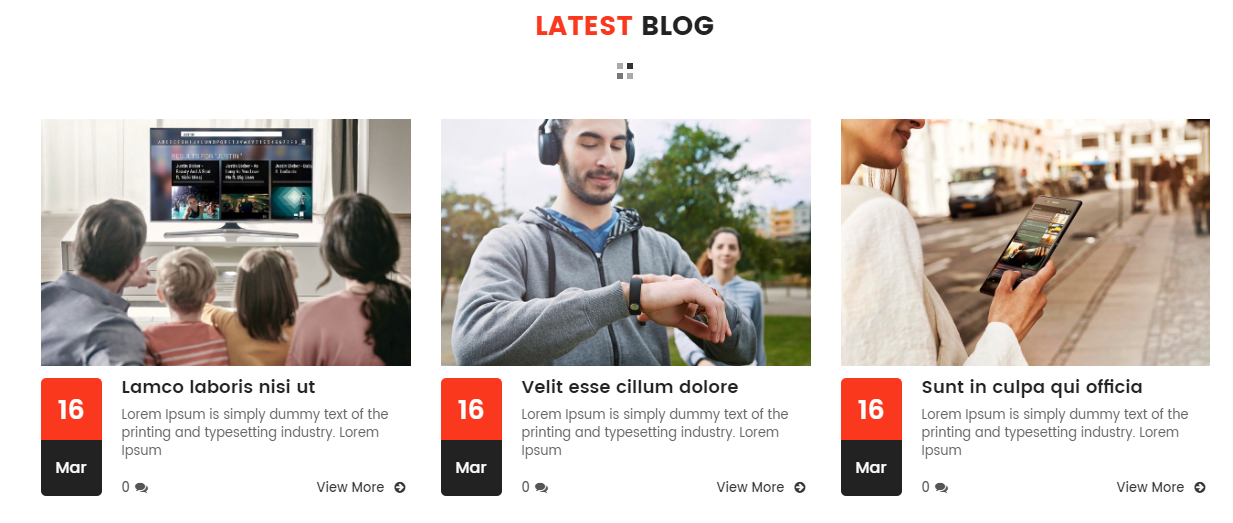
The pop-up window will display the backend settings, so you can configure the item as you want:
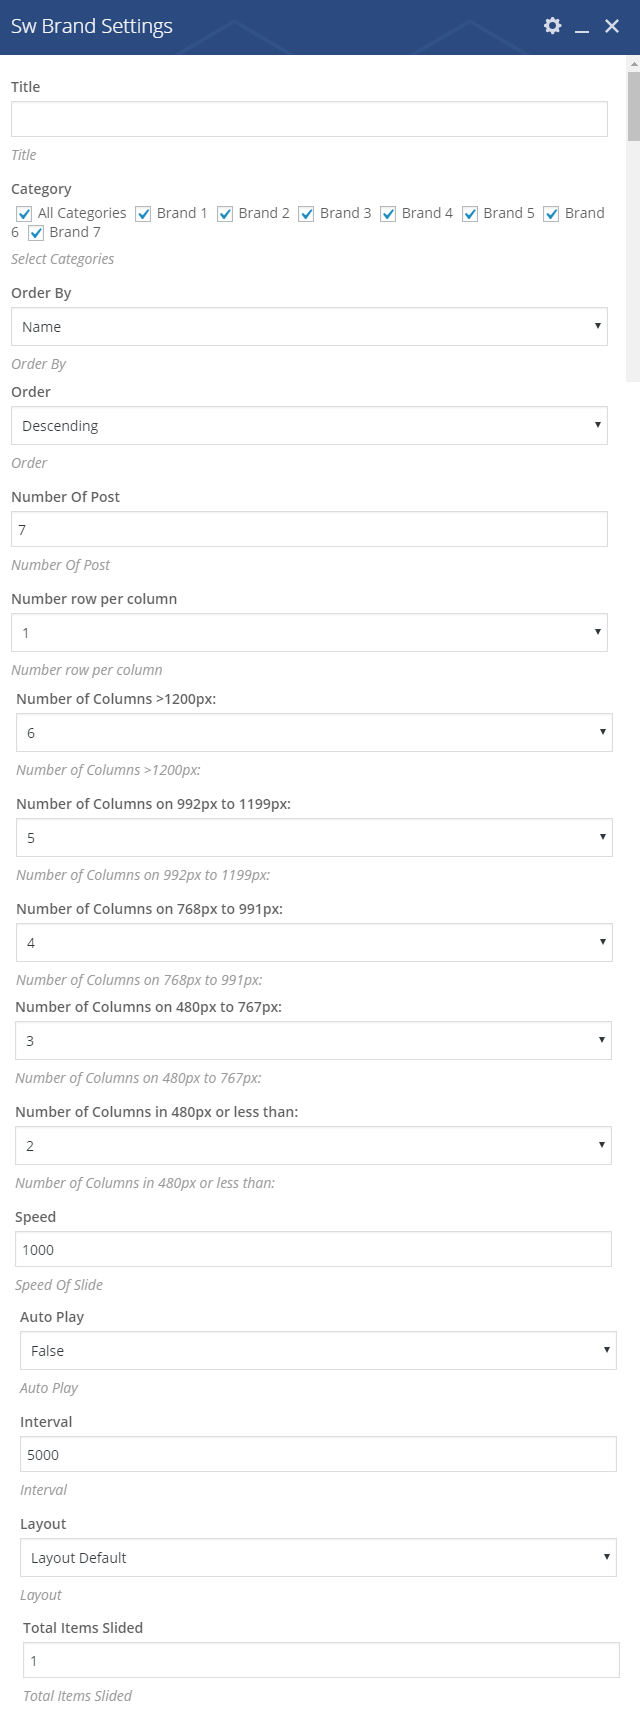
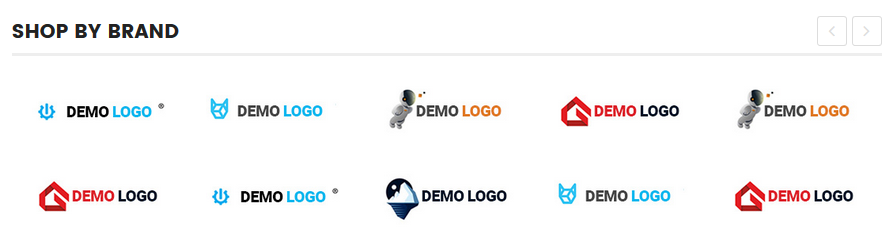
SW Brand
View Demo – After opening the homepage with Visual Composer, click on “pencil” button at center of this part to configure its backend settings

The pop-up window will display the backend settings, so you can configure the item as you want:
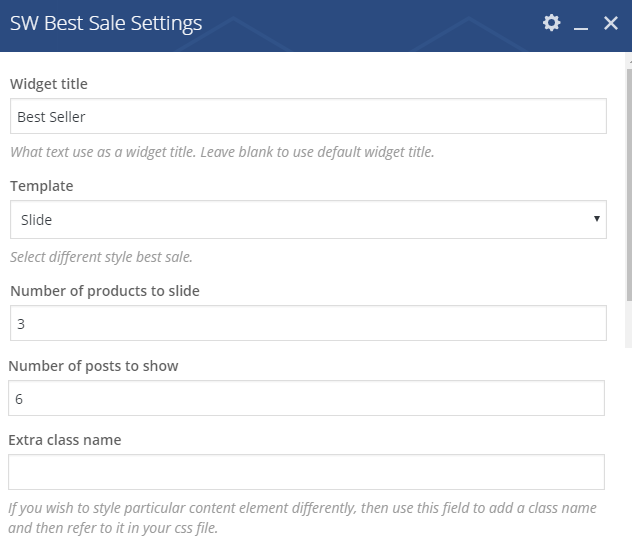
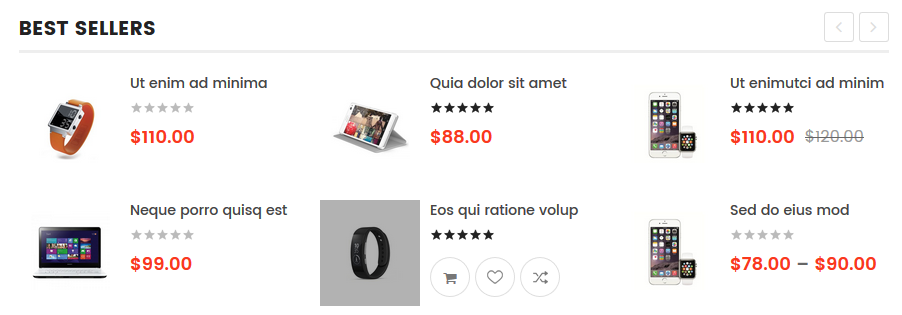
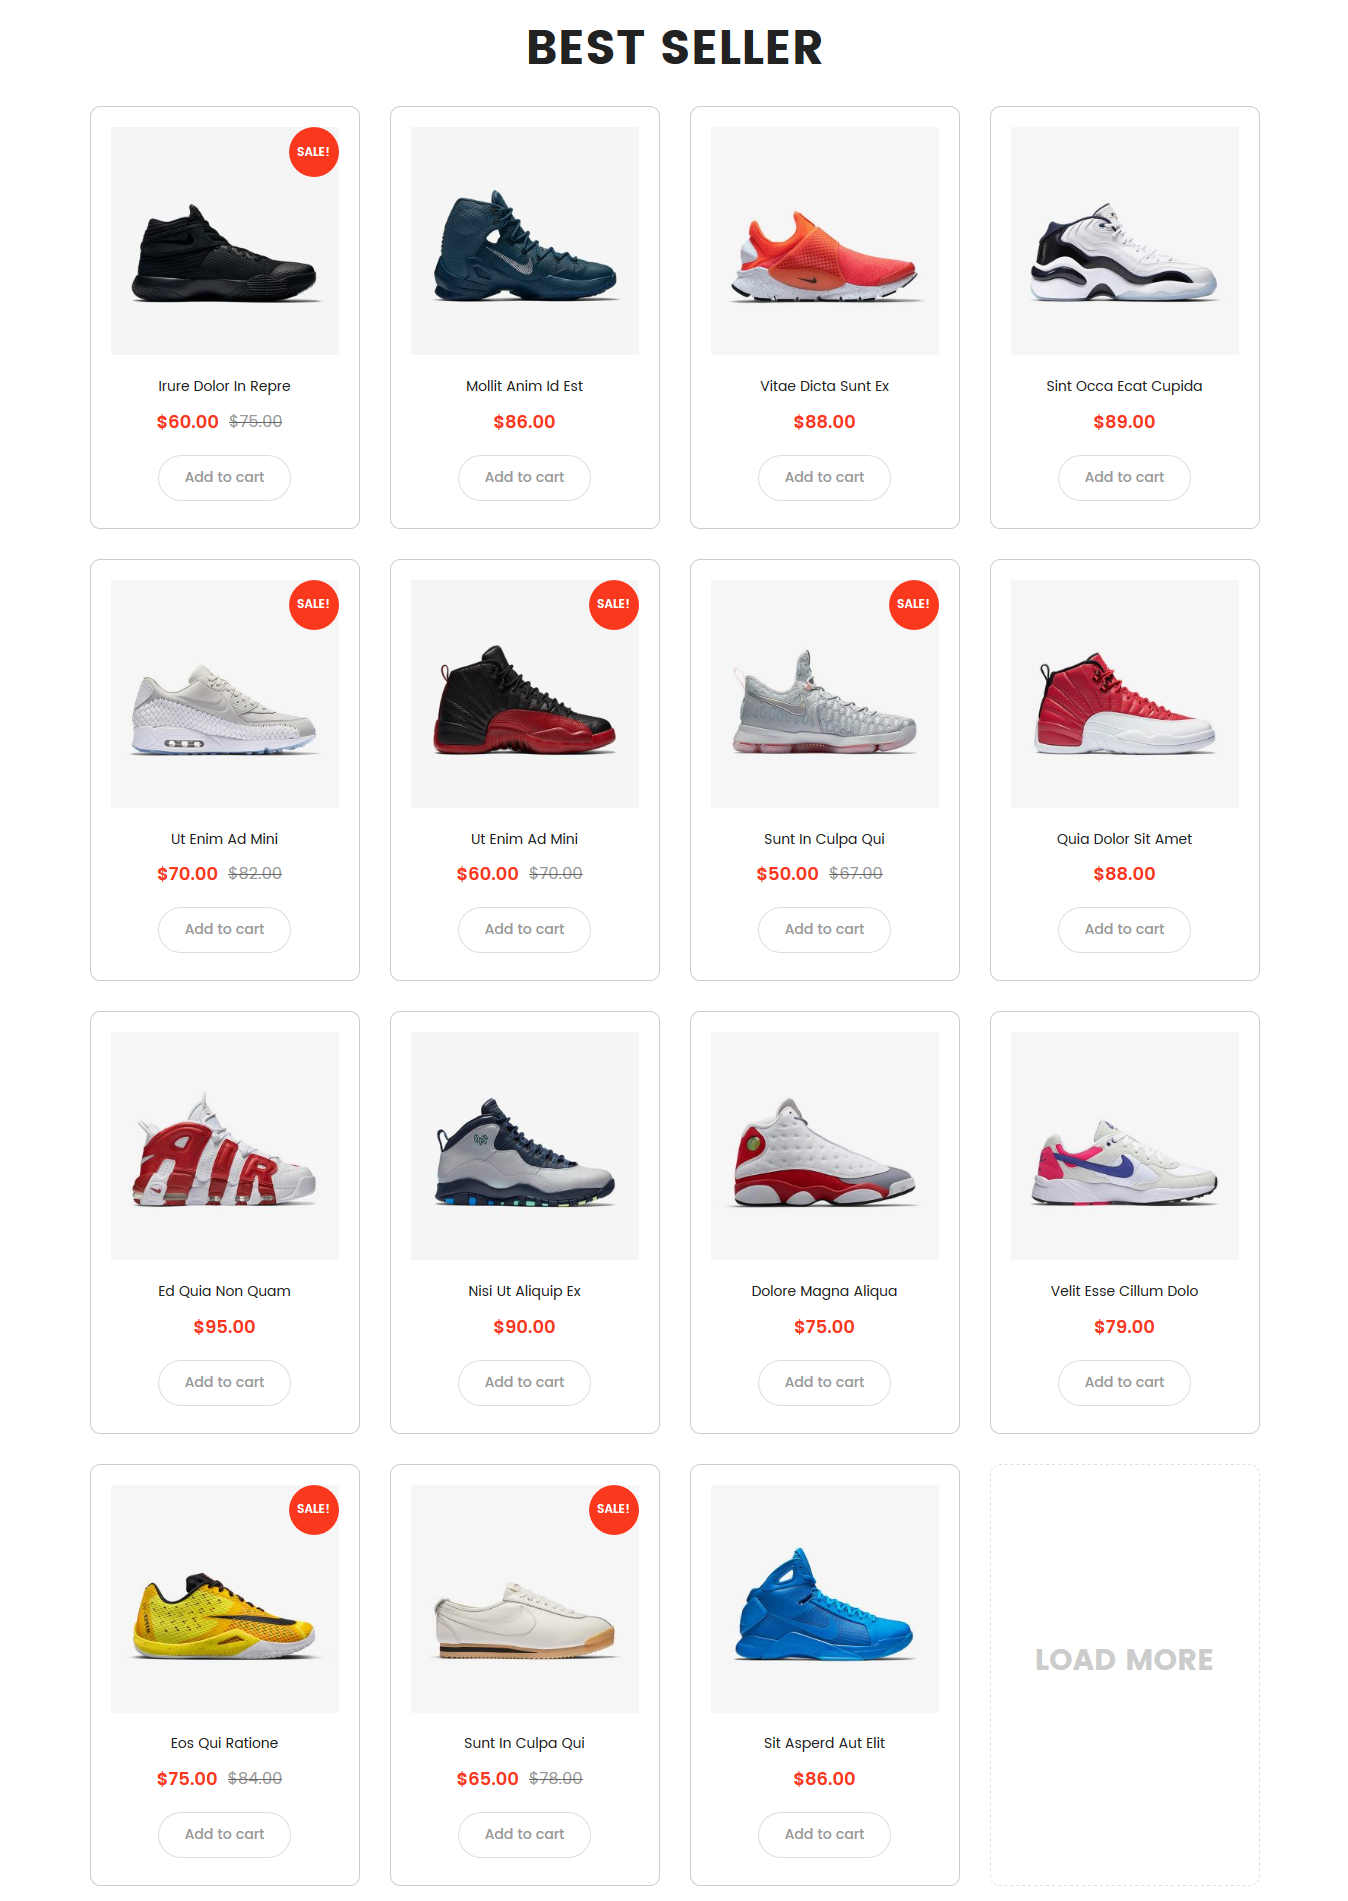
SW Best Seller
View Demo – After opening the homepage with Visual Composer, click on “pencil” button at center of this part to configure its backend settings
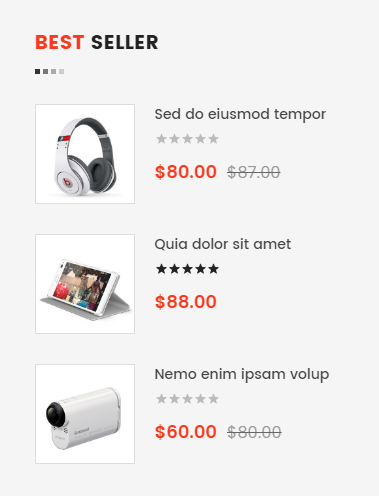
The pop-up window will display the backend settings, so you can configure the item as you want:
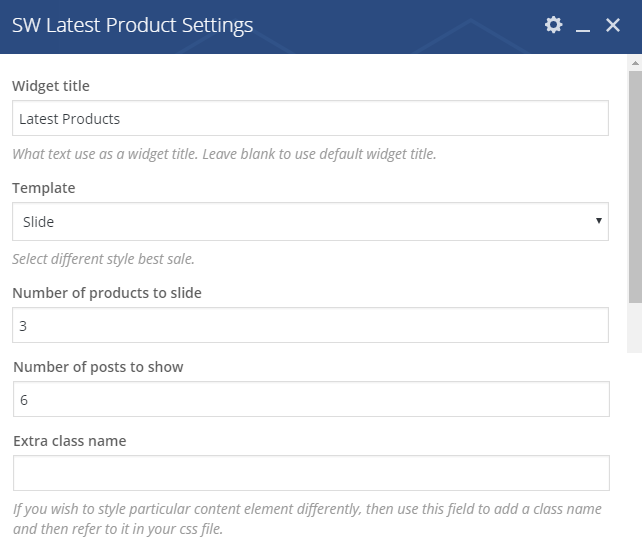
SW Lastest Products
View Demo – After opening the homepage with Visual Composer, click on “pencil” button at center of this part to configure its backend settings
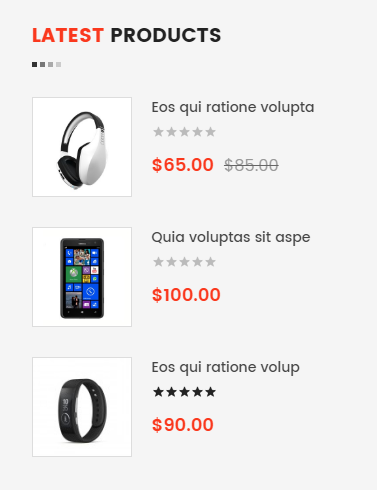
The pop-up window will display the backend settings, so you can configure the item as you want:
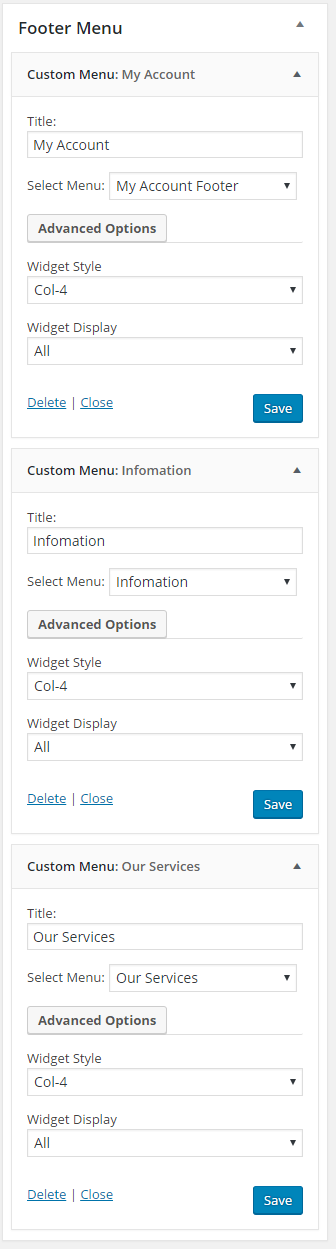
Footer Menu
View Demo
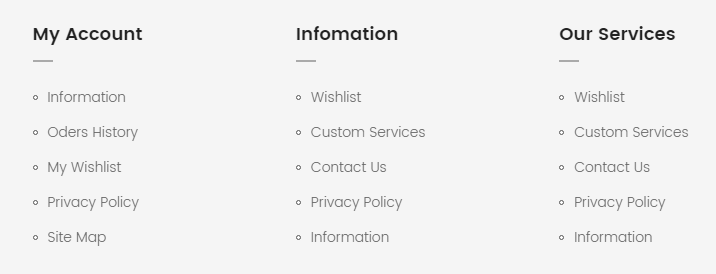
In your Administrator Page, please go to Appearance > Widgets and select the menu to configure its structure.
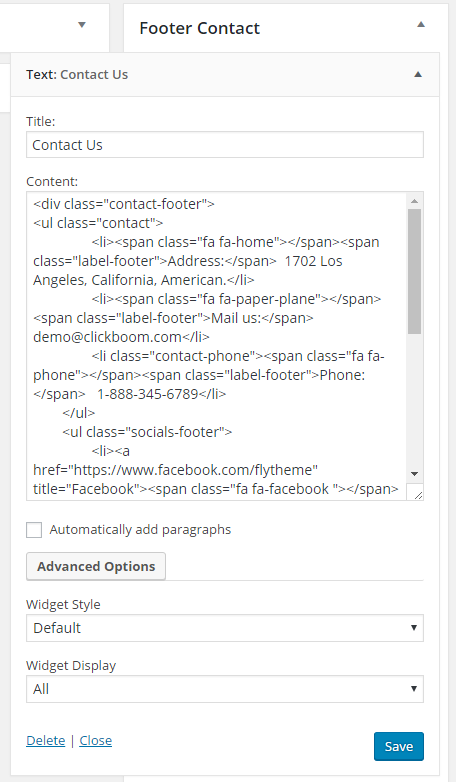
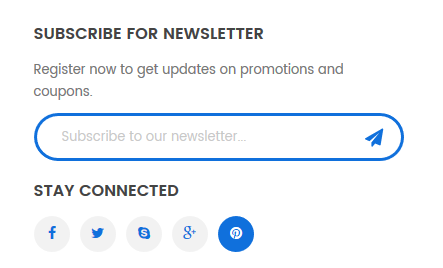
Footer Contact
View Demo
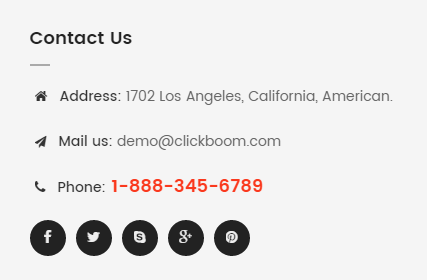
In your Administrator Page, please go to Appearance > Widgets and select the menu to configure its structure.
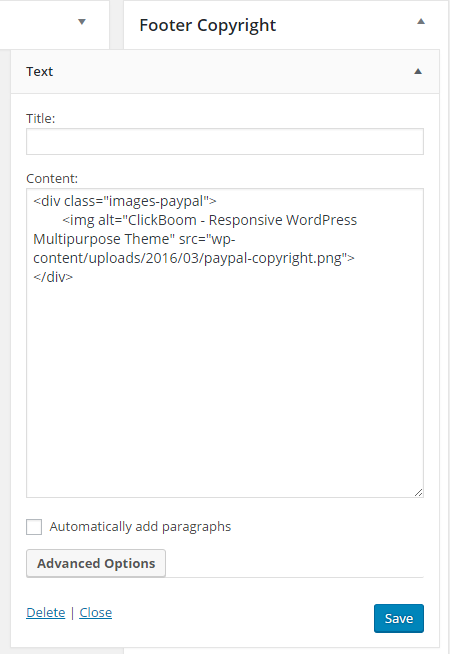
Footer Copypright
View Demo

In your Administrator Page, please go to Appearance > Widgets and select the menu to configure its structure.
8.2 SW Clickboom Style 2
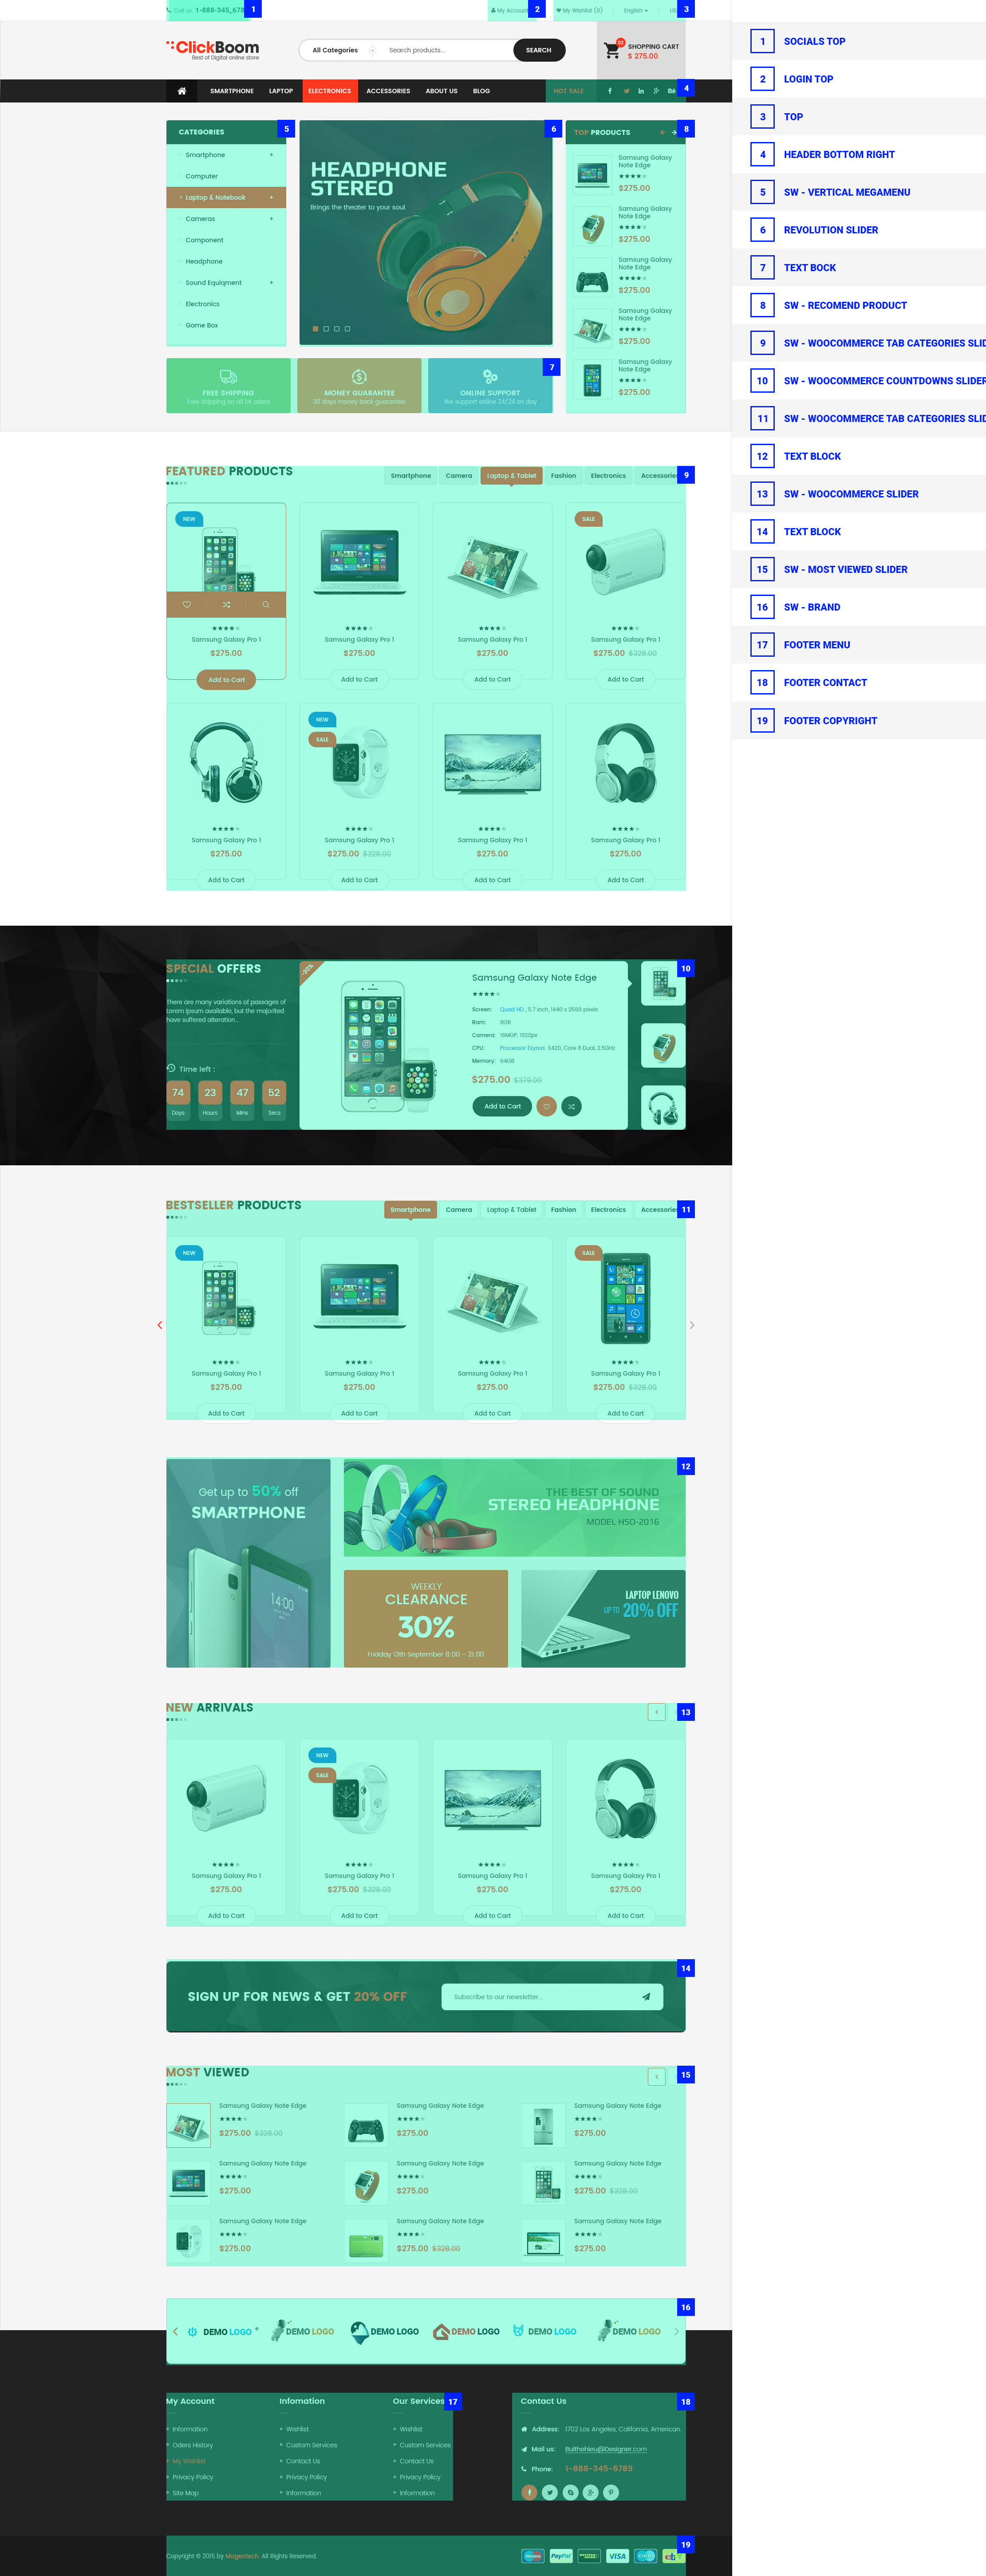
Header Bottom Right

In your Administrator Page, please go to Appearance > Widgets and select the menu to configure its structure.
The Backend Settings: Please click Here for more detail
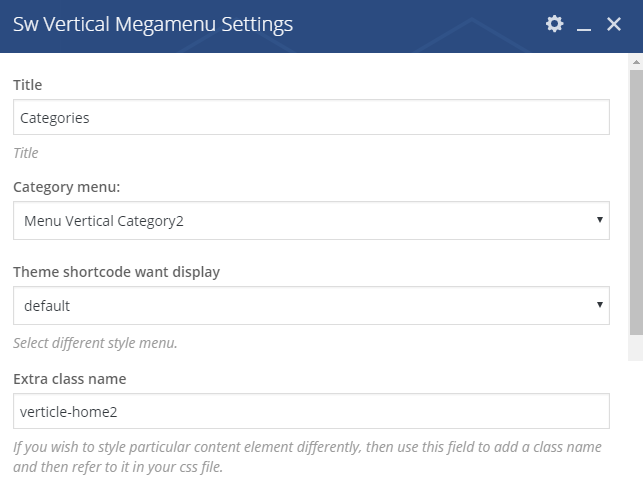
SW Vertical Mega Menu
View Demo – After opening the homepage with Visual Composer, click on “pencil” button at center of this part to configure its backend settings

The pop-up window will display the backend settings, so you can configure the item as you want:
Revolution Slider
View Demo
- After opening the homepage with Visual Composer, click on “pencil” button at center of this part to configure its backend settings. The pop-up window will display the backend settings , so you can configure the item as you want:
- General Settings: Please click Here for more detail.
- About Revolution Slider Configuration, you can refer to the one in Slider Home 1 for more detail.
Text Block
View Demo – After opening the homepage with Visual Composer, click on “pencil” button at center of this part to configure its backend settings
1. Text Block 1

The pop-up window will display the backend settings, so you can configure the item as you want:
Copy & Paste the code into your editor:
|
1 2 3 4 5 6 7 8 9 10 11 12 13 14 15 16 17 18 19 20 21 22 23 24 25 26 |
<div class="block-text-index2"> <div class="item-block free-shipping"> <div class="item-content"> <div class="item-icon"></div> <h4>Free Shipping</h4> Free shipping on all UK oders </div> </div> <div class="item-block money-guarantee"> <div class="item-content"> <div class="item-icon"></div> <h4>Money Guarantee</h4> 30 days Money back </div> </div> <div class="item-block online-support"> <div class="item-content"> <div class="item-icon"></div> <h4>Online Support</h4> We support online 24/24 </div> </div> </div> |
2. Text Block 2

The pop-up window will display the backend settings, so you can configure the item as you want:
Copy & Paste the code into your editor:
|
1 2 3 4 5 6 |
<div class="image-block"> <div class="row"> <div class="col-lg-4 col-md-4 col-sm-12 col-left"><a title="Banner Image" href="#"><img src="wp-content/uploads/2016/03/banner1-index.png" alt="Block Image" /></a></div> <div class="col-lg-8 col-md-8 col-sm-12 col-right"><a class="banner-first" title="Banner Image" href="#"><img src="wp-content/uploads/2016/03/banner2-index.png" alt="Block Image" /></a><a class="banner-second" title="Banner Image" href="#"><img src="wp-content/uploads/2016/03/banner3-index.png" alt="Block Image" /></a><a class="banner-last" title="Banner Image" href="#"><img src="wp-content/uploads/2016/03/banner4-index.png" alt="Block Image" /></a></div> </div> </div> |
3. Text Block 3

The pop-up window will display the backend settings, so you can configure the item as you want:
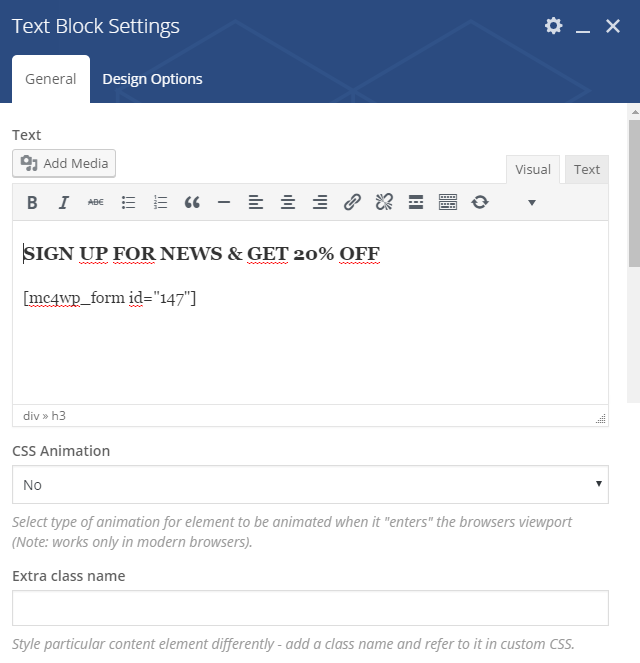
Copy & Paste the code into your editor:
|
1 2 3 4 5 |
<div class="newsletter-home2"> <h3>SIGN UP FOR NEWS & GET 20% OFF</h3> [mc4wp_form id="147"] </div> |
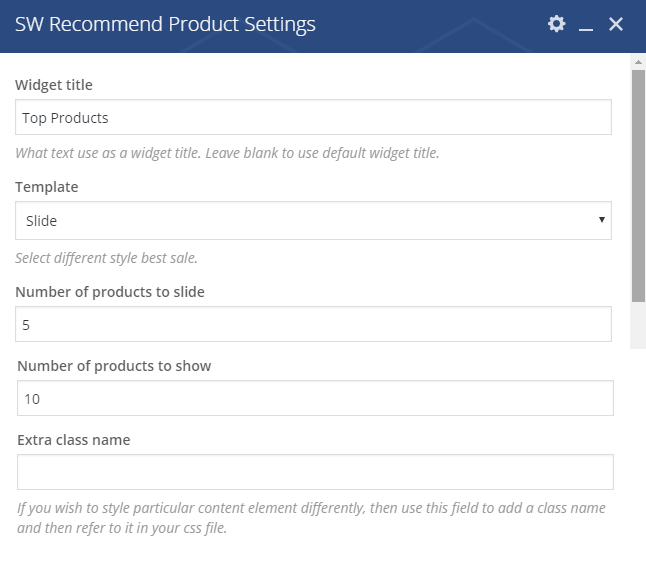
SW Recommend Prouduct
View Demo – After opening the homepage with Visual Composer, click on “pencil” button at center of this part to configure its backend settings
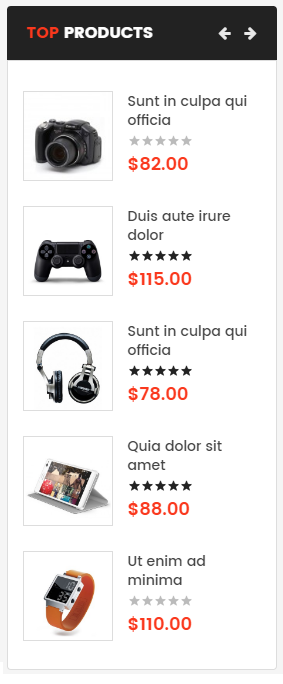
The pop-up window will display the backend settings, so you can configure the item as you want:
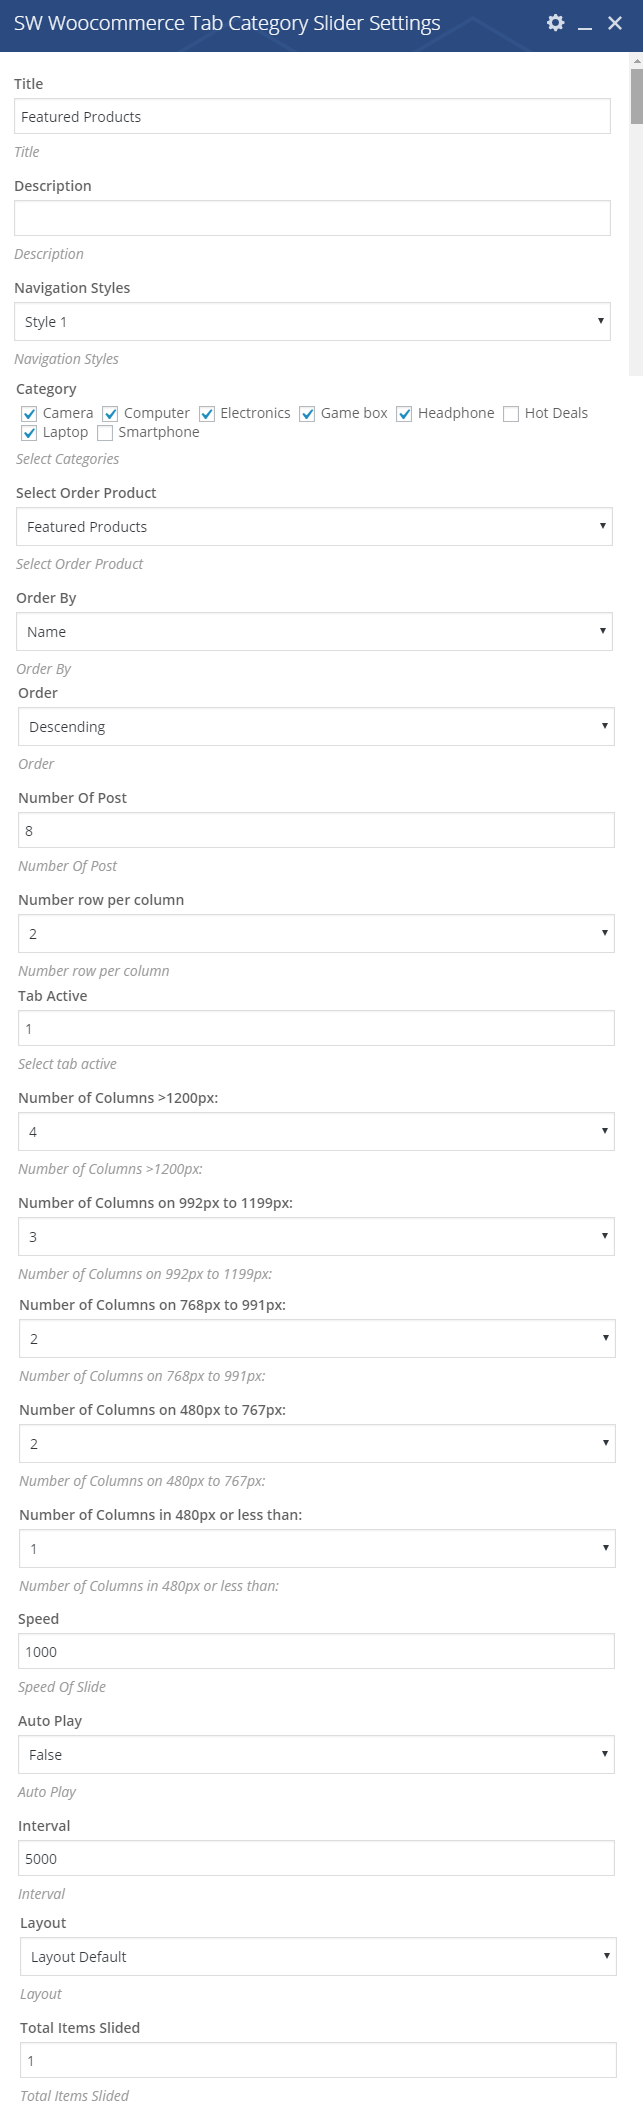
SW Woocommerce Tab Categories Slider
View Demo – After opening the homepage with Visual Composer, click on “pencil” button at center of this part to configure its backend settings
The pop-up window will display the backend settings, so you can configure the item as you want:
SW Woocommerce Countdown Slider
View Demo – After opening the homepage with Visual Composer, click on “pencil” button at center of this part to configure its backend settings
The pop-up window will display the backend settings, so you can configure the item as you want:

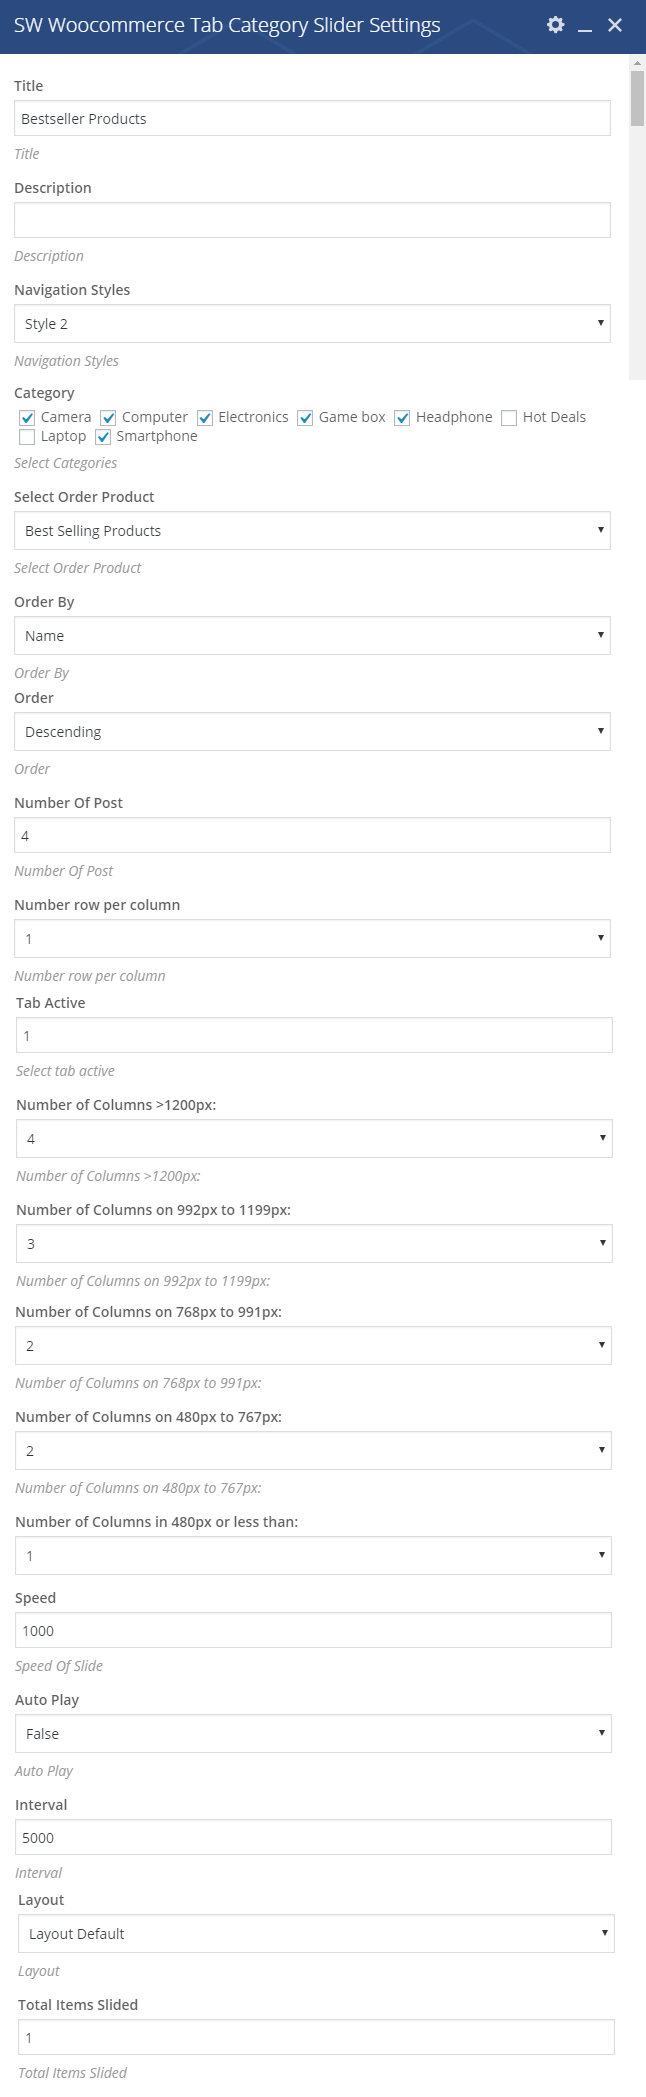
SW Woocommerce Tab Category Slider – BestSeller Products
View Demo – After opening the homepage with Visual Composer, click on “pencil” button at center of this part to configure its backend settings
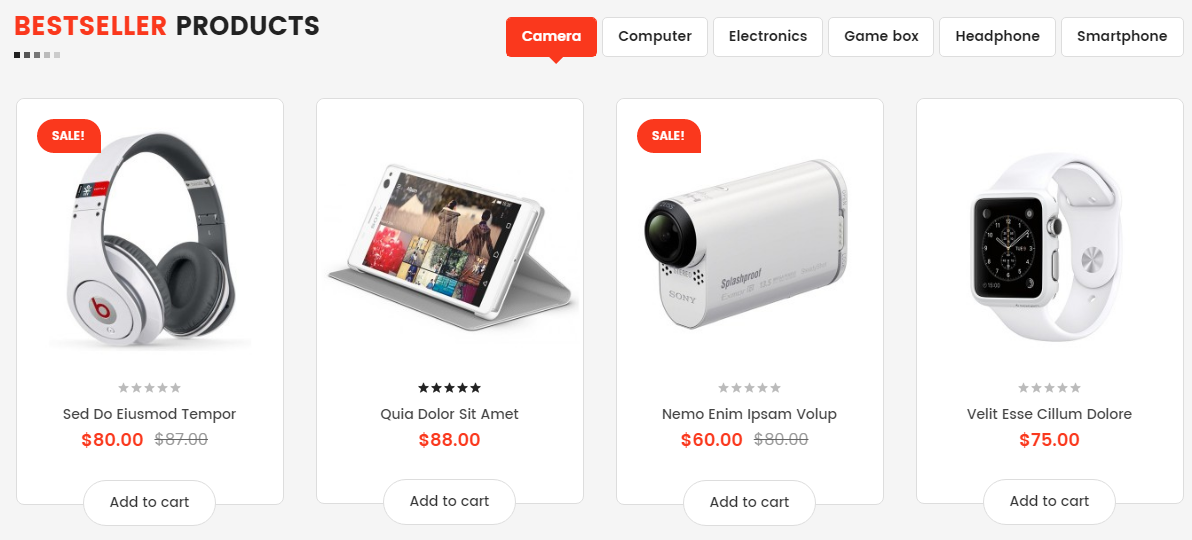
The pop-up window will display the backend settings, so you can configure the item as you want:
SW Woocommerce Slider
View Demo – After opening the homepage with Visual Composer, click on “pencil” button at center of this part to configure its backend settings
The pop-up window will display the backend settings, so you can configure the item as you want:
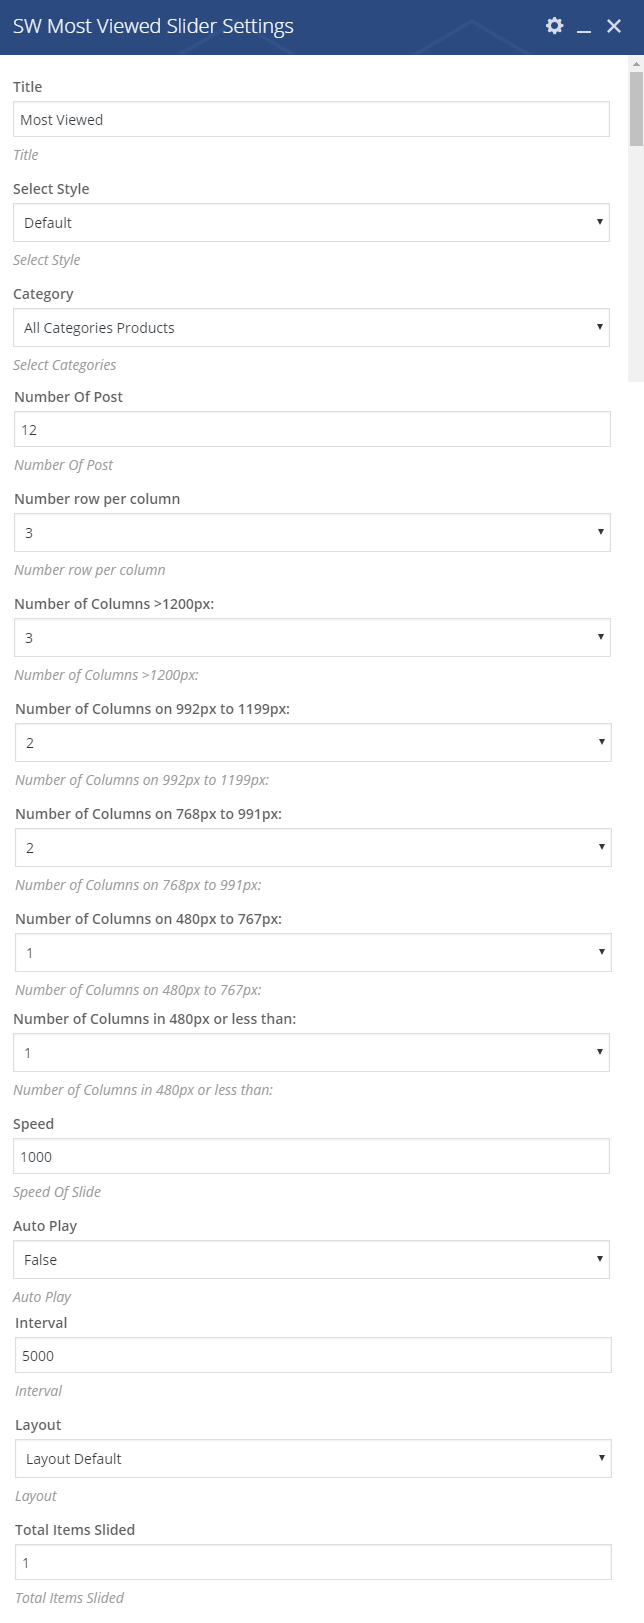
SW Most Viewed Slider
View Demo – After opening the homepage with Visual Composer, click on “pencil” button at center of this part to configure its backend settings

The pop-up window will display the backend settings, so you can configure the item as you want:
SW Brand

In your Administrator Page, please go to Appearance > Widgets and select the menu to configure its structure.
The Backend Settings: Please click Here for more detail.
8.3 SW Clickboom Style 3
Note:
In the Admin Panel, please navigate to Page >> All Page >> Home 3 to custom this home page’s settings.
- Backend Setting: Please click Here for more detail about the setting of this page.
- This home page uses Header and Footer Style 3. To configure Header and Footer Style, please go to Appearance > Theme Options and set it in tab Header & Footer.
Socials Top, Login Top & Top
View Demo

The configuration is the same to the one in Home Page 1. Please click Here to see more details.
Revolution Slider
View Demo
After opening the homepage with Visual Composer, click on “pencil” button at center of this part to configure its backend settings.
The pop-up window will display the Backend Setting , then you can configure the item as you want.
- General Settings: Please click Here for more detail.
- Column Settings: Please click Here for more detail.
- About Revolution Slider Configuration, you can refer to the one in Slider Home 1 for more detail.
Single Image
View Demo
After opening the homepage with Visual Composer, click on “pencil” button at center of this part to configure its backend settings.
- General Settings: Please click Here for more detail.
- Inner Column Settings: Please click Here for more detail.
SW Best Sale
View Demo
After opening the homepage with Visual Composer, click on “pencil” button at center of this part to configure its backend settings.
- General Settings: Please click Here for more detail.
Single Image
View Demo

After opening the homepage with Visual Composer, click on “pencil” button at center of this part to configure its backend settings.
- General Settings: Please click Here for more detail.
Accordion
View Demo
After opening the homepage with Visual Composer, click on “pencil” button at center of this part to configure its backend settings.
- Accordion Settings: Please click Here for more detail.
- Section Settings: Please click Here for more detail.
- Text Block Settings: Please click Here for more detail.
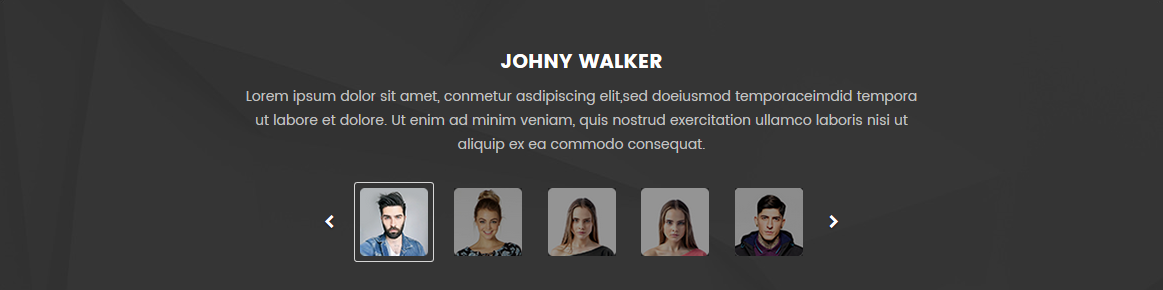
SW Testimonial Slider
View Demo
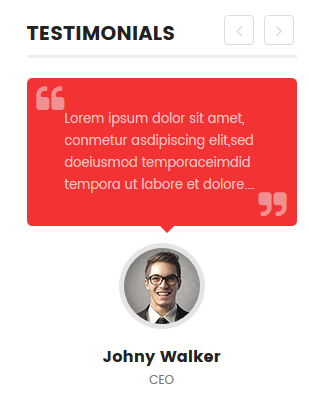
After opening the homepage with Visual Composer, click on “pencil” button at center of this part to configure its backend settings.
- General Settings: Please click Here for more detail.
WP Tag Cloud
View Demo
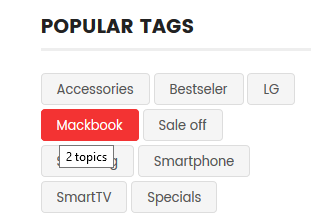
After opening the homepage with Visual Composer, click on “pencil” button at center of this part to configure its backend settings.
- General Settings: Please click Here for more detail. Please add Extra class name
tag-style-home3into this block to have the same style as in the demo.
SW WooCommerce Tab Category Slider
View Demo
After opening the homepage with Visual Composer, click on “pencil” button at center of this part to configure its backend settings.
- General Settings: Please click Here for more detail.
Single Image
View Demo

After opening the homepage with Visual Composer, click on “pencil” button at center of this part to configure its backend settings.
- General Settings: Please click Here for more detail.
SW WooCommerce Slider
View Demo
After opening the homepage with Visual Composer, click on “pencil” button at center of this part to configure its backend settings.
- General Settings: Please click Here for more detail.
SW Brand
View Demo
After opening the homepage with Visual Composer, click on “pencil” button at center of this part to configure its backend settings.
- General Settings: Please click Here for more detail.
YA Responsive Post Slider
View Demo
After opening the homepage with Visual Composer, click on “pencil” button at center of this part to configure its backend settings.
- General Settings: Please click Here for more detail.
Text Block
View Demo

After opening the homepage with Visual Composer, click on “pencil” button at center of this part to configure its backend settings.
- Text Block 1 Settings: Please click Here for more detail.
- Text Block 2 Settings: Please click Here for more detail.
- Row Settings: Please click Here for more detail. Please add Extra class name
newsletter-home3into this block to have the same style as in the demo.
Footer Bottom Home 3
View Demo

In your Administrator Page, please go to Appearance > Widgets and choose this one to configure as you want.
- General Settings: Please click Here for more detail.
You can copy & Paste the code into your editor:
|
1 2 3 4 5 6 7 8 9 10 11 12 13 14 15 16 17 |
<div class="block-text-index3"><br /> <div class="item-block free-shipping"><br /> <div class="item-icon"></div><br /> <h4>Free Shipping</h4><br /> <p>Free shipping on all UK oders</p><br /> </div><br /> <div class="item-block money-guarantee"><br /> <div class="item-icon"></div><br /> <h4>Money Guaranteeg</h4><br /> <p>Free shipping on all UK oders</p><br /> </div><br /> <div class="item-block online-support"><br /> <div class="item-icon"></div><br /> <h4>Online Support</h4><br /> <p>We support online 24/24 on day</p><br /> </div><br /> </div> |
Footer Contact, Footer Menu & Footer Copyright
View Demo:
The configuration is the same to the one in Home Page 1. Please click Here to see more details.
8.4 SW Clickboom Style 4
Note:
In the Admin Panel, please navigate to Page >> All Page >> Home 4 to custom this home page’s settings.
- Backend Setting: Please click Here for more detail about the setting of this page.
- This home page uses Header and Footer Style 4. To configure Header and Footer Style, please go to Appearance > Theme Options and set it in tab Header & Footer.
Socials Top, Login Top & Top
View Demo

The configuration is the same to the one in Home Page 1. Please click Here to see more details.
Revolution Slider
View Demo
After opening the homepage with Visual Composer, click on “pencil” button at center of this part to configure its backend settings.
The pop-up window will display the Backend Setting , then you can configure the item as you want.
- General Settings: Please click Here for more detail.
- Column Settings: Please click Here for more detail.
- About Revolution Slider Configuration, you can refer to the one in Slider Home 1 for more detail.
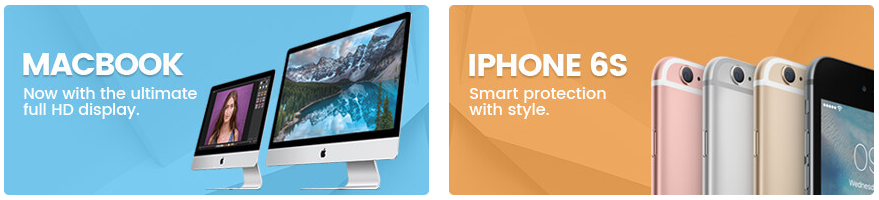
Raw HTML
View Demo

After opening the homepage with Visual Composer, click on “pencil” button at center of this part to configure its backend settings.
- General Settings: Please click Here for more detail.
You can copy & Paste the code into your editor:
|
1 2 3 4 5 6 7 8 9 10 11 12 13 14 15 16 17 18 19 20 21 22 23 24 25 26 27 28 29 30 31 32 33 34 35 |
<div class="banner-block-index4"><br /> <div class="item-banner item1"><br /> <div class="item-wrap"><br /> <div class="item-text"><br /> <div class="title">Macbook</div><br /> <div class="des">Now with the ultimate<br><br /> full HD display.</div><br /> </div><br /> <p><a title="Go Shop" href="#" target="_blank">Shop Now</a></p><br /> <div class="item-image"><img src="wp-content/uploads/2016/07/image1-banner.jpg" alt="Image1" width="380" height="190"></div><br /> </div><br /> </div><br /> <div class="item-banner item2"><br /> <div class="item-wrap"><br /> <div class="item-text"><br /> <div class="title">IPHONE <span class="lowcase">6Plus</span></div><br /> <div class="des">Smart protection<br><br /> with style.</div><br /> </div><br /> <p><a title="Go Shop" href="#" target="_blank">Shop Now</a></p><br /> <div class="item-image"><img src="wp-content/uploads/2016/07/image2-banner.jpg" alt="Image1" width="380" height="190"></div><br /> </div><br /> </div><br /> <div class="item-banner item3"><br /> <div class="item-wrap"><br /> <div class="item-text"><br /> <div class="title">Electronics</div><br /> <div class="des">Now with the ultimate<br><br /> full HD display.</div><br /> </div><br /> <p><a title="Go Shop" href="#" target="_blank">Shop Now</a></p><br /> <div class="item-image"><img src="wp-content/uploads/2016/07/image3-banner.jpg" alt="Image1" width="380" height="190"></div><br /> </div><br /> </div><br /> </div> |
SW WooCommerce Tab Category Slider
View Demo
After opening the homepage with Visual Composer, click on “pencil” button at center of this part to configure its backend settings.
- General Settings: Please click Here for more detail.
SW WooCommerce Countdown Slider
View Demo
After opening the homepage with Visual Composer, click on “pencil” button at center of this part to configure its backend settings.
- General Settings: Please click Here for more detail.
SW WooCommerce Slider
View Demo
After opening the homepage with Visual Composer, click on “pencil” button at center of this part to configure its backend settings.
- General Settings: Please click Here for more detail.
SW Testimonial Slider
View Demo
After opening the homepage with Visual Composer, click on “pencil” button at center of this part to configure its backend settings.
- General Settings: Please click Here for more detail.
- Row Settings: Please click Here for more detail.
- Column Settings: Please click Here for more detail.
YA Responsive Post Slider
View Demo
After opening the homepage with Visual Composer, click on “pencil” button at center of this part to configure its backend settings.
- General Settings: Please click Here for more detail. Please add Extra class name
tag-style-home4into this block to have the same style as in the demo.
SW WooCommerce Categories Slider
View Demo
After opening the homepage with Visual Composer, click on “pencil” button at center of this part to configure its backend settings.
- General Settings: Please click Here for more detail.
Above Footer
View Demo

After opening the homepage with Visual Composer, click on “pencil” button at center of this part to configure its backend settings.
- General Settings: Please click Here for more detail.
Footer Contact Home 4
View Demo
In your Administrator Page, please go to Appearance > Widgets and choose this one to configure as you want.
- General Settings: Please click Here for more detail.
You can copy & Paste the code into your editor:
|
1 2 3 4 5 6 7 8 9 10 11 12 13 14 |
<div class="contact-footer"><br /> Register now to get updates on promotions and coupons.<br /> <div class="subscribe"><br /> [mc4wp_form id="147"]<br /> </div><br /> <h3>Stay Connected</h3><br /> <ul class="socials-footer"><br /> <li><a href="https://www.facebook.com/flytheme" title="Facebook"><span class="fa fa-facebook "></span></a></li><br /> <li><a href="https://twitter.com/Flytheme" title="twitter"><span class="fa fa-twitter"></span></a></li><br /> <li><a href="#" title="Skype"><span class="fa fa-skype"></span></a></li><br /> <li><a href="https://plus.google.com/u/0/b/102399087761949580069/102399087761949580069/posts" title="GooglePlus"><span class="fa fa-google-plus"></span></a></li><br /> <li><a href="https://www.pinterest.com/flytheme/" title="pinterest"><span class="fa fa-pinterest"></span></a></li><br /> </ul><br /> </div> |
Footer Bottom Home 4
View Demo

In your Administrator Page, please go to Appearance > Widgets and choose this one to configure as you want.
- General Settings: Please click Here for more detail.
Footer Menu & Footer Copyright
View Demo:
The configuration is the same to the one in Home Page 1. Please click Here to see more details.
8.5 SW Clickboom Style 5
Note:
In the Admin Panel, please navigate to Page >> All Page >> Home 5 to custom this home page’s settings.
- Backend Setting: Please click Here for more detail about the setting of this page.
- This home page uses Header and Footer Style 5. To configure Header and Footer Style, please go to Appearance > Theme Options and set it in tab Header & Footer.
Login Top
View Demo
The configuration is the same to the one in Home Page 1. Please click Here to see more details.
Revolution Slider
View Demo
After opening the homepage with Visual Composer, click on “pencil” button at center of this part to configure its backend settings.
The pop-up window will display the Backend Setting , then you can configure the item as you want.
- General Settings: Please click Here for more detail.
- About Revolution Slider Configuration, you can refer to the one in Slider Home 1 for more detail.
Raw HTML
View Demo

After opening the homepage with Visual Composer, click on “pencil” button at center of this part to configure its backend settings.
- General Settings: Please click Here for more detail.
You can copy & Paste the code into your editor:
|
1 2 3 4 5 6 7 8 9 10 11 12 13 14 15 16 17 18 19 20 21 22 23 24 |
<div class="block-text-home5"><br /> <div class="row"><br /> <div class="item col-first free-shipping col-lg-6 col-md-6 col-sm-12"><br /> <div class="item-detail"><br /> <div class="item-icon"><br /> </div><br /> <div class="item-content"><br /> <h4>Free Shipping</h4><br /> <p>Lorem ipsum dolor siz awet, consectetur adipiscimi emitz<br> sex eiusimog tempoz incididu labore.</p><br /> </div><br /> </div><br /> </div><br /> <div class="item col-last free-return col-lg-6 col-md-6 col-sm-12"><br /> <div class="item-detail"><br /> <div class="item-icon"><br /> </div><br /> <div class="item-content"><br /> <h4>Free Return</h4><br /> <p>Lorem ipsum dolor siz awet, consectetur adipiscimi emitz<br> sex eiusimog tempoz incididu labore.</p><br /> </div><br /> </div><br /> </div><br /> </div><br /> </div> |
SW WooCommerce Responsive Listing
View Demo
After opening the homepage with Visual Composer, click on “pencil” button at center of this part to configure its backend settings.
- General Settings: Please click Here for more detail.
SW Brand
View Demo

After opening the homepage with Visual Composer, click on “pencil” button at center of this part to configure its backend settings.
- General Settings: Please click Here for more detail.
- Row Settings: Please click Here for more detail. Please add Extra class name
brand-home5into this block to have the same style as in the demo.
Single Image
View Demo

After opening the homepage with Visual Composer, click on “pencil” button at center of this part to configure its backend settings.
- General Settings: Please click Here for more detail.
Text Block
View Demo

After opening the homepage with Visual Composer, click on “pencil” button at center of this part to configure its backend settings.
- General Settings: Please click Here for more detail.
Raw HTML
View Demo
After opening the homepage with Visual Composer, click on “pencil” button at center of this part to configure its backend settings.
- General Settings: Please click Here for more detail. Please add Extra class name
brand-home5into this block to have the same style as in the demo.
You can copy & Paste the code into your editor:
|
1 2 3 4 5 6 7 8 9 |
<div class="contact-footer-home5"><br /> <ul class="socials-footer"><br /> <li><a href="https://www.facebook.com/flytheme" title="Facebook"><span class="fa fa-facebook "></span></a></li><br /> <li><a href="https://twitter.com/Flytheme" title="twitter"><span class="fa fa-twitter"></span></a></li><br /> <li><a href="#" title="Skype"><span class="fa fa-skype"></span></a></li><br /> <li><a href="https://plus.google.com/u/0/b/102399087761949580069/102399087761949580069/posts" title="GooglePlus"><span class="fa fa-google-plus"></span></a></li><br /> <li><a href="https://www.pinterest.com/flytheme/" title="pinterest"><span class="fa fa-pinterest"></span></a></li><br /> </ul><br /> </div> |
Footer Menu Home 5
View Demo

In your Administrator Page, please go to Appearance > Widgets and choose this one to configure as you want.
- General Settings: Please click Here for more detail.
10.6 SW Clickboom Style 6
Note:
In the Admin Panel, please navigate to Page >> All Page >> Home 6 to custom this home page’s settings.
- Backend Setting: Please click Here for more detail about the setting of this page.
- This home page uses Header and Footer Style 6. To configure Header and Footer Style, please go to Appearance > Theme Options and set it in tab Header & Footer.
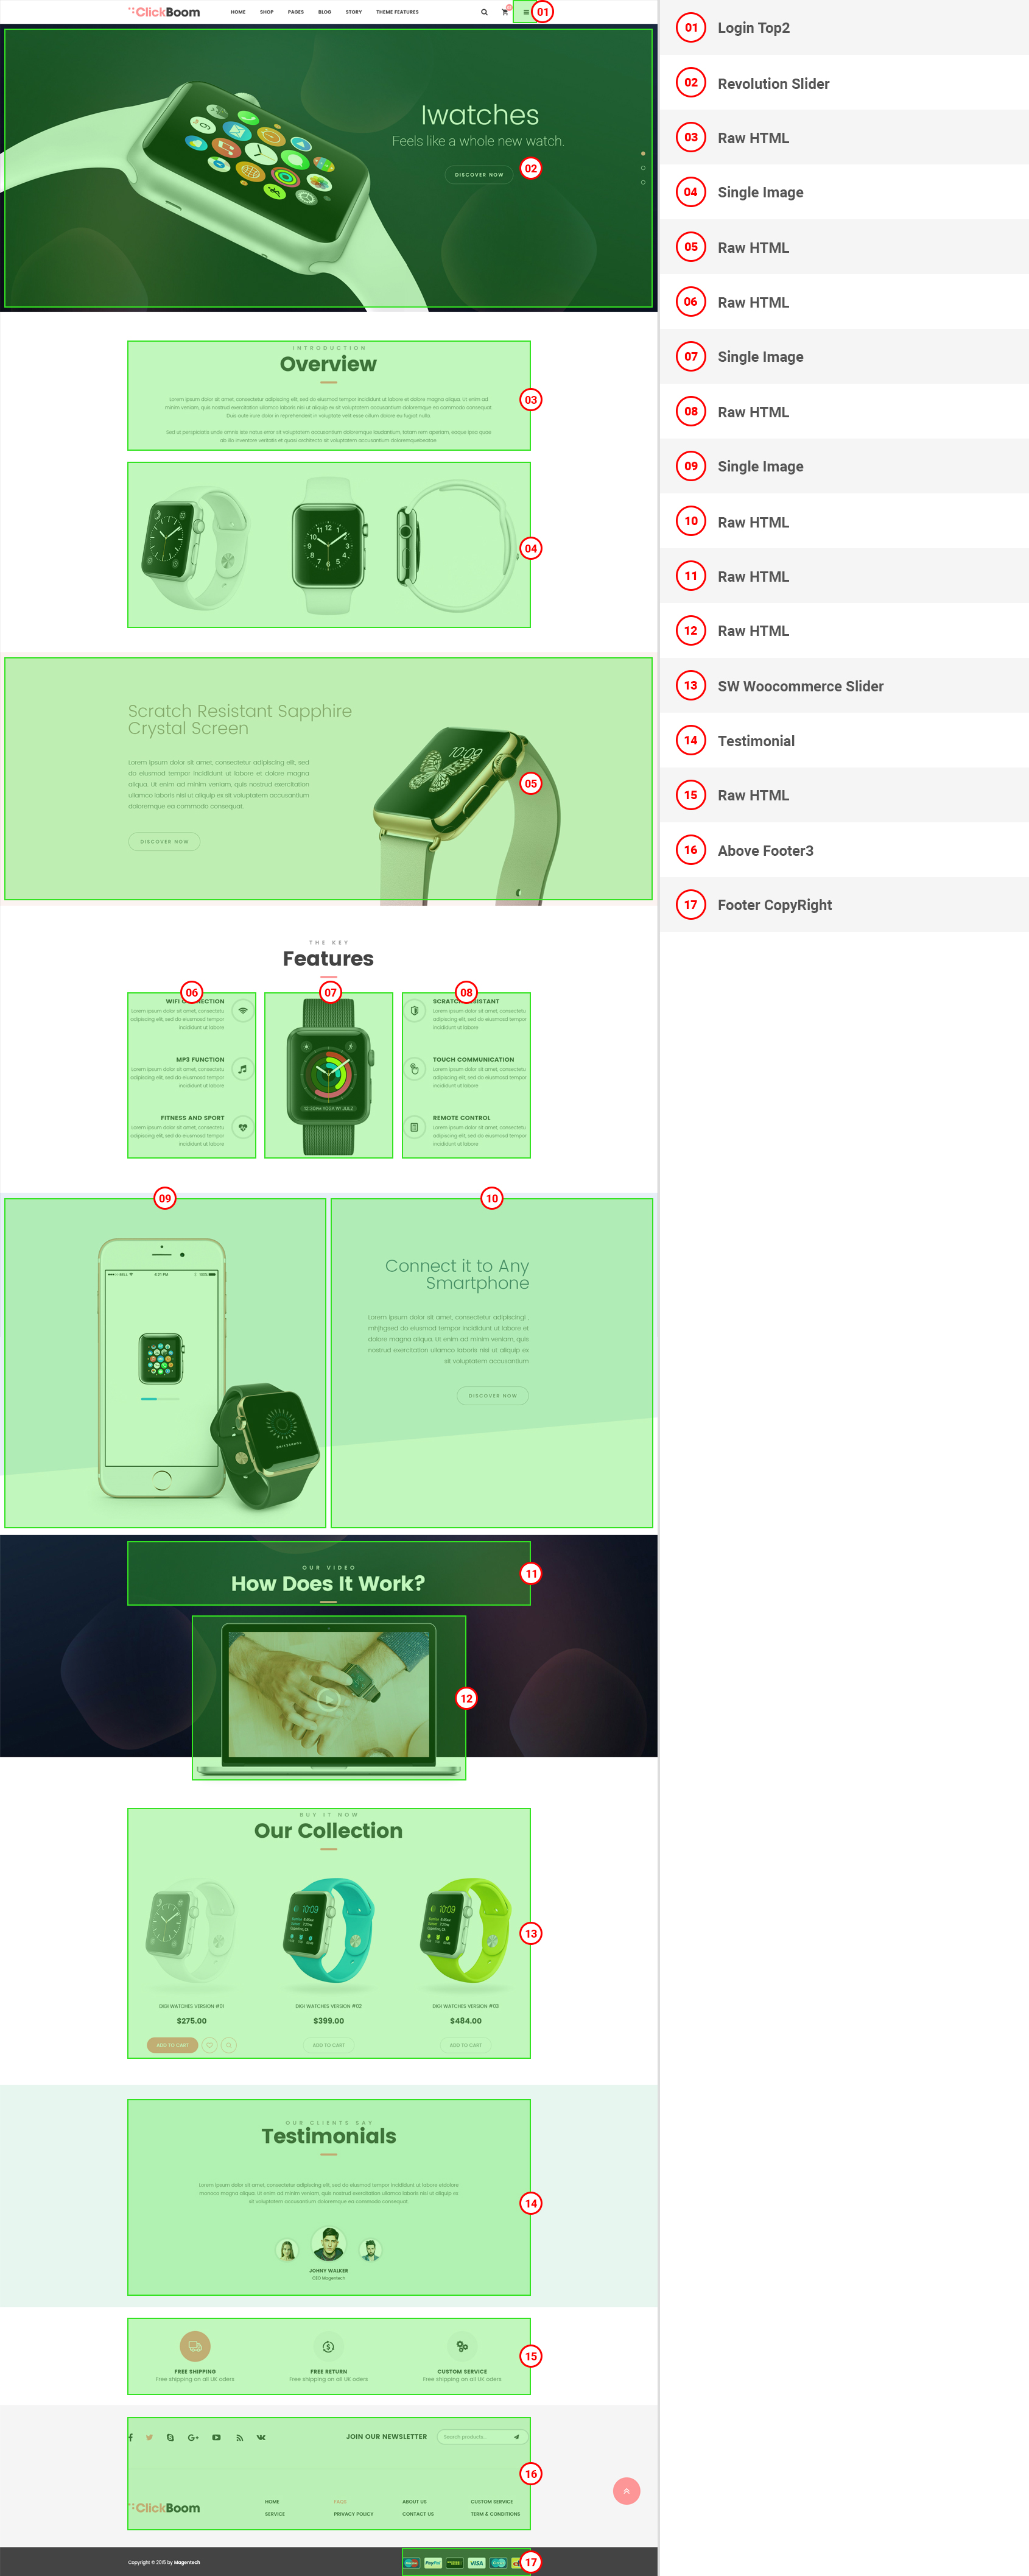
Login Top2
View Demo:
In your Administrator Page, please go to Appearance > Widgets and choose this one to configure as you want.
- General Settings: Please click Here for more detail.
Copy & Paste the code into your editor:
|
1 2 3 4 5 6 7 8 9 10 11 12 13 14 15 16 17 18 19 |
<div id="lang_sel"><br /> <ul class="nav"><br /> <li class="icl-en"><br /> <a href="[get_url]&direction=ltr"><br /> <img class="iclflag" title="English" alt="en" src="[bloginfo]/wp-content/themes/clickboom/assets/img/en.png" width="25" height="15"><br /> </a><br /> </li><br /> <li class="icl-ge"><br /> <a href="[get_url]&direction=rtl"><br /> <img class="iclflag" title="Ge" alt="ar" src="[bloginfo]/wp-content/themes/clickboom/assets/img/ge.png" width="25" height="15"><br /> </a><br /> </li><br /> <li class="icl-fr"><br /> <a href="[get_url]&direction=rtl"><br /> <img class="iclflag" title="Italy" alt="ar" src="[bloginfo]/wp-content/themes/clickboom/assets/img/fr.png" width="25" height="15"><br /> </a><br /> </li><br /> </ul><br /> </div> |
Revolution Slider
View Demo:
After opening the homepage with Visual Composer, click on “pencil” button  at center of this part to configure its backend settings.
- General Settings: Please click Here for more detail.
- About Revolution Slider Configuration, you can refer to the one in Slider Home 1 for more detail.
Raw HTML
View Demo:
After opening the homepage with Visual Composer, click on “pencil” button at center of this part to configure its backend settings.
The pop-up window will display the Backend Setting , then you can configure the item as you want.
- General Settings: Please click Here for more detail.
Copy & Paste the code into your editor:
|
1 2 3 4 5 6 7 8 9 |
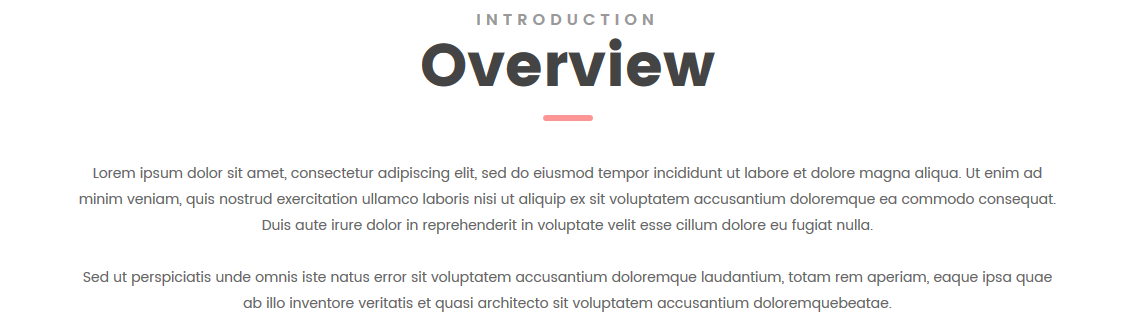
<div class="block-text-index61"><br /> <div class="intro">introduction</div><br /> <div class="title">Overview</div><br /> <div class="item-text">Lorem ipsum dolor sit amet, consectetur adipiscing elit, sed do eiusmod tempor incididunt ut labore et dolore magna aliqua. Ut enim ad <br /> minim veniam, quis nostrud exercitation ullamco laboris nisi ut aliquip ex sit voluptatem accusantium doloremque ea commodo consequat.<br /> Duis aute irure dolor in reprehenderit in voluptate velit esse cillum dolore eu fugiat nulla.<br/><br/> <br /> Sed ut perspiciatis unde omnis iste natus error sit voluptatem accusantium doloremque laudantium, totam rem aperiam, eaque ipsa quae<br /> ab illo inventore veritatis et quasi architecto sit voluptatem accusantium doloremquebeatae.</div><br /> </div> |
Single Image
View Demo:
After opening the homepage with Visual Composer, click on “pencil” button at center of this part to configure its backend settings
The pop-up window will display the backend settings, so you can configure the item as you want:
- General Settings: Please click Here for more detail.
Raw HTML
View Demo:
After opening the homepage with Visual Composer, click on “pencil” button at center of this part to configure its Backend Settings.
The pop-up window will display the Settings, then you can configure the item as you want:
- General Settings: Please click Here for more detail.
Copy & Paste the code into your editor:
|
1 2 3 4 5 6 7 |
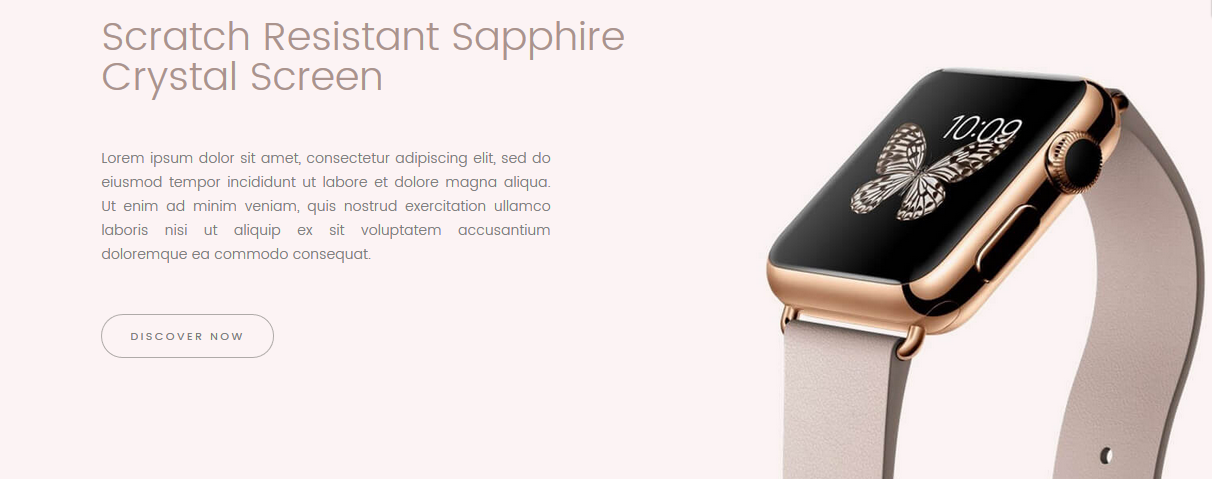
<div class="block-text-index62"><br /> <h2>Scratch Resistant Sapphire<br/>Crystal Screen</h2><br /> <div class="des"><br /> Lorem ipsum dolor sit amet, consectetur adipiscing elit, sed do eiusmod tempor incididunt ut labore et dolore magna aliqua. Ut enim ad minim veniam, quis nostrud exercitation ullamco laboris nisi ut aliquip ex sit voluptatem accusantium doloremque ea commodo consequat.<br /> </div><br /> <a href="#" title="Discover now">Discover now</a><br /> </div> |
Raw HTML
View Demo:

After opening the homepage with Visual Composer, click on “pencil” button at center of this part to configure its backend settings.
The pop-up window will display the backend settings, so you can configure the item as you want:
- General Settings: Please click Here for more detail.
Copy & Paste the code into your editor:
|
1 2 3 4 |
<div class="block-text-index61 style1"><br /> <div class="intro">the key</div><br /> <div class="title">Features</div><br /> </div> |
Raw HTML
View Demo:
After opening the homepage with Visual Composer, click on “pencil” button at center of this part to configure its backend settings.
The pop-up window will display the backend settings, so you can configure the item as you want:
- General Settings: Please click Here for more detail.
Copy & Paste the code into your editor:
|
1 2 3 4 5 6 7 8 9 10 11 12 13 14 15 16 17 18 19 20 21 22 23 24 25 |
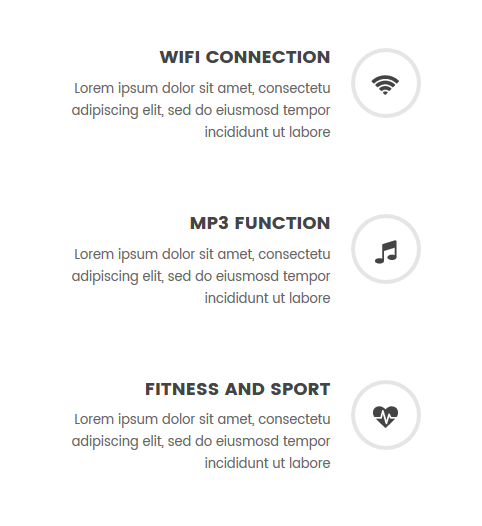
<div class="block-text-index63 style1"><br /> <div class="item-wrap"><br /> <div class="item"><br /> <div class="item-icon"><i class="fa fa-wifi"></i></div><br /> <div class="item-content"><br /> <h3>wifi connection</h3><br /> Lorem ipsum dolor sit amet, consectetu adipiscing elit, sed do eiusmosd tempor incididunt ut labore<br /> </div><br /> </div><br /> <div class="item"><br /> <div class="item-icon"><i class="fa fa-music"></i></div><br /> <div class="item-content"><br /> <h3>MP3 function</h3><br /> Lorem ipsum dolor sit amet, consectetu adipiscing elit, sed do eiusmosd tempor incididunt ut labore<br /> </div><br /> </div><br /> <div class="item"><br /> <div class="item-icon"><i class="fa fa-heartbeat"></i></div><br /> <div class="item-content"><br /> <h3>Fitness and Sport</h3><br /> Lorem ipsum dolor sit amet, consectetu adipiscing elit, sed do eiusmosd tempor incididunt ut labore<br /> </div><br /> </div><br /> </div><br /> </div> |
Single Image
View Demo:
After opening the homepage with Visual Composer, click on “pencil” button at center of this part to configure its backend settings.
The pop-up window will display the backend settings, so you can configure the item as you want:
- General Settings: Please click Here for more detail.
Raw HTML
View Demo:
After opening the homepage with Visual Composer, click on “pencil” button at center of this part to configure its backend settings.
The pop-up window will display the backend settings, so you can configure the item as you want:
- General Settings: Please click Here for more detail.
Copy & Paste the code into your editor:
|
1 2 3 4 5 6 7 8 9 10 11 12 13 14 15 16 17 18 19 20 21 22 23 24 25 |
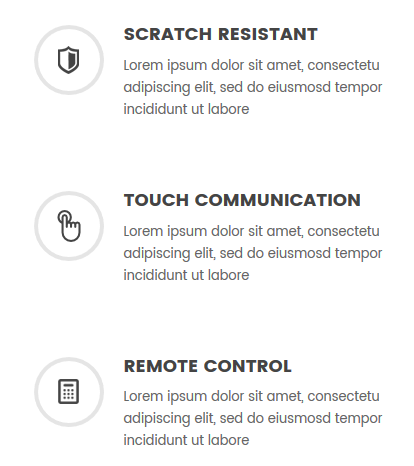
<div class="block-text-index63 style2"><br /> <div class="item-wrap"><br /> <div class="item"><br /> <div class="item-icon icon1"></div><br /> <div class="item-content"><br /> <h3>Scratch Resistant</h3><br /> Lorem ipsum dolor sit amet, consectetu adipiscing elit, sed do eiusmosd tempor incididunt ut labore<br /> </div><br /> </div><br /> <div class="item"><br /> <div class="item-icon icon2"></div><br /> <div class="item-content"><br /> <h3>Touch Communication</h3><br /> Lorem ipsum dolor sit amet, consectetu adipiscing elit, sed do eiusmosd tempor incididunt ut labore<br /> </div><br /> </div><br /> <div class="item"><br /> <div class="item-icon icon3"></div><br /> <div class="item-content"><br /> <h3>Remote Control</h3><br /> Lorem ipsum dolor sit amet, consectetu adipiscing elit, sed do eiusmosd tempor incididunt ut labore<br /> </div><br /> </div><br /> </div><br /> </div> |
Single Image
View Demo:
After opening the homepage with Visual Composer, click on “pencil” button at center of this part to configure its backend settings.
The pop-up window will display the backend settings, so you can configure the item as you want:
- General Settings: Please click Here for more detail.
- Row Settings: Please click Here for more detail. Please add Extra class name
block-phone-home6into this block to have the same style as in the demo.
Raw HTML
View Demo:
After opening the homepage with Visual Composer, click on “pencil” button at center of this part to configure its backend settings.
The pop-up window will display the backend settings, so you can configure the item as you want:
- General Settings: Please click Here for more detail.
- Row Settings: Please click Here for more detail. Please add Extra class name
block-phone-home6into this block to have the same style as in the demo.
Raw HTML
View Demo:

After opening the homepage with Visual Composer, click on “pencil” button at center of this part to configure its backend settings.
The pop-up window will display the backend settings, so you can configure the item as you want:
- General Settings: Please click Here for more detail.
- Row Settings: Please click Here for more detail.
Copy & Paste the code into your editor:
|
1 2 3 4 |
<div class="block-text-index61 style2"><br /> <div class="intro">our video</div><br /> <div class="title">How Does It Work?</div><br /> </div> |
Raw HTML
View Demo:
After opening the homepage with Visual Composer, click on “pencil” button at center of this part to configure its backend settings.
The pop-up window will display the backend settings, so you can configure the item as you want:
- General Settings: Please click Here for more detail. Please add Extra class name
bg-vimeointo this block to have the same style as in the demo. - Row Settings: Please click Here for more detail. Please add Extra class name
bg-vimeo-home6into this block to have the same style as in the demo.
Copy & Paste the code into your editor:
|
1 2 3 |
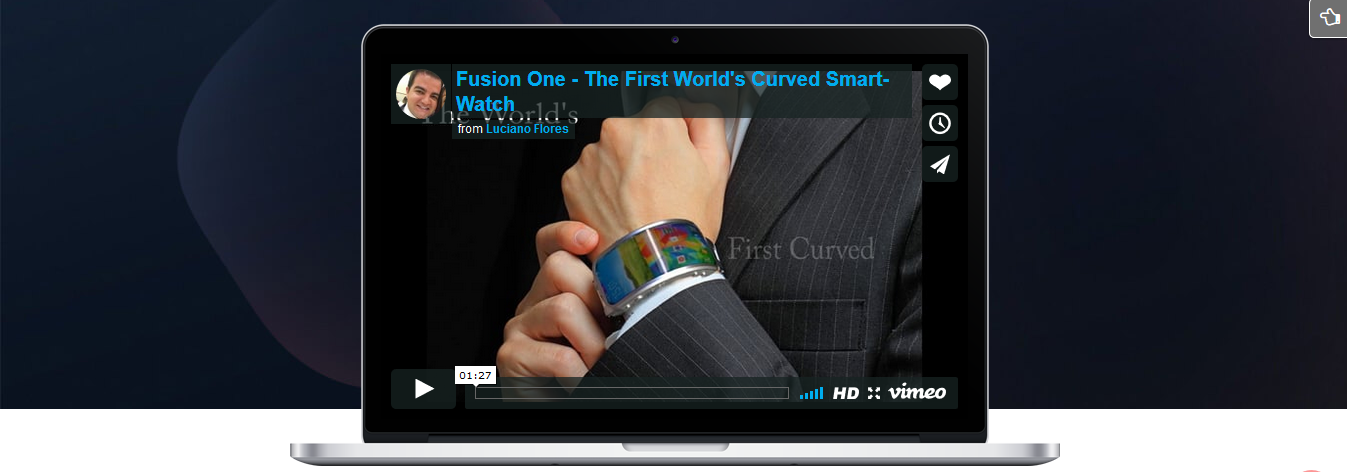
<div class="bg-iframe"><br /> <iframe src="https://player.vimeo.com/video/110044919" width="587" height="365" allowfullscreen></iframe><br /> </div> |
Text Block
View Demo:

After opening the homepage with Visual Composer, click on “pencil” button at center of this part to configure its backend settings.
The pop-up window will display the backend settings, so you can configure the item as you want:
- General Settings: Please click Here for more detail.
Copy & Paste the code into your editor:
|
1 2 3 4 |
<div class="block-text-index61 style1"><br /> <div class="intro">buy it now</div><br /> <div class="title">Our Collection</div><br /> </div> |
SW WooCommerce Slider
View Demo:
After opening the homepage with Visual Composer, click on “pencil” button at center of this part to configure its backend settings.
The pop-up window will display the backend settings, so you can configure the item as you want:
- General Settings: Please click Here for more detail.
Text Block
View Demo:

After opening the homepage with Visual Composer, click on “pencil” button at center of this part to configure its backend settings.
The pop-up window will display the backend settings, so you can configure the item as you want:
- General Settings: Please click Here for more detail.
Copy & Paste the code into your editor:
|
1 2 3 4 |
<div class="block-text-index61 style1"><br /> <div class="intro">Our Clients say</div><br /> <div class="title">Testimonials</div><br /> </div> |
Raw HTML
View Demo:
After opening the homepage with Visual Composer, click on “pencil” button at center of this part to configure its backend settings.
The pop-up window will display the backend settings, so you can configure the item as you want:
- General Settings: Please click Here for more detail.
Copy & Paste the code into your editor:
|
1 2 3 4 5 6 7 8 9 10 11 12 13 14 15 16 17 18 19 20 21 22 23 24 25 |
<div class="block-text-index6"><br /> <div class="row"><br /> <div class="item-block free-shipping col-lg-4 col-md-4 col-sm-12"><br /> <div class="item-content"><br /> <div class="item-icon"></div><br /> <h4>Free Shipping</h4><br /> <p>Free shipping on all UK oders</p><br /> </div><br /> </div><br /> <div class="item-block money-guarantee col-lg-4 col-md-4 col-sm-12"><br /> <div class="item-content"><br /> <div class="item-icon"></div><br /> <h4>Money Guarantee</h4><br /> <p>30 days Money back</p><br /> </div><br /> </div><br /> <div class="item-block online-support col-lg-4 col-md-4 col-sm-12"><br /> <div class="item-content"><br /> <div class="item-icon"></div><br /> <h4>Online Support</h4><br /> <p>We support online 24/24</p><br /> </div><br /> </div><br /> </div><br /> </div> |
9SUPPORT
- SUPPORT – If you have any questions that are beyond the scope of this help file, please feel free to send us via: Support Tickets System
- FAQs – Go to Here for more detail more the Frequently Asked Questions.