

Part I: Start the Plugin
Step 1: Login your Admin Panel
Step 2: In the left column, scroll down on Plugin and search WC Vendor
Step 3: Choose the right plugin and Click Install Now, the Activate the Plugin
Part II: Create some Vendor’s Pages by Shortcode
In this part, just come to this page: https://docs.wcvendors.com/docs/wc-vendors/pages-and-shortcodes/ to select some shortcode for pages you want to create
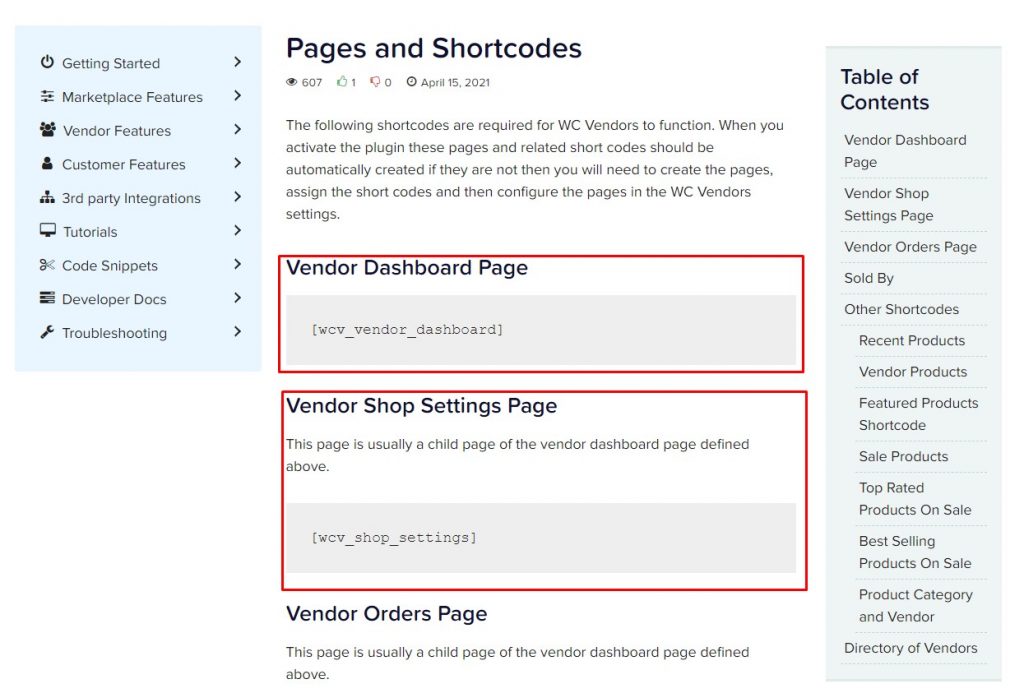 Step 4: back to Pages >> Add New section, then add relevant Title and Shortcode for the page you want >> Then Publish
Part III: Do some Configurations
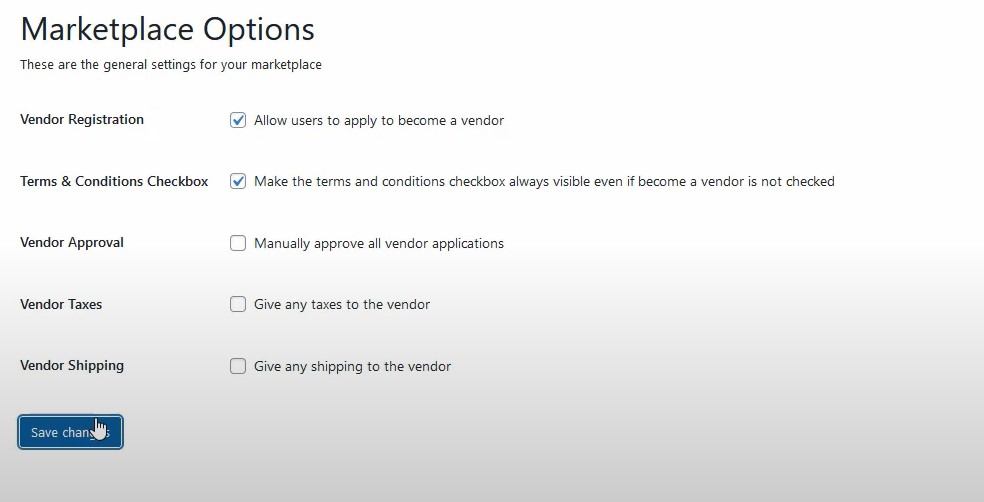
Step 5: Back to WC Vendors >> Settings
In general field, please setup as following, then Save the Changes
In Display field, choose as following:
Dashboard >> WC Vendor Dashboard
Shop Settings >> Vendor Shop Settings
Orders >> Vendor Orders
Vendors >> vendor Store List
Then Save the Changes
Part IV: Create Vendor Account and Add Products
Step 6: Come back to your Homepage and create your vendor account, you will see Vendor’s Dashboard
Step 7: Add New product : In this step, please create product as usual.
Part V: Add SW Vendor Slider Widget to Your Homepage
Step 8: Back to your Homepage and choose Edit with Elementor
Step 9: Scroll down WordPress Section of Elementor, find out SW Vendor Slider Plugin and drag to the place your want to put
Step 10: Configure to show out Silder by filling Title, select Users, Number of Row per Column, Number of Column >> then Update
After all the step above, back to homepage to see your juice!
To see the guide visually, please watch this video:


Leave Your Comment