 Firstly, a huge thanks for purchasing our themes and plugins. If you still had any problem with our themes or plugins, please feel free to contact us via our Support Ticket System then we will support you until you feel happy with our product!
Normally, with a variable product in WooCommerce:
- All variations of Variable product will be shown on Select option.
- User can only add a variable product on the product page.
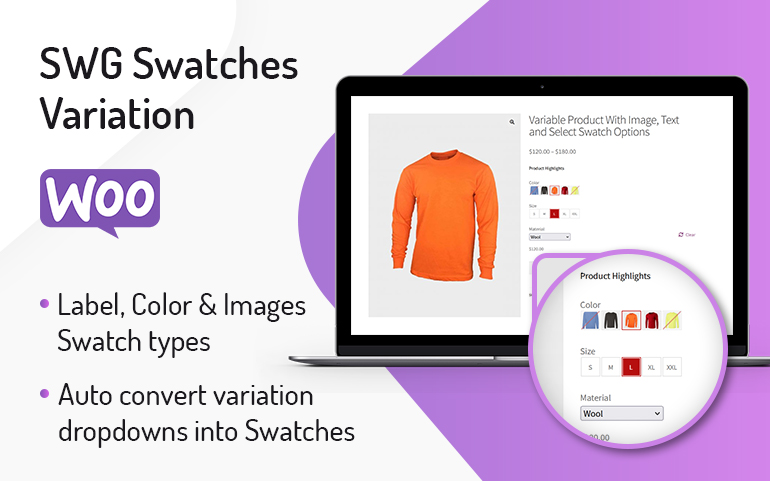
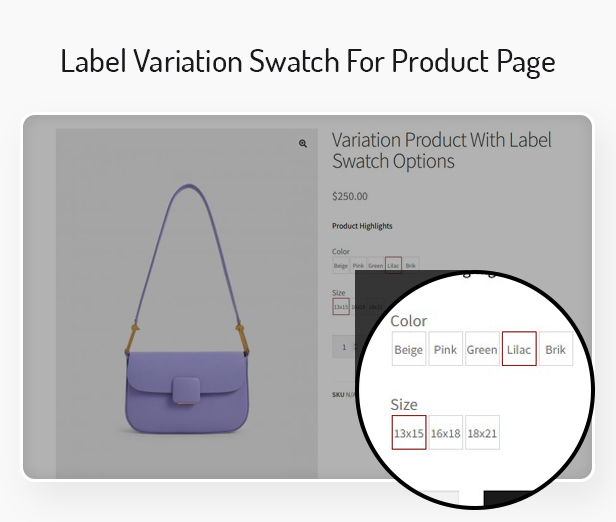
However, our SWG Swatches Variation plugin gives you an alternative to the default WooCommerce dropdown fields so that the variations on your products can be their actual colors, images, and labels. Besides, It will also allow user to be able to purchase variable products directly from the homepage or product listing page without going to a single product page. So, how to install and configure this plugin on your site, let’s start together now.
I. INSTALL AND ACTIVE SWG SWATCHES VARIATION PLUGIN
To install this theme, please follow the below steps:
- Download the plugin from our site. You can purchase it here
- Login to your site’s admin panel and navigate to Plugins -> Add New -> Upload.
- Click choose plugin’s file package, select the plugin file and click install
- Click activate button to active SWG Swatches Variation plugin on your site
Note: This plugin will be included in our WordPress’s theme. So, If you are using our WordPress themes, you can skip this step.
II: ENABLE/DISABLE SWATCHES IMAGES FEATURES

- Go to WooCommerce > Settings > Choose tab SWG Wooswatches to open the SWG Swatches Variation Settings
- Check for the Enable Swatches Variation parameter to enable the swatch feature on your site.
 Check for the Enable Swatches Variation Listing parameter to enable swatches variation on the product listing page.
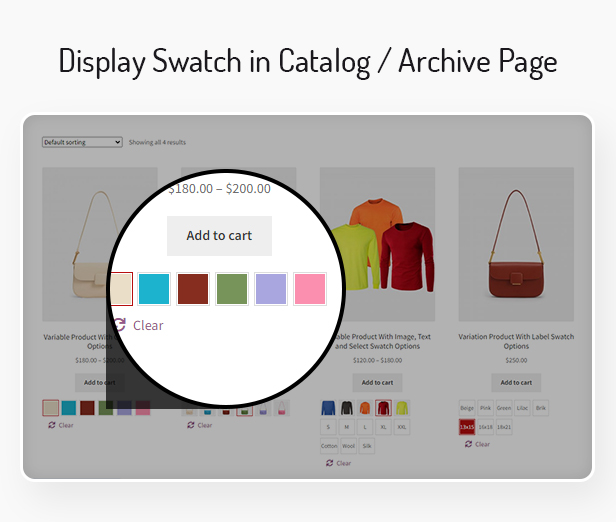 Enable and disable tooltip from Enable Tooltip settings.
- Choose image size of Tooltip in the Image Tool Tip parameter
- Set the size for product variable in the Product Variable width parameter and Product Variable height parameter.
- Add color code for activation status in the Active Color parameter.
- Click on the save changes button
III: CREATE PRODUCT ATTRIBUTES
Two different product attribute types are available in WooCommerce, local and global product attributes. In WooCommerce, both options are called attributes, but there is a difference in the functionality of these attributes.
3.1 GLOBAL ATTRIBUTE
These are the properties that you will find in the WP-Admin under Product > Attributes. All attributes created here are at on a global website level and can be used with all products. Here you can quickly and easily add attributes and their terms.
To create a Global Attribute, please follow the below steps:
Step 1: Create Global Attribute
- Login to your site’s admin panel and navigate to Product -> Attributes -> Add new attribute
- Add a Name.
- Add a Slug; (optional); this is the URL-friendly version of the name.
- Enable Archives if desired. If enabled, you can view a page with all products having this attribute. For example, if you have this enabled, and “black” is one of the options under “color”, you can add http://yourstore.com/pa_color/black/ to your menu to only display black clothing – pa stands for “product attribute.”
- Set type of attribute: select or checkbox
- Select a Default sort order. Choose between “Name”, “Name (numeric)”, “Term ID” or “Custom ordering” where you decide by dragging and dropping the terms in the list when configuring the terms (see below). “Name (numeric)” is relevant if the values are numbers. If you select “Name”, it sorts alphabetically with 1 and 10 preceding 2. If you select “Name (numeric)” it sorts based on numerical value.
- Click to Add Attribute.
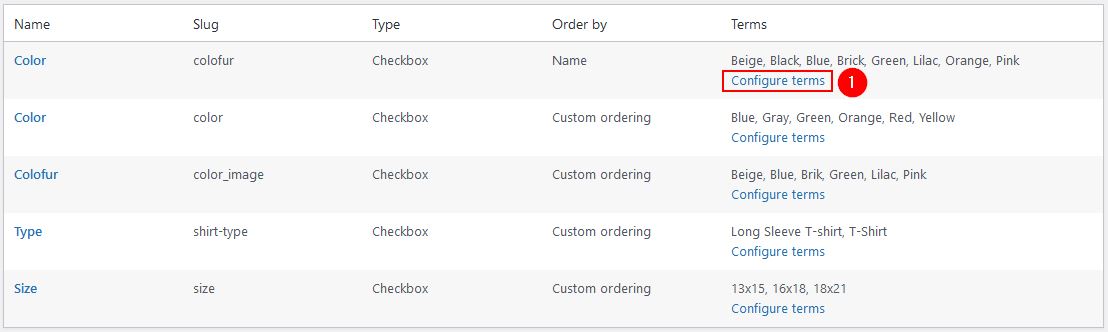
Step 2: Create Attribute’s Term
- Click on the “Configure terms” text to add attribute values.
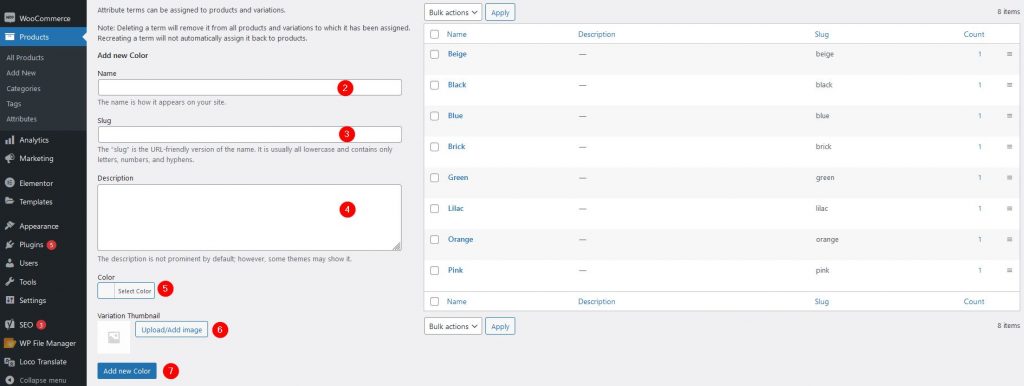
- Add Name
- Add a Slug
- Add Description. This field isn’t required. So, you can empty if you want
- If you want to show this term in color, please click on the Select Color button and set color
- If you want to show this term in image, please click on the Upload/Add an image to update an image for this term
3.2 LOCAL ATTRIBUTE:
These attributes are created when you create or edit a product. You can’t use these attributes to filter and they are only visible on the product page itself. Alternatively, add an attribute you only want to use for one product. This would only be ideal if you have a product with unique variations.
To create a Local Attribute, please follow the below steps:
- Login to your site’s admin panel and navigate to Product -> Add Product(or edit an existing one).
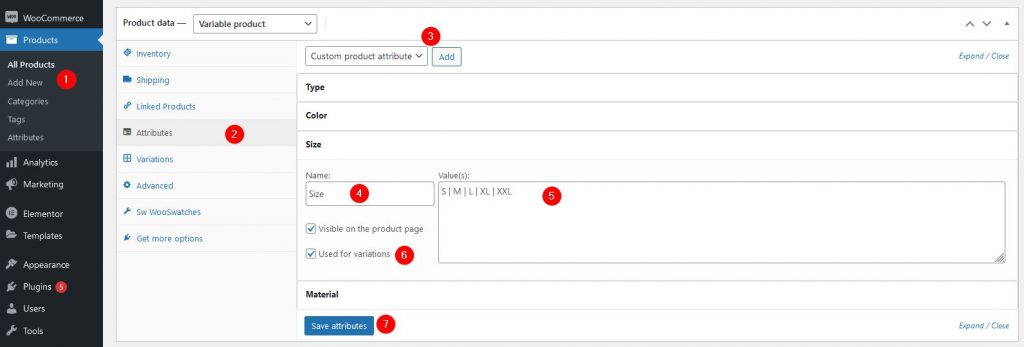
- Scroll down at product data and click to the Attributes tab.
- Select Custom product attribute in the drop-down and click on the Add button.
- Add Name
- Add Values( each attribute’s value will separated by “|”)
- Check for the Used for variations checkbox
- Click on the Save attributes button
- Click on the Update button
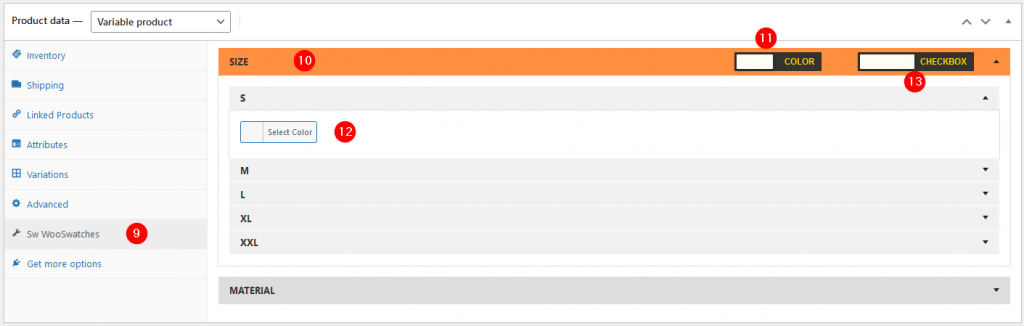
- Scroll down at product data section and click on the Sw WooSwatches tab
- Click on the Local Attribute which do you want to configure
- Select COLOR or IMAGE.
- Set color if you choose color or add an image if you choose Image
- Select Attribute type : Select/ checkbox
For both of attribute types, Please note that:
- Label, Color and image only show if you set product attribute type : Checkbox.
- If you add value for both of Color and Image parameters for the term, the Image will be priority to show.
- If you don’t add value for both of the color or thumbnail for the term, label will be shown in the front end
IV. ADD ATTRIBUTES TO VARIABLE PRODUCT
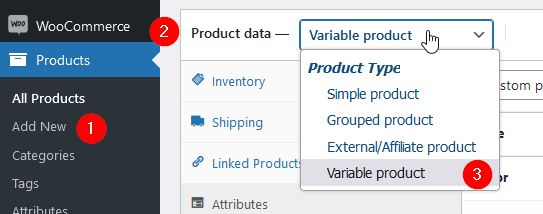
- Go to Products -> Add Product (or edit an existing one).
- Select the Attributes tab in the Product Data.
- Select Product Type : Variation Product.
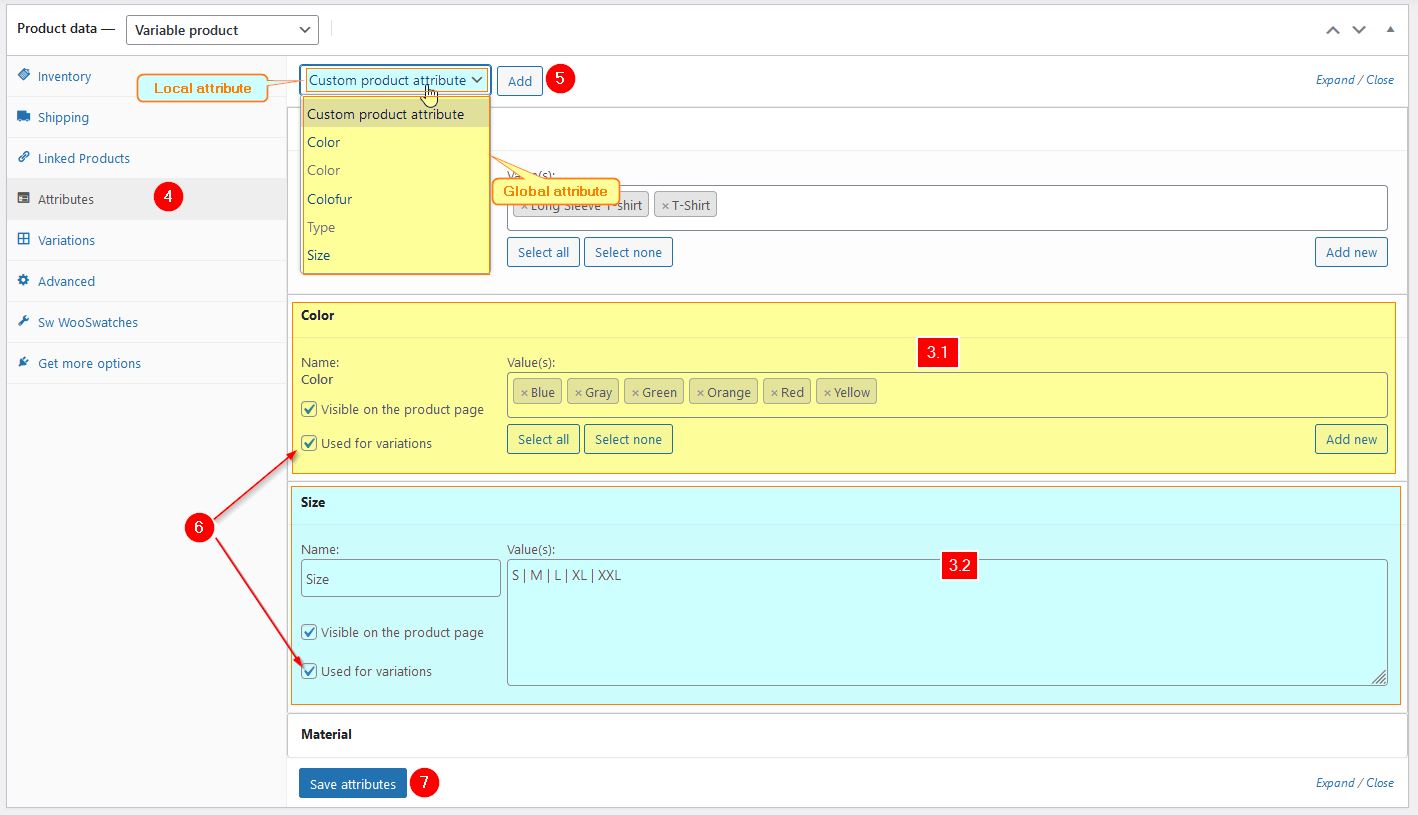
- Click to Attributes tab
- In this tab, you can select a global attribute or add new custom attribute in the drop-down => and click on the Add button
- Global Attribute: You can click on the Select All button to get all terms or click on the Select One button to choose some terms which do you want to add (3.1)
- Local Attribute: Add Name of product attribute => then Add Values. Please note that each attribute’s value will separated by “|” (3.2)
- Check for the Used for variations checkbox
- Click to the Save Attributes button
- Click to the Variations tab
- Select Add Variation and click on the Add button
- Choose Term values for each attribute and do some necessary info for it as Add image, Add SKU, Add Price….
- Set Default Form Values
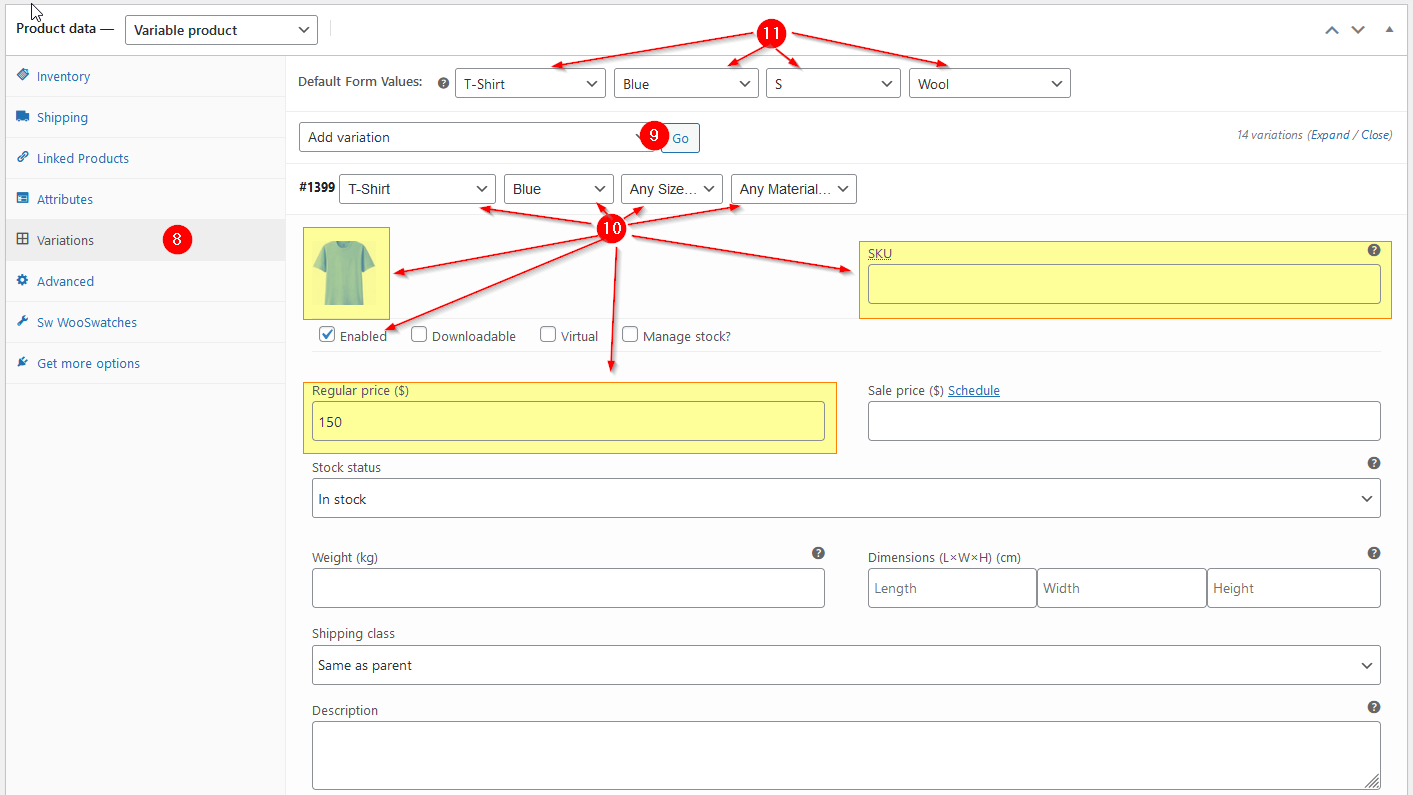
- After all, click on Update product to update the variation to the product.
Now you complete the task of creating a product with color and image swatches.
Currently, our top best themes are ready for this features. Let’s enjoy our demos for more experience. (See our best themes)