1.1 Introduction
First of all, I would like to thank you for purchasing this theme, your support is truly appreciated.
SW TopZ is a modern and beautiful WordPress Theme. Both developers and non-trained users can use it easily. This document covers the installation and use of this theme, reveals some answers to common problems and issues. We encourage you to read throughout this document if you are experiencing any difficulties.
If you have any questions that are beyond the scope of document, please feel free to contact us via our Support Page.
1.2 System Requirements
At the basic level, this theme will require the following conditions:
- PHP version 5.6 or later
- MySQL version 5 or later
- WordPress 4.7.x or later (Please note that the latest WordPress version is prefered.)
Note:
TheRecommended PHP Configuration Limitsshould be paid attention. In several cases, you may deal with problems related to low PHP configuration limits, such as: white screen, demo content fails when importing, empty page content and other similar issues. The solution is to increase the PHP limits. You can do this on your own by editing the following lines inphp.inifile in your root directory. This is not a file that comes with WordPress so if you are unfamiliar with it you should contact your web host about increasing those limits to a minimum as follows:
max_execution_time 360memory_limit 128Mpost_max_size 32Mupload_max_filesize 32M
At first, you need to download the package to your computer and then unzip it. The package includes files listed as follows:
Data files, including:
- plugins: js_composer.zip, one-click-install.zip, one-click-install-index2.zip, one-click-install-index3.zip, revslider.zip, sw-core.zip, sw-woocommerce.zip
- revslider: slideshow-1.zip, video_bg.zip, slideshow-2.zip, slideshow-3.zip .
- media.xml, media-index2.xml, media-index3.xml
Theme Installation files, including:
- sw_topz_quickstart_vx.x.x.zip for quickstart installation
- sw_topz-child-theme.zip
- sw_topz_theme_vx.x.x.zip for manual installation
Note:
- Please note that this file sw_topz_quickstart_vx.x.x.zip is not included in the Themeforest package. You can contact Support Page if you need any help.
- The child theme allows you to modify or add to the functionality of the parent theme instead of modifying the core theme files directly, which makes it easy to update the parent theme without erasing your changes. If you plan on making any updates or additions to this theme, you will definitely need to set up this child theme on your site)
To have more information about this topic, please go Here for more detail.
There are two ways to install this SW TopZ Theme:
- Quickstart Installation: This one is suitable for the first installation and want to get a whole fresh site as in the Demo. Please note that the quickstart file is not included in the Themeforest package. You could contact us via our Support Page to be supported.
- Manual Installation (including Theme Installation): If you want to build your site based on available content with SW TopZ, this one will be suitable. It won’t overwrite your old data.
3.1 Quickstart Installation
Please follow the steps in the Quickstart Installation Instruction for WordPress Theme .
3.2 Theme Installation
Before starting the Theme Installation process, please make sure that your host meets all following requirements:
- Your web host meets the minimum requirements to run WordPress
- This theme is built up and tested with WordPress Version 4.7.3. Therefore, this WordPress version should be used to have best performance. Besides, this theme is also compatible with WordPress 3.x.x and 4.x.x.
3.2.1 Theme Upload
Please follow the steps in Theme Installation Instruction for WordPress Theme .
3.2.2 Theme Installation Types
In this theme, we offer a useful feature to choose the way to install this theme: Import Demo Data or not. Two methods are provided for two different case. When you want to start a new website, or use our demo contents for easily customization, save your time and your energy. In this situation, we recommend using the Import Demo Data method. If you do not use this way, you must be adept in WordPress customization and theme development
After installing theme, there are two ways for you to choose to custom this theme: create everything by yourself or import our demo data
| Do NOT import demo data | Import demo data |
|---|---|
Strong points
|
Strong points
|
Weak points
|
Weak points
|
Work Process
|
Work Process
|
3.2.3 Required Plugins Installation
- Step 1 – After installing and activating the theme you will see the message about installing required plugins at the top of the page.
- Step 2 – You need click Begin Installing plugins link in order to install needed plugins for TopZ theme
- Step 3 – You will be redirected to Install Required Plugins page, here you will find all of the theme required plugins. In order to install these plugins, you just need to check all of them and select “Install” then “Apply”.
Note: When installing plugins, if you see a notice that some plugins have unsuccessful installation, they should be install manually one by one. This case usually occurs as you select all plugins to install at once.
- Step 4 – After installing these plugins, you need to Activate them by checking all of them and select “Activate” then click “Apply”
Below are list of required plugins along with SW TopZ theme:
- Contact Form 7
- Image Widget
- MailChimp for WordPress
- Regenerate Thumbnails
- Slider Revolution
- SW Core
- SW Woocommerce
- WooCommerce
- WooCommerce PayPal Powered by Braintree Gateway
- WooCommerce Stripe Gateway
- WordPress Importer
- WordPress Less
- WPBakery Visual Composer
- YITH WooCommerce Compare
- YITH WooCommerce Wishlist
- Yoast SEO
Please go here to have more detail about Importation in TopZ WordPress themes.
Please go here to have more detail about customing a page in our WordPress themes.
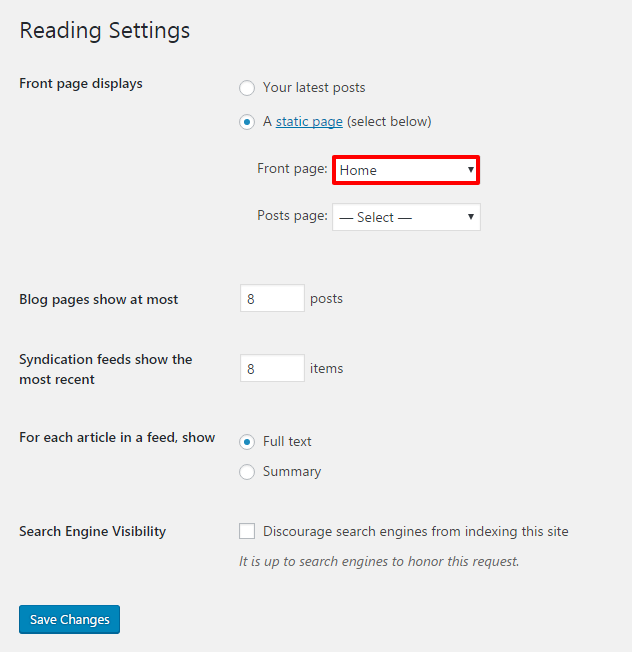
After setting up this theme, you should set up your homepage to view your achivement. Please go to Settings >> Reading area and look for the Front Page display area. Change the radio button “A static page” and select the front page and blog page from the dropdown menus, then save changes.
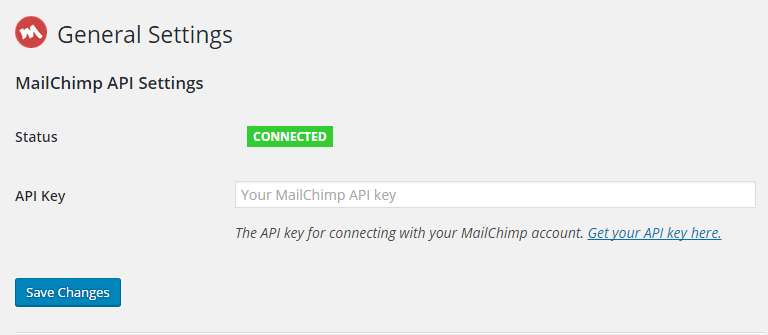
In this section, we will bring you some steps to configure MailChimp for your site.
Frontend Appearance:

Backend Settings:
1.Go to MailChimp for WP >> MailChimp to access general setting page of MailChimp. You should connect to your mailchimp account by entering API Key.
2.Also, in order to make MailChimp Form work effectively, you should navigate to MailChimp for WP >> Forms in admin sidebar, fill in the forms. After making the changes, remember to click Save Changes button.
- Form Fields: Please click to see the Backend Settings.
Copy the code here to the form mark-up field in the page.
|
1 2 3 4 |
<div class="frm-input"> <input class="frm-email" type="email" name="EMAIL" placeholder="Email Address..." required /> <button class="frm-submit" type="submit" value="subscribe">Subscribe</button> </div> |
- Form Messages: Please click to see the Backend Settings.
- Form Settings: Please click to see the Backend Settings.
- Form Appearance: Please click to see the Backend Settings.
You can click Here for more information about this plugin.
Note: After both Import demo data and Not import demo data method, the theme options are available, so this section is to showed you what we provide and how they are set.
Our stunning TopZ theme provides an advanced Theme Options panel that is loaded with many options to customize your page effectively. These options are organized into logical tabbed sections which will be very easy for you to navigate. Each option also has a short description of what it will do on the front end. Because of the sizable amount of options, we cannot go over them in full detail in this documentation. We encourage you to please take some time and navigate through each tab to see what we offer.
To access the theme options panel, please go to Appearance >> Theme Options in your WordPress admin. After that, you will see a logical tabbed sections including a lot of tabs for you to discover.
Below sections will go through each tab in detail for you.
SOME NOTES ABOUT THE THEME OPTIONS:
- Customize & Cpanel option: This is only used for the Demo development. Due to the risk of loosing your customization in CSS file, the option Demo Mode is not recommended.
- Reset to Defaults option: Please DO NOT use it if you do not want to loose your configuration. When the theme is reset to default, all the value here will be back to the default without saving any your configuration.
- Before configuring, you can also backup your theme options by clicking on the Import/Export tab. This is a great way to move your custom options from site to site.
- The configuration here will be applied to the pages in your site if there is no change in the Page Metabox. You can refer to the Theme Options & Page Metabox to master the framework before going on.
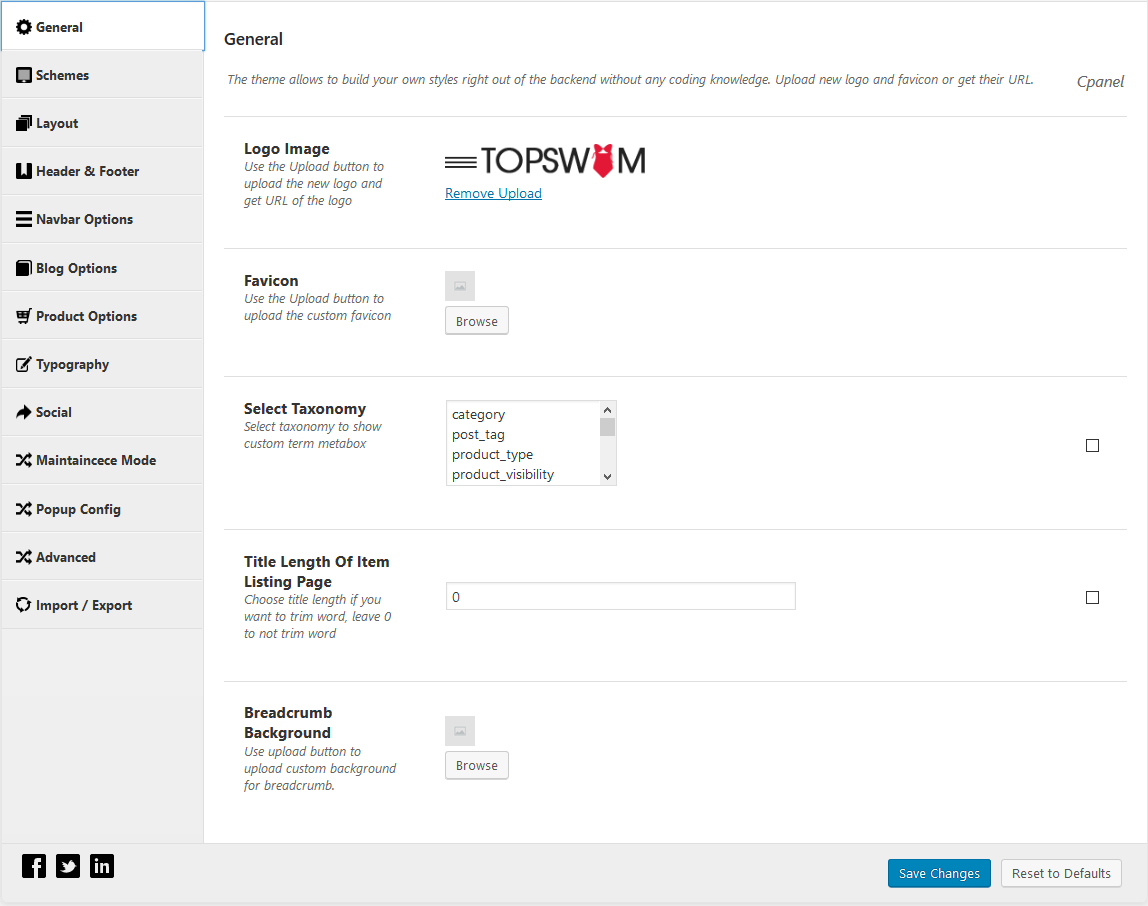
8.1 General
In this tab, you will see options for Logo Image, Favicon, Option for Taxonomy and Title Length of Item Listing Page. .
- Logo Image: You can easily upload your desired logo image and get URL of the logo.
- Favicon: You also can upload custom Favicon for your site.
- Select Taxonomy: You can freely select taxonomy to show custom term metabox.
- Title Length Of Item Listing Page: This one let you to choose the Title Length if you want to trim word for the Item Listing Page.
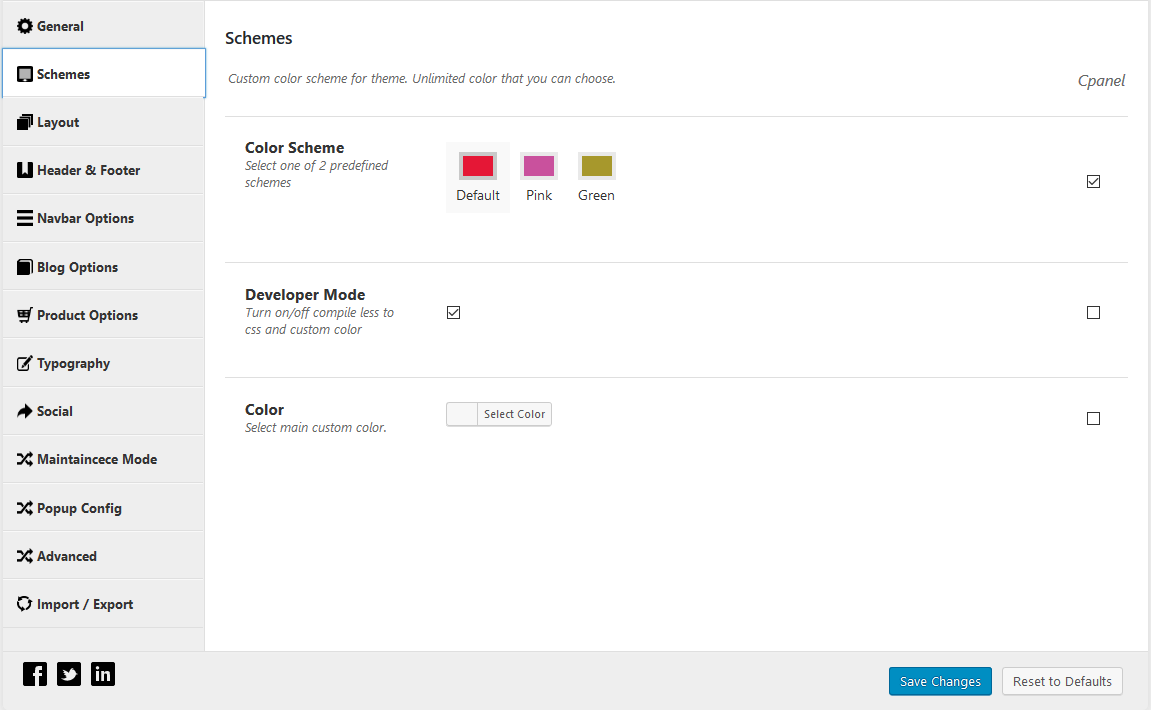
8.2 Schemes
In this tab, you will see options for Color Scheme, Develop Mode and Color option for Body, Border and for the Custom one .
- Color Scheme: We plan to update more color schemes for this theme in next versions.
- Developer Mode: If you want to configure option Color, this option should be chosen. However, this will turn on the compile less to css in your site. Due to the risk to loss of custom CSS, this is not recommended.
- Color: You also can select main custom color here.
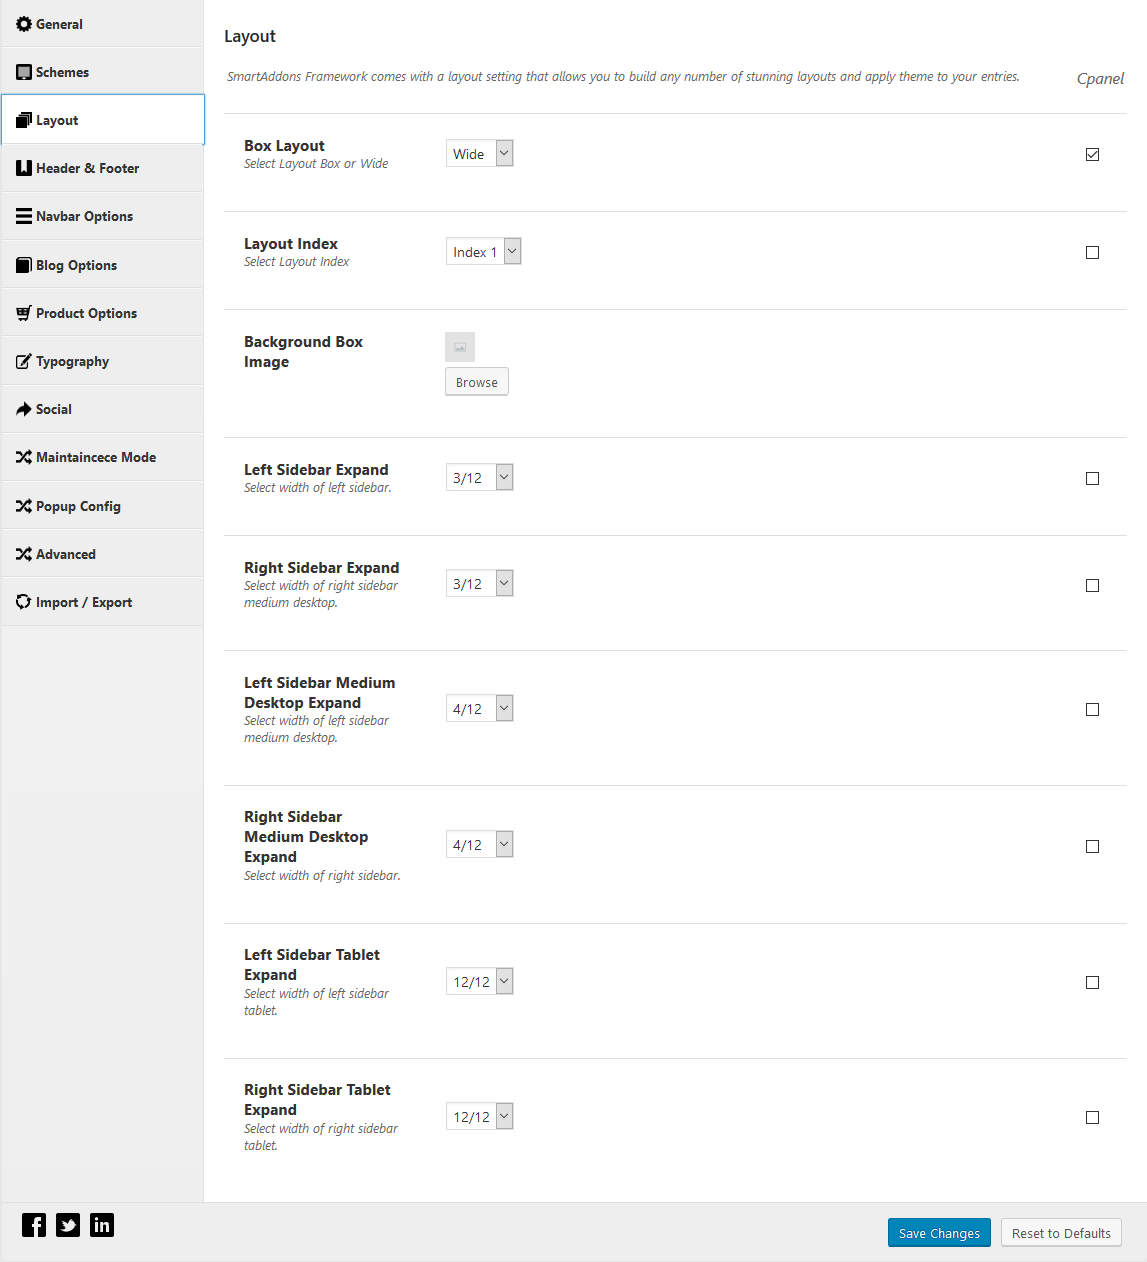
8.3 Layout
SW TopZ gives you multiple selections for this theme layouts. You can change sidebar positions (left, right) with wide or boxed version for many kind of devices. SW TopZ supports boxed and wide layout, with boxed version you can easily customize the background image to meet your expectation. Let’s look at the screenshot for more detail about these ones.
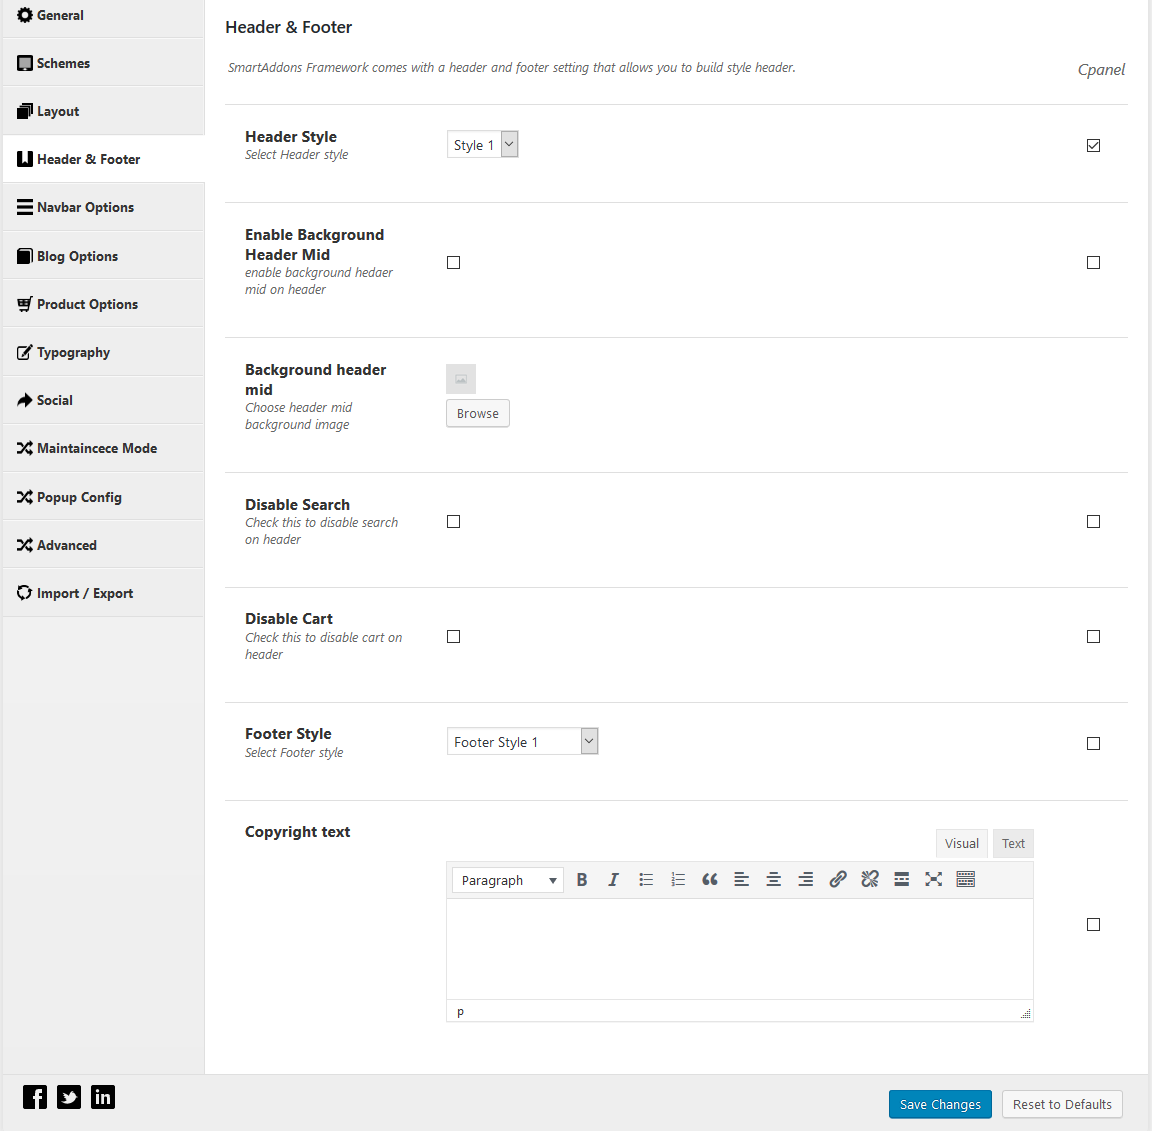
8.4 Header & Footer
These options enable you to change page appearance with various Header and Footer Styles. In addition, SW TopZ allows you to customize your Phone Number, Email and Copyright text in your footer. Moreover, you can check to disable the Search and Cart on the header of your site.
- Header Style: Currently, this theme currently supports 04 Header Styles ( Header Style 1, Header Style 2, Header Style 3, Header Style 4) . We will update more in the next versions.
- Footer Style: Currently, this theme supports 04 Footer Styles (Footer Style 1, Footer Style 2, Footer Style 3). We will update more in the next versions.
- Copyright text: It lets you to change the Copyright text. If there is no change here, the demo data will be applied.
Note:
- Header: To configure Header, you can go to Appearance > Widget then choose one and configure as your expectation.
- Footer: To configure Footer, you can go to Page > All pages, choose a Footer Style to then configure as your expectation.
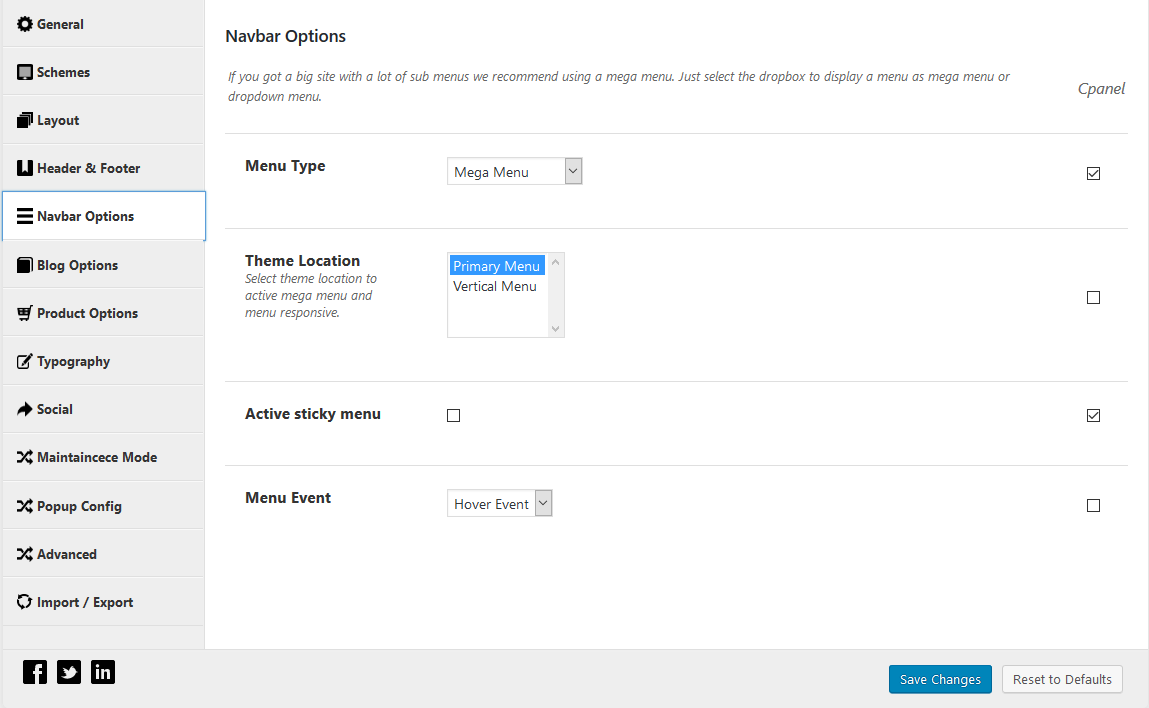
SW TopZ supports mega menu and dropdown menu. There is options for you to choose with Menu Type, Theme Location. In addition, you can active sticky menu by choose option Active sticky menu for your site here.
- Menu Event: This option is applied to the Event Menu. You can choose Hover Event or Click Event to hover or click on parent menu to appear child menu.
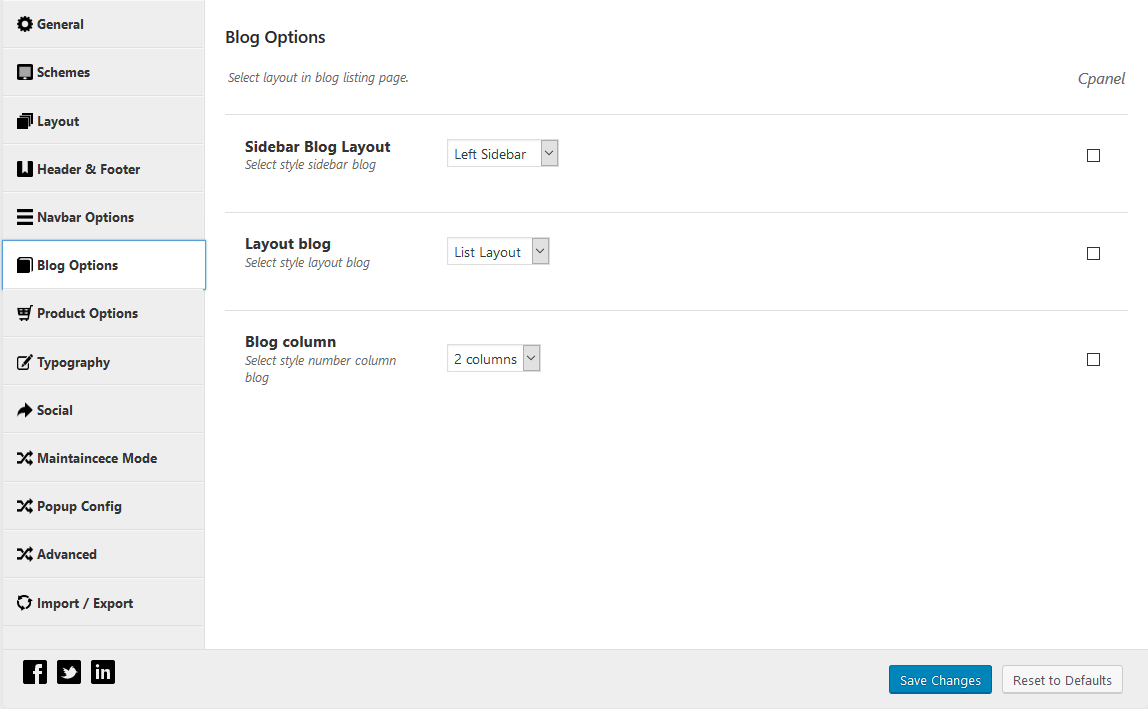
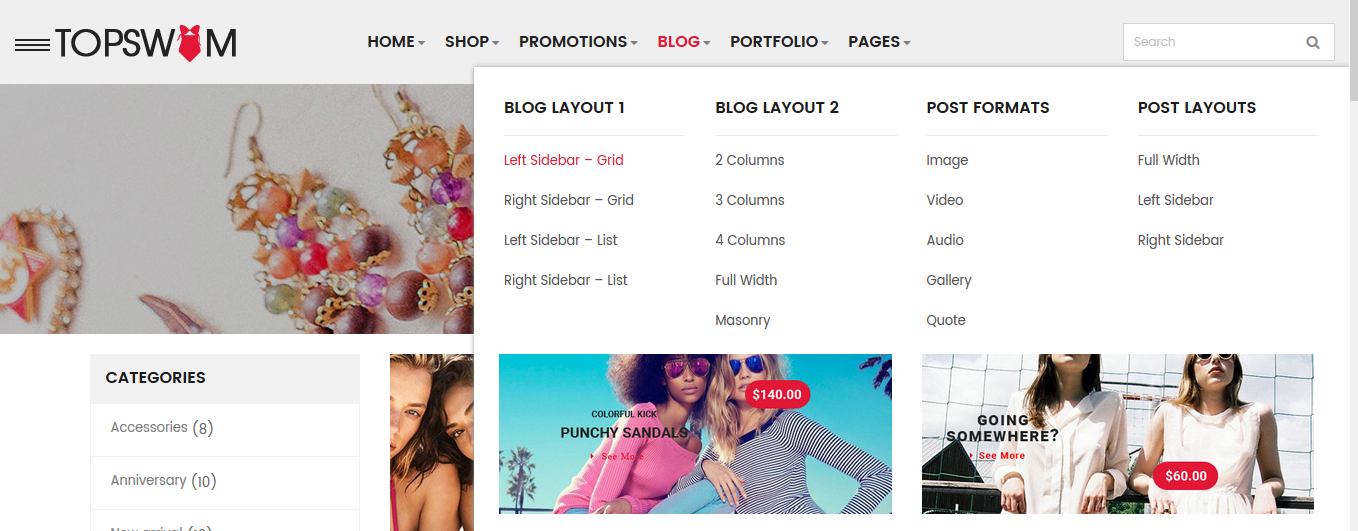
8.6 Blog Options
SW TopZ gives you multiple selections for Blog page with many features for Sidebar Blog Layout (Full Layout / Left Sidebar / Right Sidebar), Layout Blog and Blog Column .
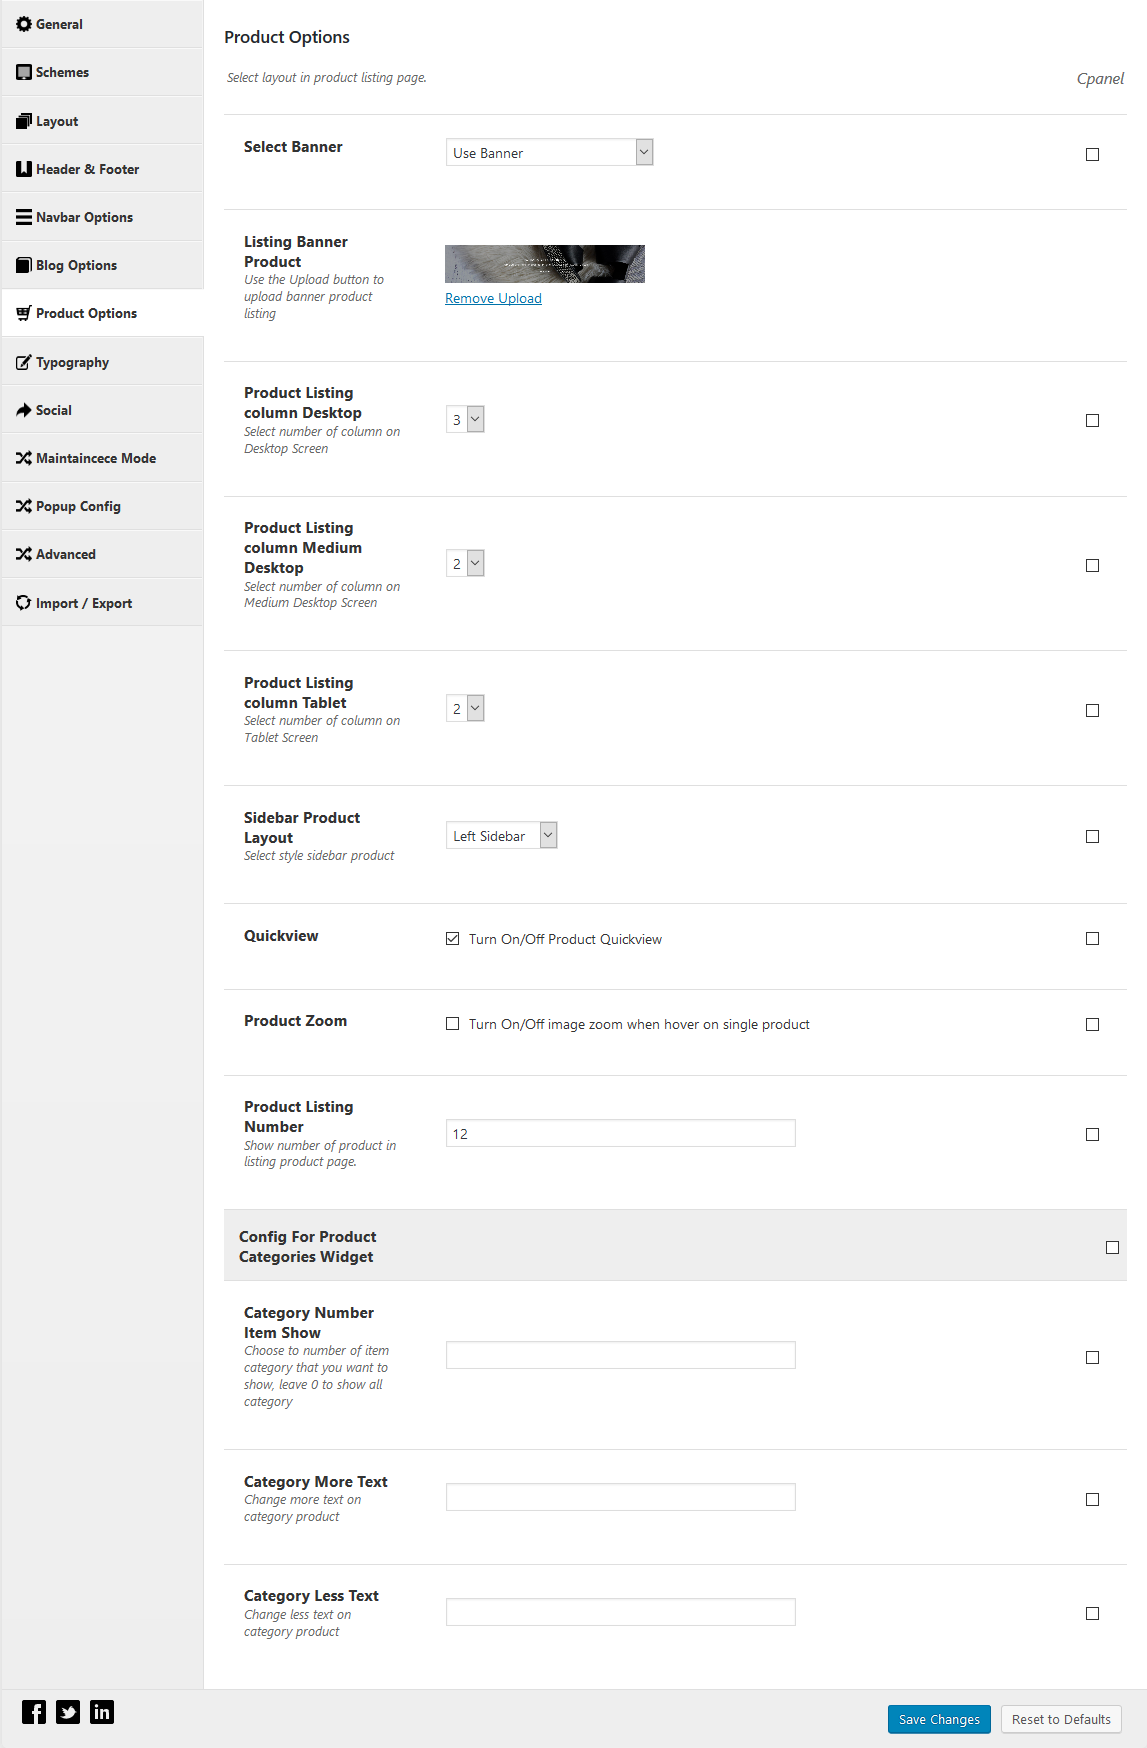
8.7 Product Options
SW TopZ allows you to change number of Products Column to display on different devices, select Sidebar Style for product and display Quickview Option. You can also change the number of product in Listing Product pages.
In addition, you can configure the Product Categories Widget with number of item and text showing.
- Select Banner: You can choose to use Listing Banner or Category Product Image to appear as the banner in product page. If you want to have different banner for each category, the second one will be recommended.
- Listing Banner Product: If you choose Banner as Use Banner, you can upload image here to set the banner for all product page.
- Quickview: You can use this option to let user have quickview of product.
- Product Zoom: You can use this option to turn on the product image zoom when hover on single product.
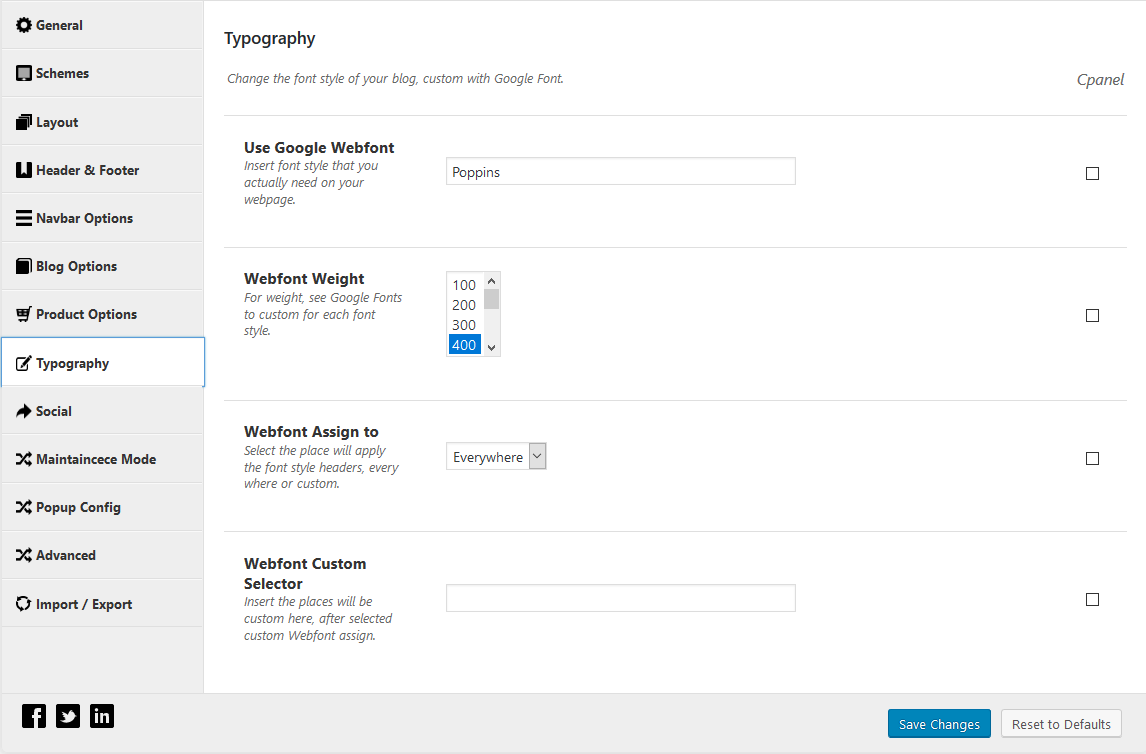
8.8 Typography
SW TopZ provides various options to custom the font style for your blog with Google Font.
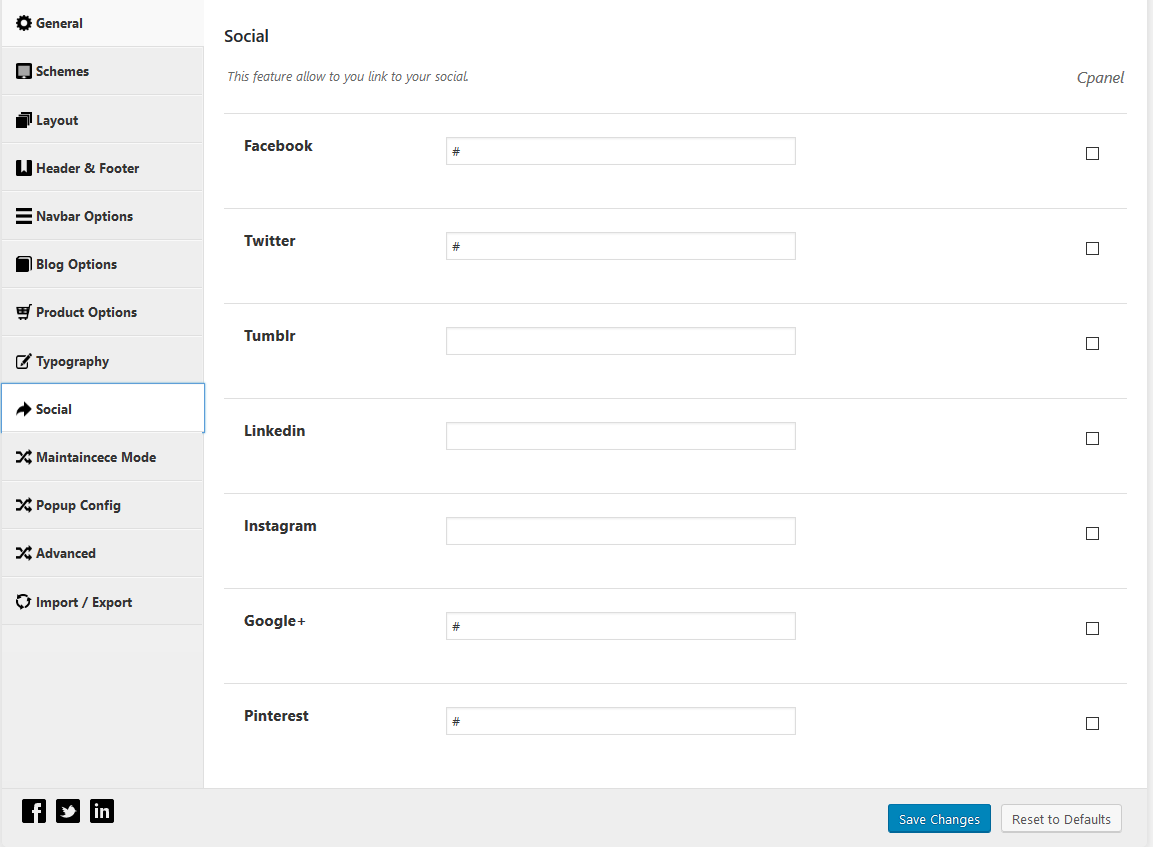
With Social tab, SW TopZ allows you to link your social easily. You can add link of your Facebook, Twitter, Tumblr, Linkedn, Google+ and Pinterest into your site.
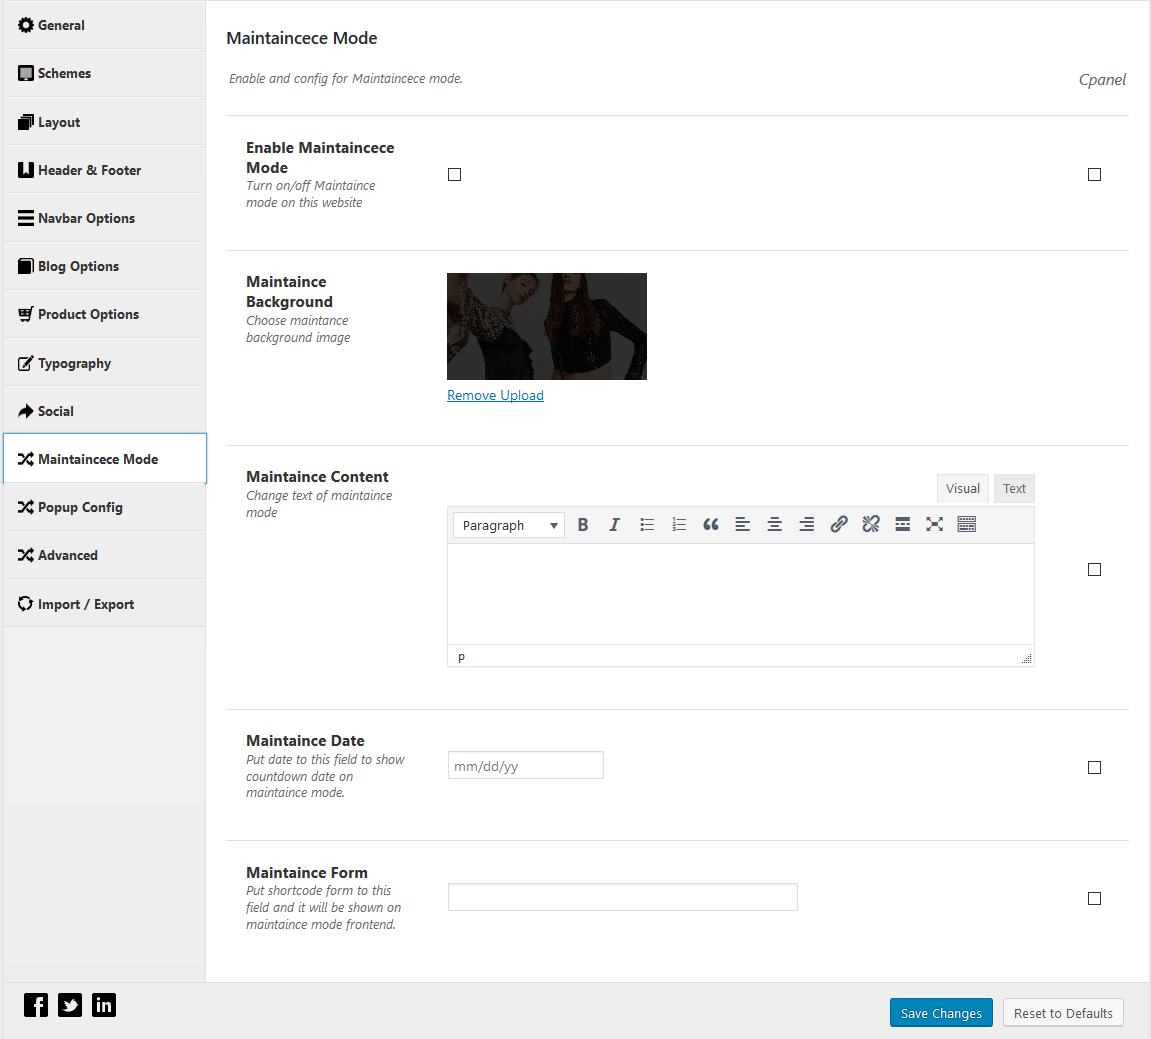
8.10 Maintaincece Mode
If your site has not been ready to be launch, the Maintaincece Mode will be truly useful for you. In this tab, you can enable and configure Maintaincece Mode with various options including Background, Content, Date and Form.
If you want to use this Maintaincece Mode, firstly, please click on Enable Maintaincece Mode then you can configure other options in this tab.
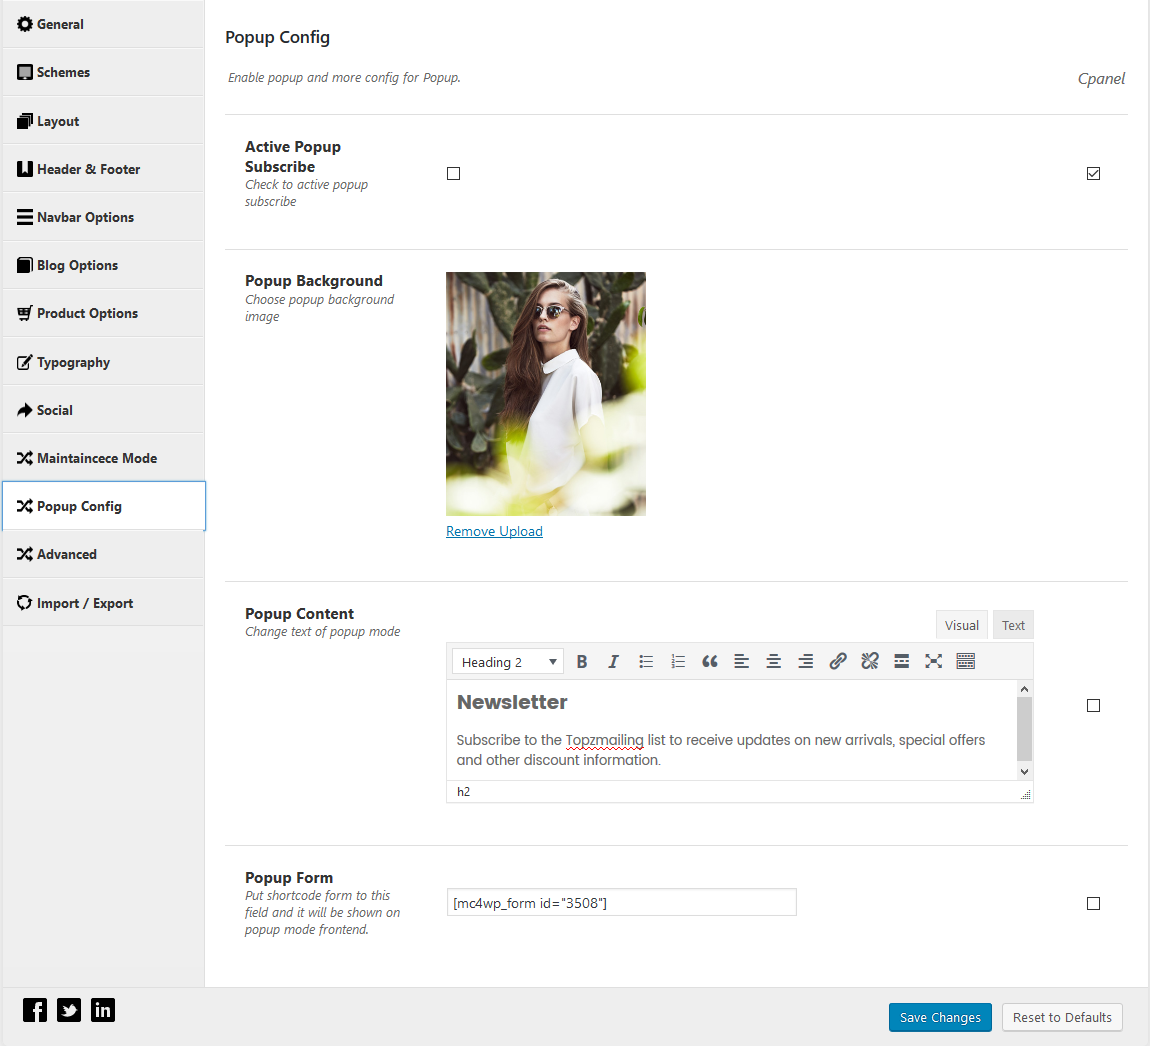
8.11 Popup Config
This feature let you to configure the Newsletter popup for your website. It let you to configure the Popup Background, Popup Content and Popup Form.
If you want to use this feature, firstly, please click on Active Popup Subscribe then you can configure other options inlcuding Popup Background, Popup Content and Popup Form in this tab.
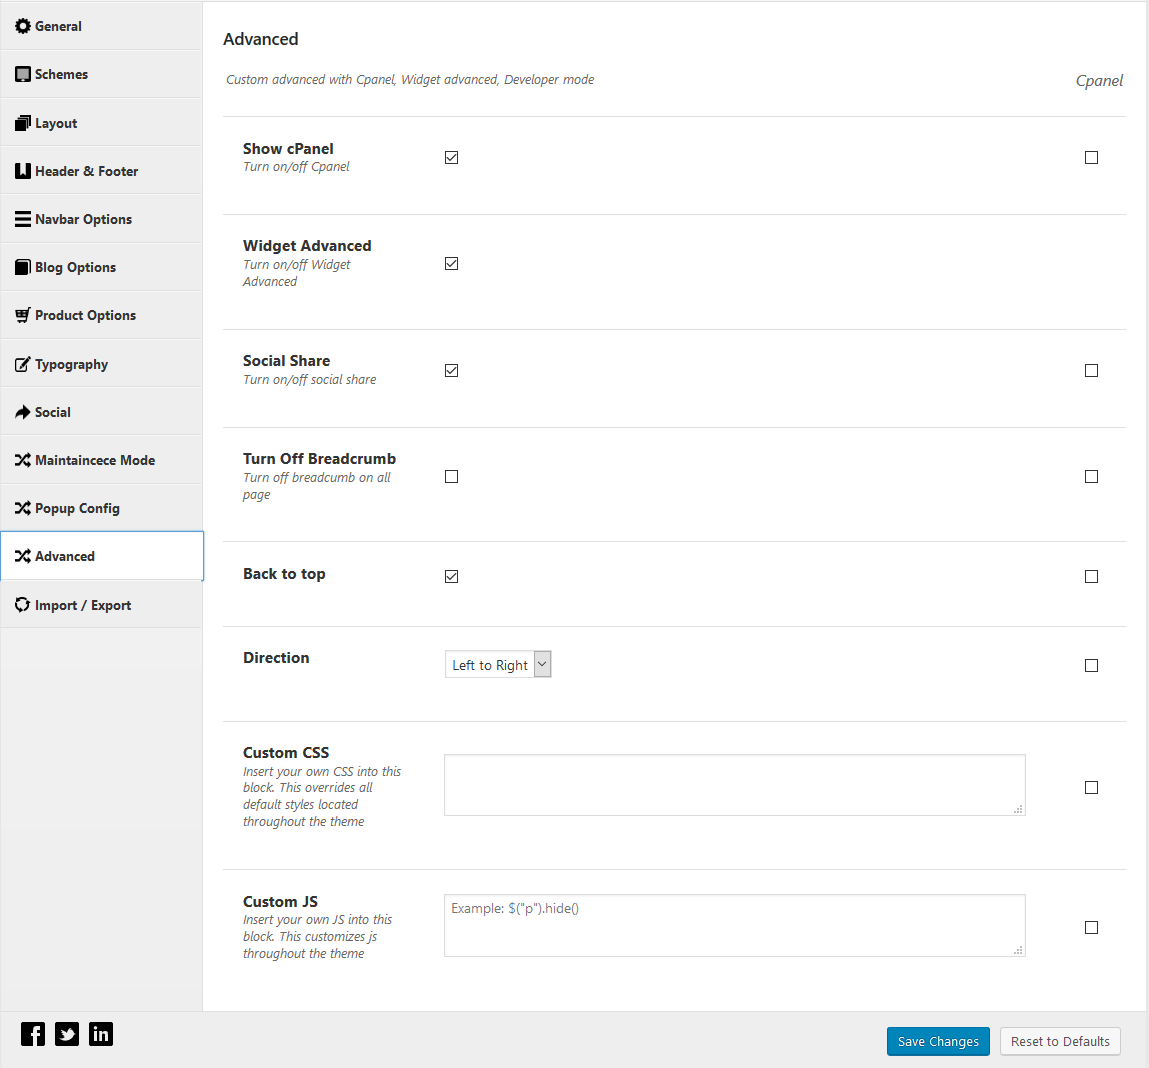
8.12 Advanced
This tab provides options for your advanced customization.
- Show cPanel: Turn on/off Cpanel. This is only for Develop purpose.
- Widget Advanced: You could choose Widget Advanced to display advanced configuration in widget panel for configuring by yourself.
- Developer Mode: Due to the risk of losing your customization in css files, this option is not recommended to be chosen.
- Active Preload and Preload Active Page(s): You could choose to active preloading for theme and select page having this action.
- Back to top: You could choose to turn on “back to top” option
- Direction: You could change your site’s direction from left to right or from right to left.
- Custom CSS/JS: Insert your own CSS and JS into this part. These CSS and JS will override all default styles located throughout the theme.
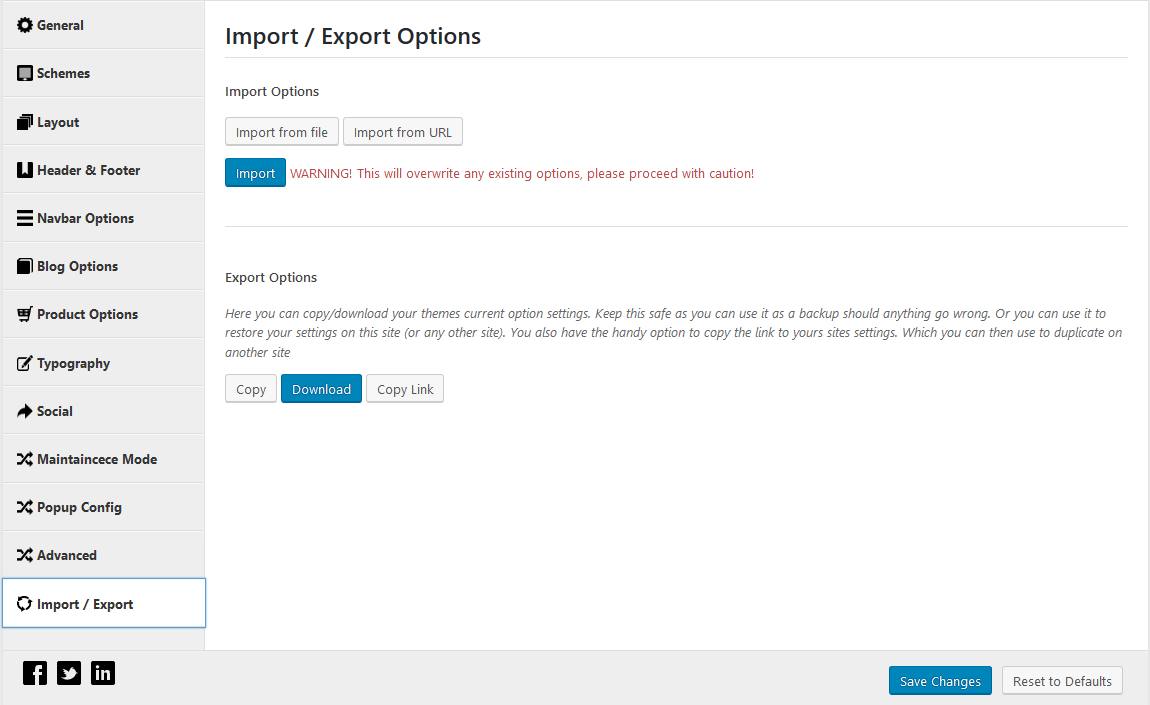
8.13 Import/Export Options
You can also backup your current theme options by clicking on the Import/Export tab >> Export Options. Import Options is not recommended, because this action will overwrite any existing options in your site.
This theme uses 6 menus:
- Primary Menu (Primary Menu)
- Left Menu (Vertical Menu)
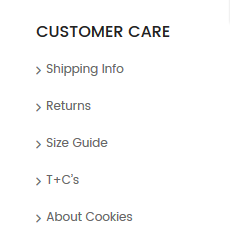
- Customer Care
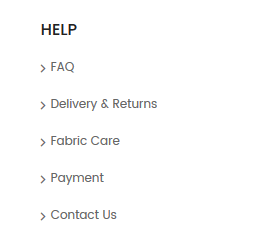
- Help
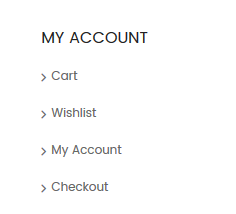
- My Account
- Our Story
If you have imported demo content, go to Existing Menu or else go to Creating a New Menu to create a new menu.
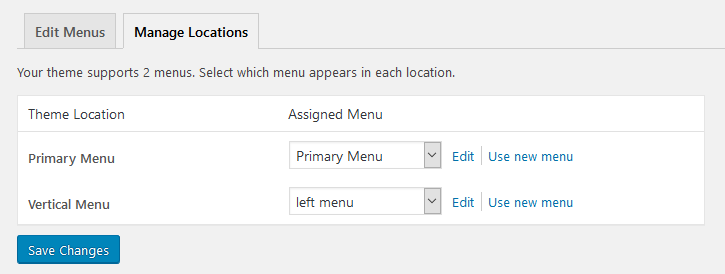
Step 1: Go to Appearance > Menus
Step 2: In the Manage Locations area, choose an Assigned Menu, which appropriates to Theme Locations then click Save Changes to save the settings.
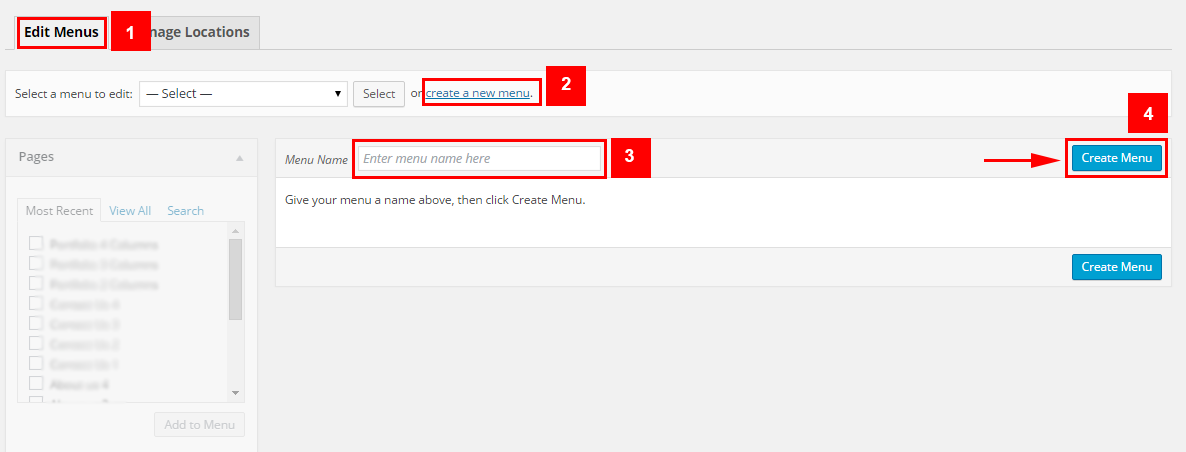
Step 1: Go to to Appearance > Menus
Step 2: Click Create a new menu. Enter Menu Name and click Create Menu.
Step 3: Check the menu item in the boxes in the left column, click Add to Menu to add items to the menu and drag/drop to arrange them.
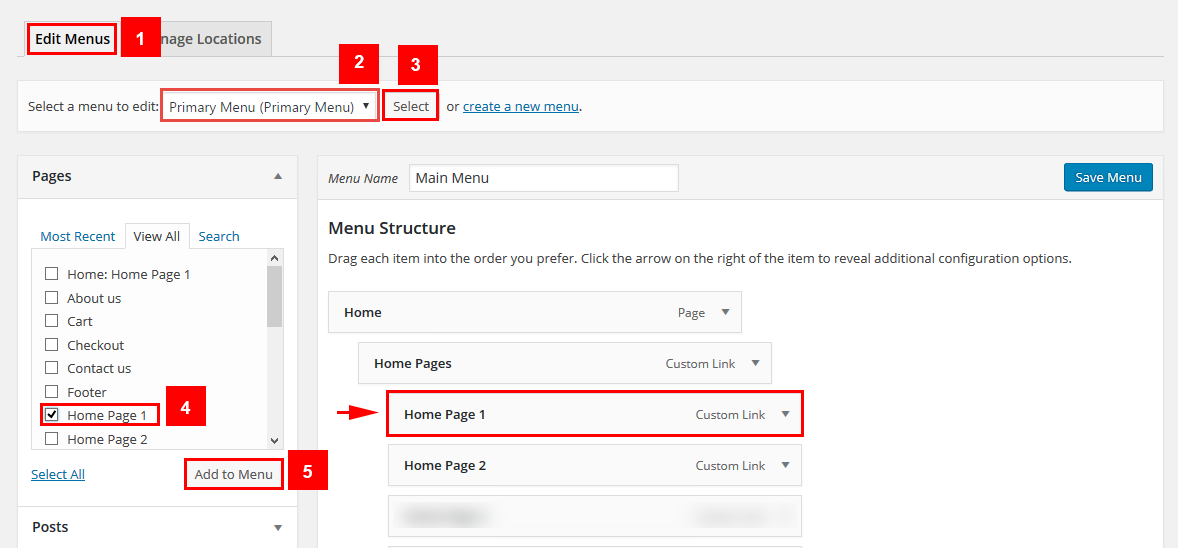
Step 4: Click Save Menu
Step 5: Now assign the created menu to the appropriate location
Step 1: Go to to Appearance > Menus
Step 2: Click Edit Menus. Select a Menu Name in the dropdown menu and click Select to choose a menu to edit.

Step 3: Edit the menu and its items in Menu Structure
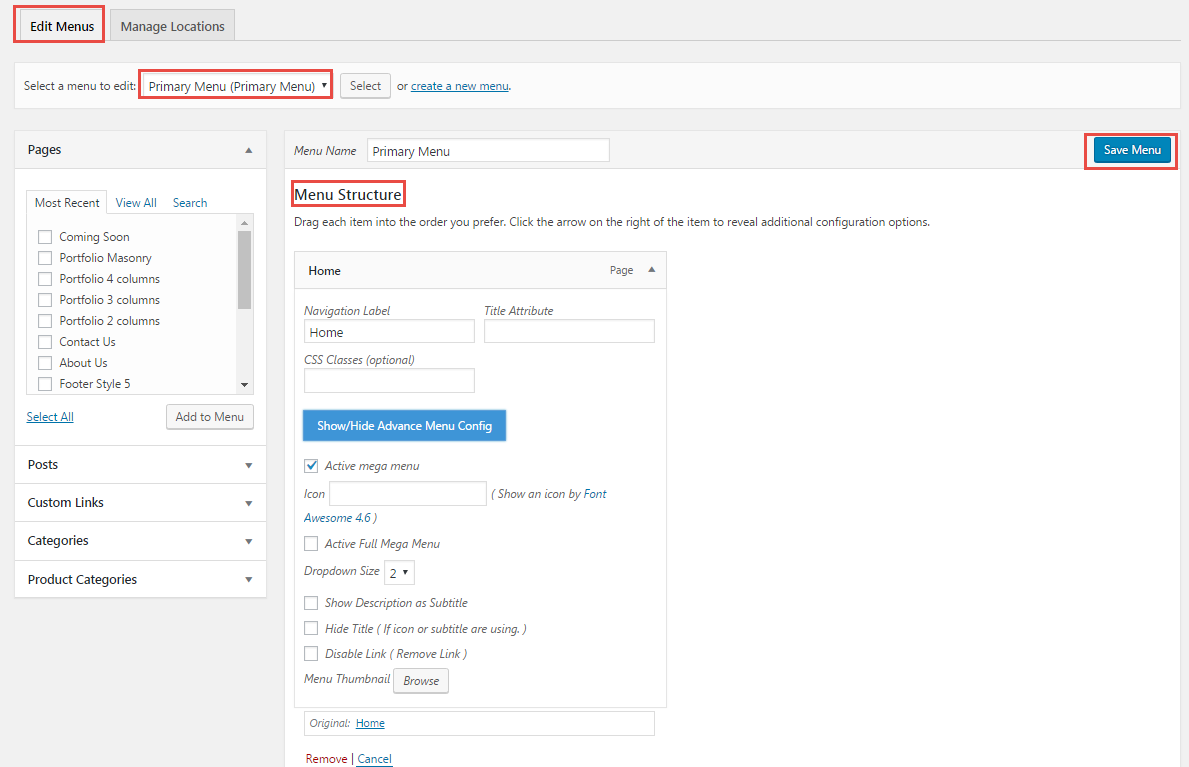
Step 4: Click Save Menu to save your changes
Note: When editing items in these menus, the items (in a menu) having same level could have same configuration. Therefore, we encourage you read throughtly and find out the item’s level to configure it without any errors.

In your Administrator Page, please go to Appearance > Menus and choose the menu to configure its structure.
The Frontend Appearance:
The Backend Settings:
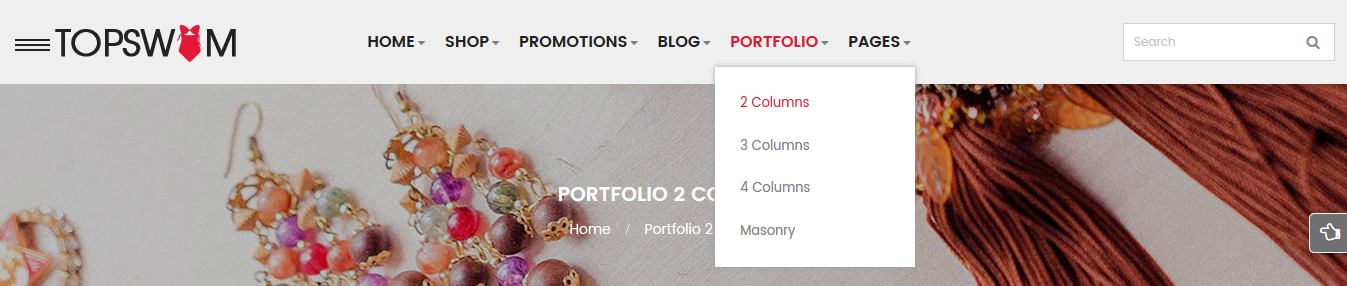
1. We call Parent Level Menu Level 0. Then, next levels are Level 1, Level 2,etc.
2. Click on the first Menu Level 0 (Parent Level Menu ) item and select Dropdown Size = “3″ in the selection box.
Click here to see the Backend Settings.
3. Click “Save” button
Description of parameters in Advanced Menu Configuration:
- Active mega menu: Allow to activate/inactivate Mega Menu
- Icon: Using icon-* class to display Icon for any menu item with intergrated Font Awesome.
- Dropdown Size: Set the width of dropdown menu. (ex: min = 1 (= 150px); max = 6 (= 900px)).
- Dropdown Align
- Only for menu items level 0 – If you need a dropdown align by right direction, configure it to “Right” instead of “Left” or “Default” – “Default” means that no class can be added to dropdown, everything follows the default css. – “Left” / “Right”: add to dropdown an utility class and float it left/ right, make it align as your desire .
- Show Description as Subtitle
- Show a short description – It is an essential attribute of a menu item. You may need to select to show it in the metabox screen.
- Hide Title
- When you would like to hide the title of menu, please select “Yes” value. In this case, you need to configure Icon, Subtitle or Advanced Content.
- Disable Link: Allow to disable link.
- Advanced: Several advanced functions are placed here.
1.”Default”: NOOP, do nothing. Sure, it is not advanced.
2.”Use as Divider”: Show any icon, title, subtitle, content. Divider style only.
3.”Append Advanced Content”: Append content after menu title block (icon+title+subtitle).
4.”Append Advanced Content with Shortcode”: as above, but “do_shortcode” with this before append.
The Frontend Appearance:
The Backend Settings: Please click Here for more details.
The Frontend Appearance:
The Backend Settings: Please click Here for more details.
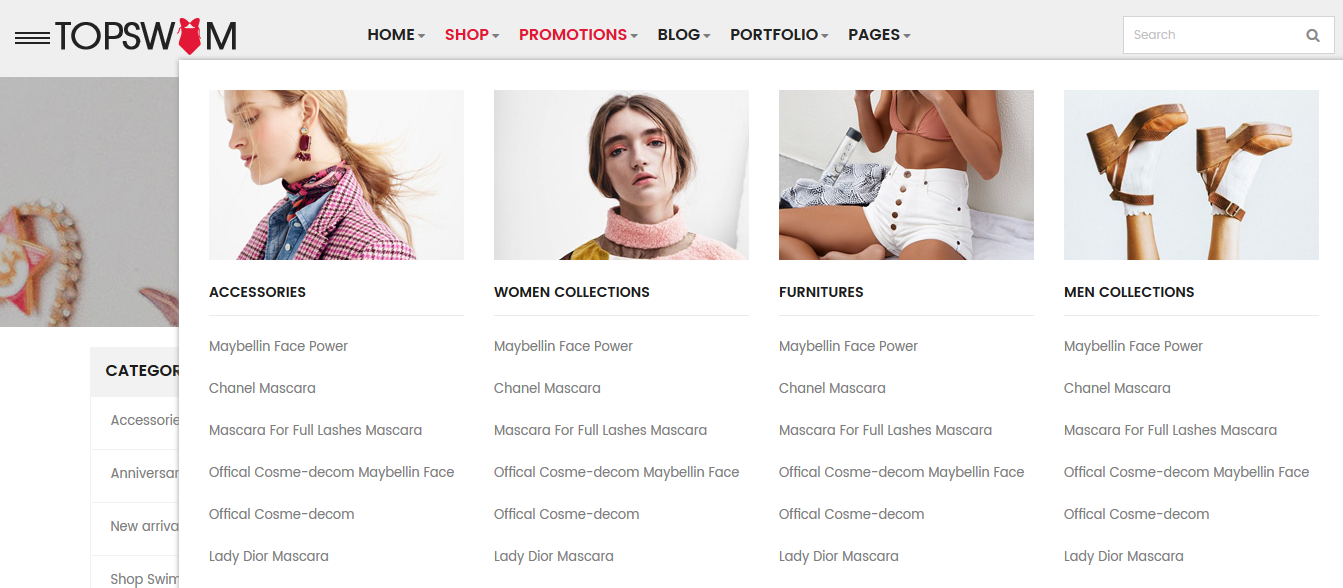
Firstly, you should create page Mega Menu first. After choosing the Text mode for this page, you can copy & Paste the code into your editor:
|
1 |
[vc_row][vc_column][vc_raw_html]JTNDZGl2JTIwY2xhc3MlM0QlMjJtZWdhLW1lbnUlMjIlM0UlMEElMDklM0NkaXYlMjBjbGFzcyUzRCUyMndyYXAtY29udGVudCUyMiUzRSUwQSUwOSUwOSUzQ2RpdiUyMGNsYXNzJTNEJTIyaXRlbSUyMiUzRSUwQSUwOSUwOSUwOSUzQ2RpdiUyMGNsYXNzJTNEJTIyaXRlbS1pbWFnZSUyMiUzRSUwQSUwOSUwOSUwOSUwOSUzQ2ElMjBocmVmJTNEJTIyJTIzJTIyJTNFJTNDaW1nJTIwY2xhc3MlM0QlMjJhbGlnbm5vbmUlMjBzaXplLWZ1bGwlMjB3cC1pbWFnZS0zNDk2JTIyJTIwc3JjJTNEJTIyaHR0cCUzQSUyRiUyRmRldi55dGN2bi5jb20lMkZ5dGNfdGVtcGxhdGVzJTJGd29yZHByZXNzJTJGc3dfdG9weiUyRndwLWNvbnRlbnQlMkZ1cGxvYWRzJTJGMjAxNyUyRjA1JTJGbWVudTEuanBnJTIyJTIwYWx0JTNEJTIyJTIyJTIwd2lkdGglM0QlMjIyNTUlMjIlMjBoZWlnaHQlM0QlMjIxNzAlMjIlMjAlMkYlM0UlM0MlMkZhJTNFJTBBJTA5JTA5JTA5JTNDJTJGZGl2JTNFJTBBJTA5JTA5JTA5JTNDZGl2JTIwY2xhc3MlM0QlMjJpdGVtLWNvbnRlbnQlMjIlM0UlMEElMDklMDklMDklMDklM0NoMyUzRUFjY2Vzc29yaWVzJTNDJTJGaDMlM0UlMEElMDklMDklMDklMDklM0N1bCUzRSUwQSUwOSUwOSUwOSUwOSUwOSUzQ2xpJTNFJTNDYSUyMGhyZWYlM0QlMjIlMjMlMjIlM0VNYXliZWxsaW4lMjBmYWNlJTIwcG93ZXIlM0MlMkZhJTNFJTNDJTJGbGklM0UlMEElMDklMDklMDklMDklMDklM0NsaSUzRSUzQ2ElMjBocmVmJTNEJTIyJTIzJTIyJTNFQ2hhbmVsJTIwbWFzY2FyYSUzQyUyRmElM0UlM0MlMkZsaSUzRSUwQSUwOSUwOSUwOSUwOSUwOSUzQ2xpJTNFJTNDYSUyMGhyZWYlM0QlMjIlMjMlMjIlM0VNYXNjYXJhJTIwZm9yJTIwZnVsbCUyMGxhc2hlcyUyME1hc2NhcmElM0MlMkZhJTNFJTNDJTJGbGklM0UlMEElMDklMDklMDklMDklMDklM0NsaSUzRSUzQ2ElMjBocmVmJTNEJTIyJTIzJTIyJTNFT2ZmaWNhbCUyMENvc21lLWRlY29tJTIwTWF5YmVsbGluJTIwZmFjZSUzQyUyRmElM0UlM0MlMkZsaSUzRSUwQSUwOSUwOSUwOSUwOSUwOSUzQ2xpJTNFJTNDYSUyMGhyZWYlM0QlMjIlMjMlMjIlM0VPZmZpY2FsJTIwQ29zbWUtZGVjb20lM0MlMkZhJTNFJTNDJTJGbGklM0UlMEElMDklMDklMDklMDklMDklM0NsaSUzRSUzQ2ElMjBocmVmJTNEJTIyJTIzJTIyJTNFTGFkeSUyMERpb3IlMjBtYXNjYXJhJTNDJTJGYSUzRSUzQyUyRmxpJTNFJTBBJTA5JTA5JTA5JTA5JTNDJTJGdWwlM0UlMEElMDklMDklMDklM0MlMkZkaXYlM0UlMEElMDklMDklM0MlMkZkaXYlM0UlMEElMDklMDklM0NkaXYlMjBjbGFzcyUzRCUyMml0ZW0lMjIlM0UlMEElMDklMDklMDklM0NkaXYlMjBjbGFzcyUzRCUyMml0ZW0taW1hZ2UlMjIlM0UlMEElMDklMDklMDklMDklM0NhJTIwaHJlZiUzRCUyMiUyMyUyMiUzRSUzQ2ltZyUyMGNsYXNzJTNEJTIyYWxpZ25ub25lJTIwc2l6ZS1mdWxsJTIwd3AtaW1hZ2UtMzQ5NyUyMiUyMHNyYyUzRCUyMmh0dHAlM0ElMkYlMkZkZXYueXRjdm4uY29tJTJGeXRjX3RlbXBsYXRlcyUyRndvcmRwcmVzcyUyRnN3X3RvcHolMkZ3cC1jb250ZW50JTJGdXBsb2FkcyUyRjIwMTclMkYwNSUyRm1lbnUyLmpwZyUyMiUyMGFsdCUzRCUyMiUyMiUyMHdpZHRoJTNEJTIyMjU1JTIyJTIwaGVpZ2h0JTNEJTIyMTcwJTIyJTIwJTJGJTNFJTNDJTJGYSUzRSUwQSUwOSUwOSUwOSUzQyUyRmRpdiUzRSUwQSUwOSUwOSUwOSUzQ2RpdiUyMGNsYXNzJTNEJTIyaXRlbS1jb250ZW50JTIyJTNFJTBBJTA5JTA5JTA5JTA5JTNDaDMlM0V3b21lbiUyMGNvbGxlY3Rpb25zJTNDJTJGaDMlM0UlMEElMDklMDklMDklMDklM0N1bCUzRSUwQSUwOSUwOSUwOSUwOSUwOSUzQ2xpJTNFJTNDYSUyMGhyZWYlM0QlMjIlMjMlMjIlM0VNYXliZWxsaW4lMjBmYWNlJTIwcG93ZXIlM0MlMkZhJTNFJTNDJTJGbGklM0UlMEElMDklMDklMDklMDklMDklM0NsaSUzRSUzQ2ElMjBocmVmJTNEJTIyJTIzJTIyJTNFQ2hhbmVsJTIwbWFzY2FyYSUzQyUyRmElM0UlM0MlMkZsaSUzRSUwQSUwOSUwOSUwOSUwOSUwOSUzQ2xpJTNFJTNDYSUyMGhyZWYlM0QlMjIlMjMlMjIlM0VNYXNjYXJhJTIwZm9yJTIwZnVsbCUyMGxhc2hlcyUyME1hc2NhcmElM0MlMkZhJTNFJTNDJTJGbGklM0UlMEElMDklMDklMDklMDklMDklM0NsaSUzRSUzQ2ElMjBocmVmJTNEJTIyJTIzJTIyJTNFT2ZmaWNhbCUyMENvc21lLWRlY29tJTIwTWF5YmVsbGluJTIwZmFjZSUzQyUyRmElM0UlM0MlMkZsaSUzRSUwQSUwOSUwOSUwOSUwOSUwOSUzQ2xpJTNFJTNDYSUyMGhyZWYlM0QlMjIlMjMlMjIlM0VPZmZpY2FsJTIwQ29zbWUtZGVjb20lM0MlMkZhJTNFJTNDJTJGbGklM0UlMEElMDklMDklMDklMDklMDklM0NsaSUzRSUzQ2ElMjBocmVmJTNEJTIyJTIzJTIyJTNFTGFkeSUyMERpb3IlMjBtYXNjYXJhJTNDJTJGYSUzRSUzQyUyRmxpJTNFJTBBJTA5JTA5JTA5JTA5JTNDJTJGdWwlM0UlMEElMDklMDklMDklM0MlMkZkaXYlM0UlMEElMDklMDklM0MlMkZkaXYlM0UlMEElMDklMDklM0NkaXYlMjBjbGFzcyUzRCUyMml0ZW0lMjIlM0UlMEElMDklMDklMDklM0NkaXYlMjBjbGFzcyUzRCUyMml0ZW0taW1hZ2UlMjIlM0UlMEElMDklMDklMDklMDklM0NhJTIwaHJlZiUzRCUyMiUyMyUyMiUzRSUzQ2ltZyUyMGNsYXNzJTNEJTIyYWxpZ25ub25lJTIwc2l6ZS1mdWxsJTIwd3AtaW1hZ2UtMzQ5OCUyMiUyMHNyYyUzRCUyMmh0dHAlM0ElMkYlMkZkZXYueXRjdm4uY29tJTJGeXRjX3RlbXBsYXRlcyUyRndvcmRwcmVzcyUyRnN3X3RvcHolMkZ3cC1jb250ZW50JTJGdXBsb2FkcyUyRjIwMTclMkYwNSUyRm1lbnUzLmpwZyUyMiUyMGFsdCUzRCUyMiUyMiUyMHdpZHRoJTNEJTIyMjU1JTIyJTIwaGVpZ2h0JTNEJTIyMTcwJTIyJTIwJTJGJTNFJTNDJTJGYSUzRSUwQSUwOSUwOSUwOSUzQyUyRmRpdiUzRSUwQSUwOSUwOSUwOSUzQ2RpdiUyMGNsYXNzJTNEJTIyaXRlbS1jb250ZW50JTIyJTNFJTBBJTA5JTA5JTA5JTA5JTNDaDMlM0VmdXJuaXR1cmVzJTNDJTJGaDMlM0UlMEElMDklMDklMDklMDklM0N1bCUzRSUwQSUwOSUwOSUwOSUwOSUwOSUzQ2xpJTNFJTNDYSUyMGhyZWYlM0QlMjIlMjMlMjIlM0VNYXliZWxsaW4lMjBmYWNlJTIwcG93ZXIlM0MlMkZhJTNFJTNDJTJGbGklM0UlMEElMDklMDklMDklMDklMDklM0NsaSUzRSUzQ2ElMjBocmVmJTNEJTIyJTIzJTIyJTNFQ2hhbmVsJTIwbWFzY2FyYSUzQyUyRmElM0UlM0MlMkZsaSUzRSUwQSUwOSUwOSUwOSUwOSUwOSUzQ2xpJTNFJTNDYSUyMGhyZWYlM0QlMjIlMjMlMjIlM0VNYXNjYXJhJTIwZm9yJTIwZnVsbCUyMGxhc2hlcyUyME1hc2NhcmElM0MlMkZhJTNFJTNDJTJGbGklM0UlMEElMDklMDklMDklMDklMDklM0NsaSUzRSUzQ2ElMjBocmVmJTNEJTIyJTIzJTIyJTNFT2ZmaWNhbCUyMENvc21lLWRlY29tJTIwTWF5YmVsbGluJTIwZmFjZSUzQyUyRmElM0UlM0MlMkZsaSUzRSUwQSUwOSUwOSUwOSUwOSUwOSUzQ2xpJTNFJTNDYSUyMGhyZWYlM0QlMjIlMjMlMjIlM0VPZmZpY2FsJTIwQ29zbWUtZGVjb20lM0MlMkZhJTNFJTNDJTJGbGklM0UlMEElMDklMDklMDklMDklMDklM0NsaSUzRSUzQ2ElMjBocmVmJTNEJTIyJTIzJTIyJTNFTGFkeSUyMERpb3IlMjBtYXNjYXJhJTNDJTJGYSUzRSUzQyUyRmxpJTNFJTBBJTA5JTA5JTA5JTA5JTNDJTJGdWwlM0UlMEElMDklMDklMDklM0MlMkZkaXYlM0UlMEElMDklMDklM0MlMkZkaXYlM0UlMEElMDklMDklM0NkaXYlMjBjbGFzcyUzRCUyMml0ZW0lMjIlM0UlMEElMDklMDklMDklM0NkaXYlMjBjbGFzcyUzRCUyMml0ZW0taW1hZ2UlMjIlM0UlMEElMDklMDklMDklMDklM0NhJTIwaHJlZiUzRCUyMiUyMyUyMiUzRSUzQ2ltZyUyMGNsYXNzJTNEJTIyYWxpZ25ub25lJTIwc2l6ZS1mdWxsJTIwd3AtaW1hZ2UtMzQ5OSUyMiUyMHNyYyUzRCUyMmh0dHAlM0ElMkYlMkZkZXYueXRjdm4uY29tJTJGeXRjX3RlbXBsYXRlcyUyRndvcmRwcmVzcyUyRnN3X3RvcHolMkZ3cC1jb250ZW50JTJGdXBsb2FkcyUyRjIwMTclMkYwNSUyRm1lbnU0LmpwZyUyMiUyMGFsdCUzRCUyMiUyMiUyMHdpZHRoJTNEJTIyMjU1JTIyJTIwaGVpZ2h0JTNEJTIyMTcwJTIyJTIwJTJGJTNFJTNDJTJGYSUzRSUwQSUwOSUwOSUwOSUzQyUyRmRpdiUzRSUwQSUwOSUwOSUwOSUzQ2RpdiUyMGNsYXNzJTNEJTIyaXRlbS1jb250ZW50JTIyJTNFJTBBJTA5JTA5JTA5JTA5JTNDaDMlM0VtZW4lMjBjb2xsZWN0aW9ucyUzQyUyRmgzJTNFJTBBJTA5JTA5JTA5JTA5JTNDdWwlM0UlMEElMDklMDklMDklMDklMDklM0NsaSUzRSUzQ2ElMjBocmVmJTNEJTIyJTIzJTIyJTNFTWF5YmVsbGluJTIwZmFjZSUyMHBvd2VyJTNDJTJGYSUzRSUzQyUyRmxpJTNFJTBBJTA5JTA5JTA5JTA5JTA5JTNDbGklM0UlM0NhJTIwaHJlZiUzRCUyMiUyMyUyMiUzRUNoYW5lbCUyMG1hc2NhcmElM0MlMkZhJTNFJTNDJTJGbGklM0UlMEElMDklMDklMDklMDklMDklM0NsaSUzRSUzQ2ElMjBocmVmJTNEJTIyJTIzJTIyJTNFTWFzY2FyYSUyMGZvciUyMGZ1bGwlMjBsYXNoZXMlMjBNYXNjYXJhJTNDJTJGYSUzRSUzQyUyRmxpJTNFJTBBJTA5JTA5JTA5JTA5JTA5JTNDbGklM0UlM0NhJTIwaHJlZiUzRCUyMiUyMyUyMiUzRU9mZmljYWwlMjBDb3NtZS1kZWNvbSUyME1heWJlbGxpbiUyMGZhY2UlM0MlMkZhJTNFJTNDJTJGbGklM0UlMEElMDklMDklMDklMDklMDklM0NsaSUzRSUzQ2ElMjBocmVmJTNEJTIyJTIzJTIyJTNFT2ZmaWNhbCUyMENvc21lLWRlY29tJTNDJTJGYSUzRSUzQyUyRmxpJTNFJTBBJTA5JTA5JTA5JTA5JTA5JTNDbGklM0UlM0NhJTIwaHJlZiUzRCUyMiUyMyUyMiUzRUxhZHklMjBEaW9yJTIwbWFzY2FyYSUzQyUyRmElM0UlM0MlMkZsaSUzRSUwQSUwOSUwOSUwOSUwOSUzQyUyRnVsJTNFJTBBJTA5JTA5JTA5JTNDJTJGZGl2JTNFJTBBJTA5JTA5JTNDJTJGZGl2JTNFJTBBJTA5JTNDJTJGZGl2JTNFJTBBJTNDJTJGZGl2JTNF[/vc_raw_html][/vc_column][/vc_row] |
The Frontend Appearance:
The Backend Settings: Please click Here for more details.
The Frontend Appearance:
The Backend Settings: Please click Here for more details.
The Frontend Appearance:
The Backend Settings: Please click Here for more details.
The Frontend Appearance:

The Backend Settings: Please click Here for more details.
Note: The items having same level could have same configuration and the Theme Location is chosen as folowing image:

The Frontend Appearance:
In your Administrator Page, please go to Appearance > Menus and select the menu to configure its structure.
The Backend Settings: Please click Here for more details.
The Frontend Appearance:
In your Administrator Page, please go to Appearance > Menus and select the menu to configure its structure.
The Backend Settings: Please click Here for more details.
The Frontend Appearance:

In your Administrator Page, please go to Appearance > Menus and select the menu to configure its structure.
The Backend Settings: Please click Here for more details.
The Frontend Appearance:
In your Administrator Page, please go to Appearance > Menus and select the menu to configure its structure.
The Backend Settings: Please click Here for more details.
The Frontend Appearance:

In your Administrator Page, please go to Appearance > Menus and select the menu to configure its structure.
The Backend Settings: Please click Here for more details.
Note: After completing the Theme Installation process, the layouts are available in your site. Now you can check and see how they are set and then can configure your site as your expectations.
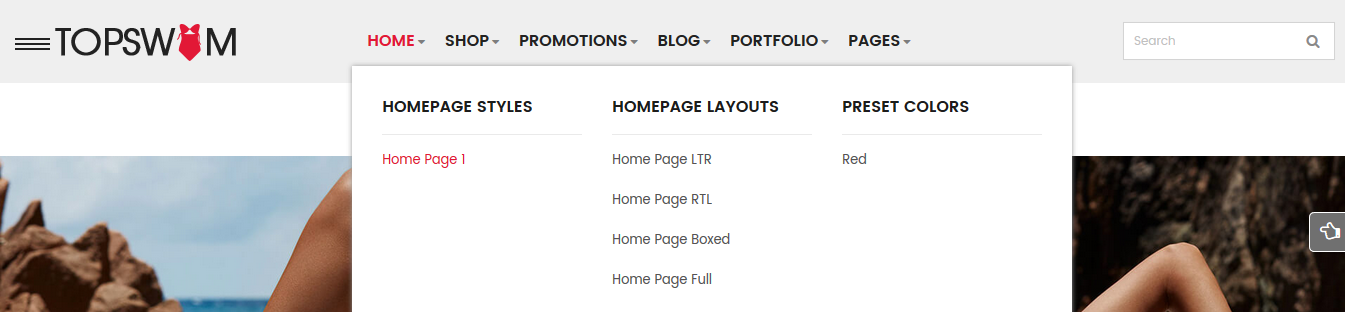
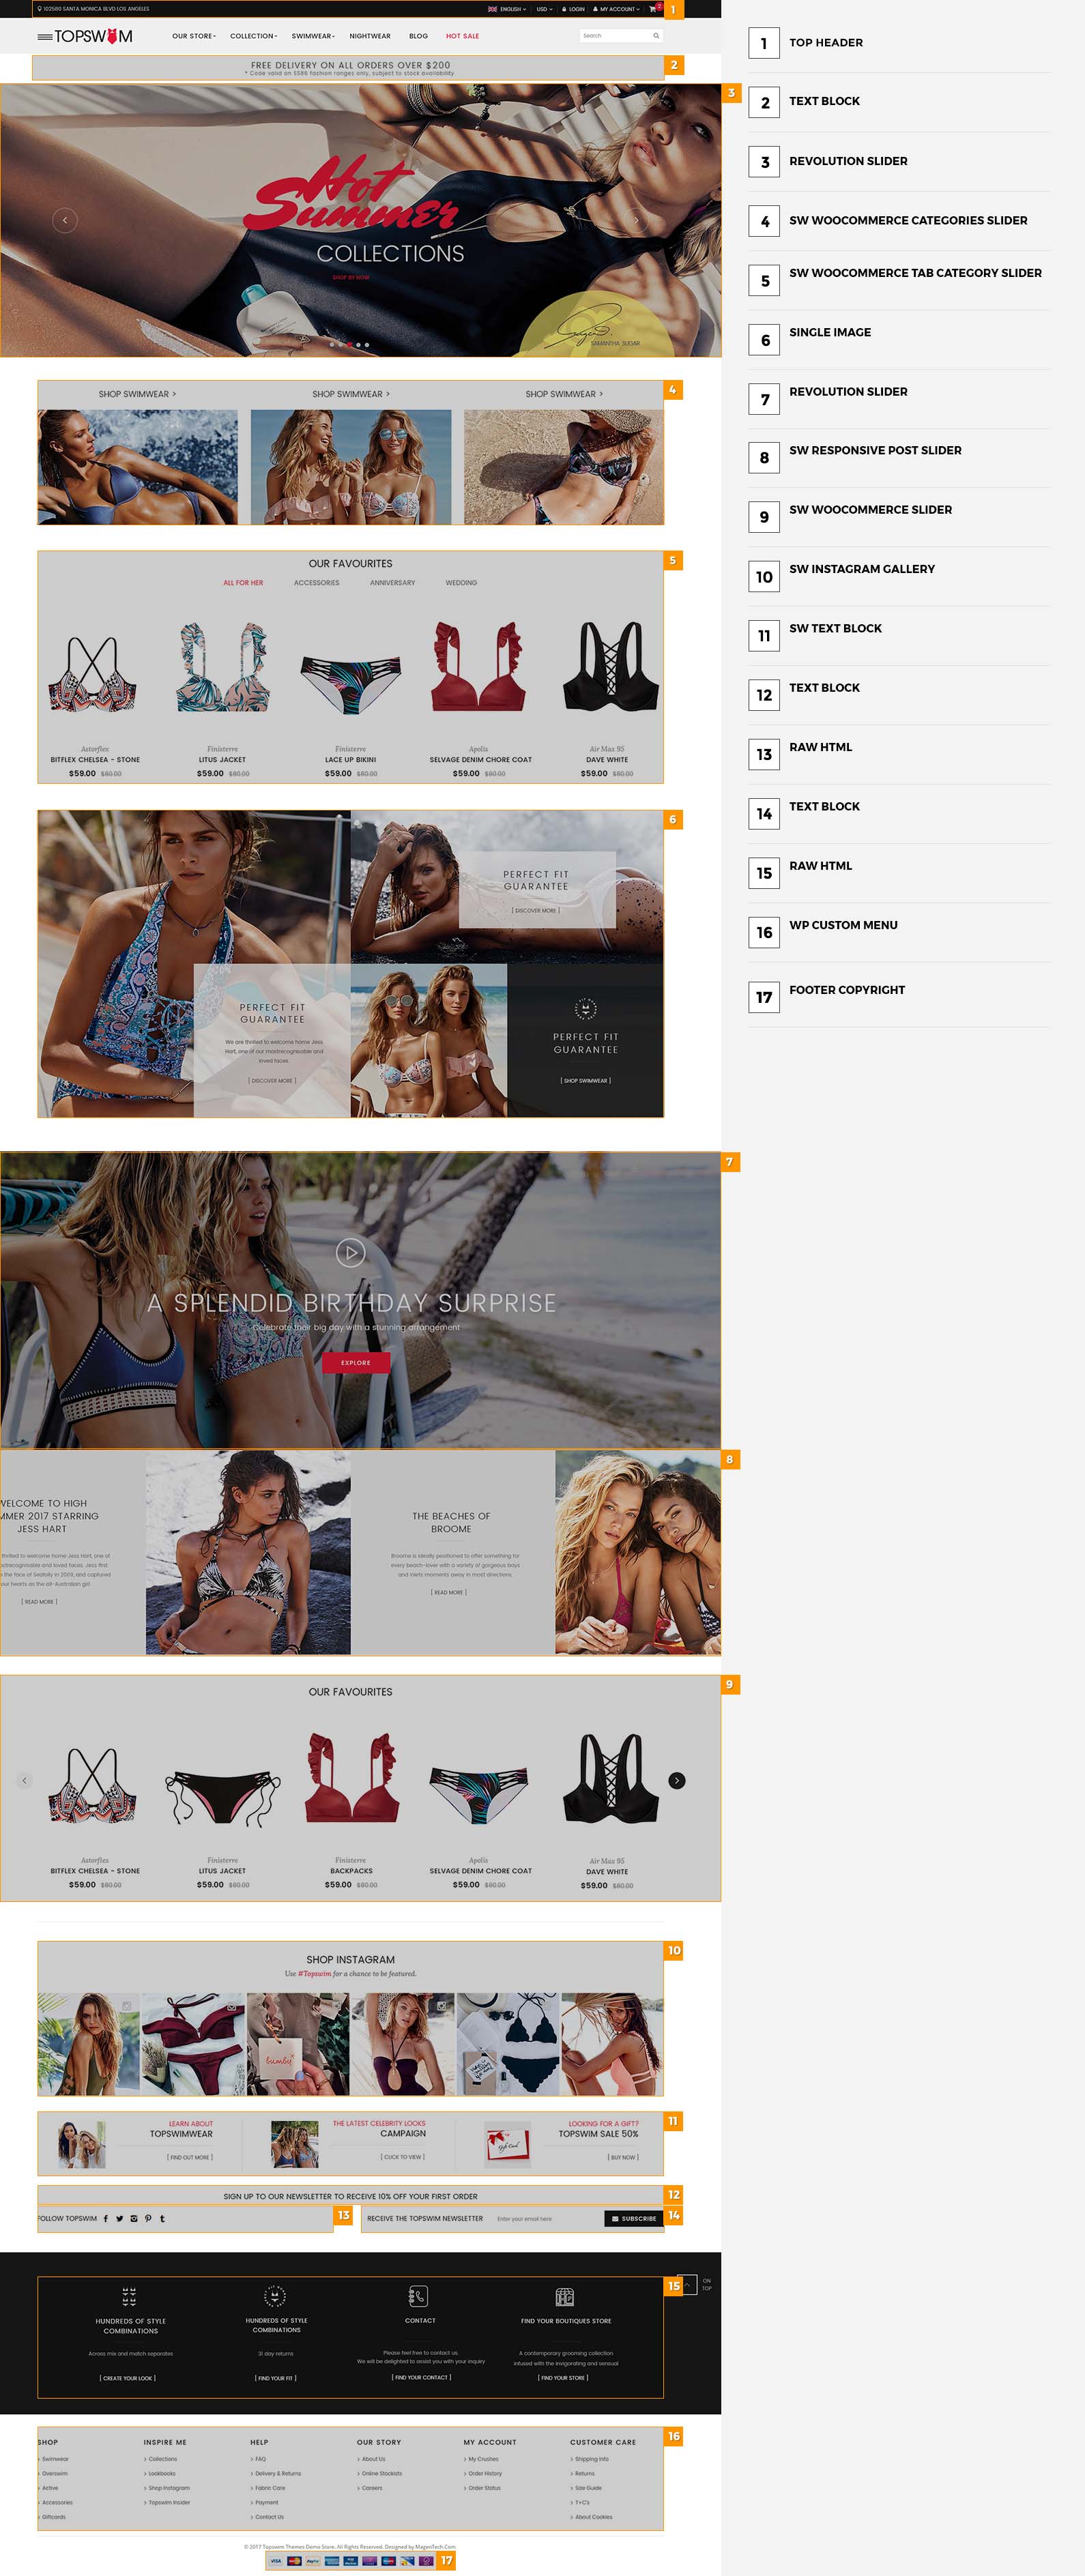
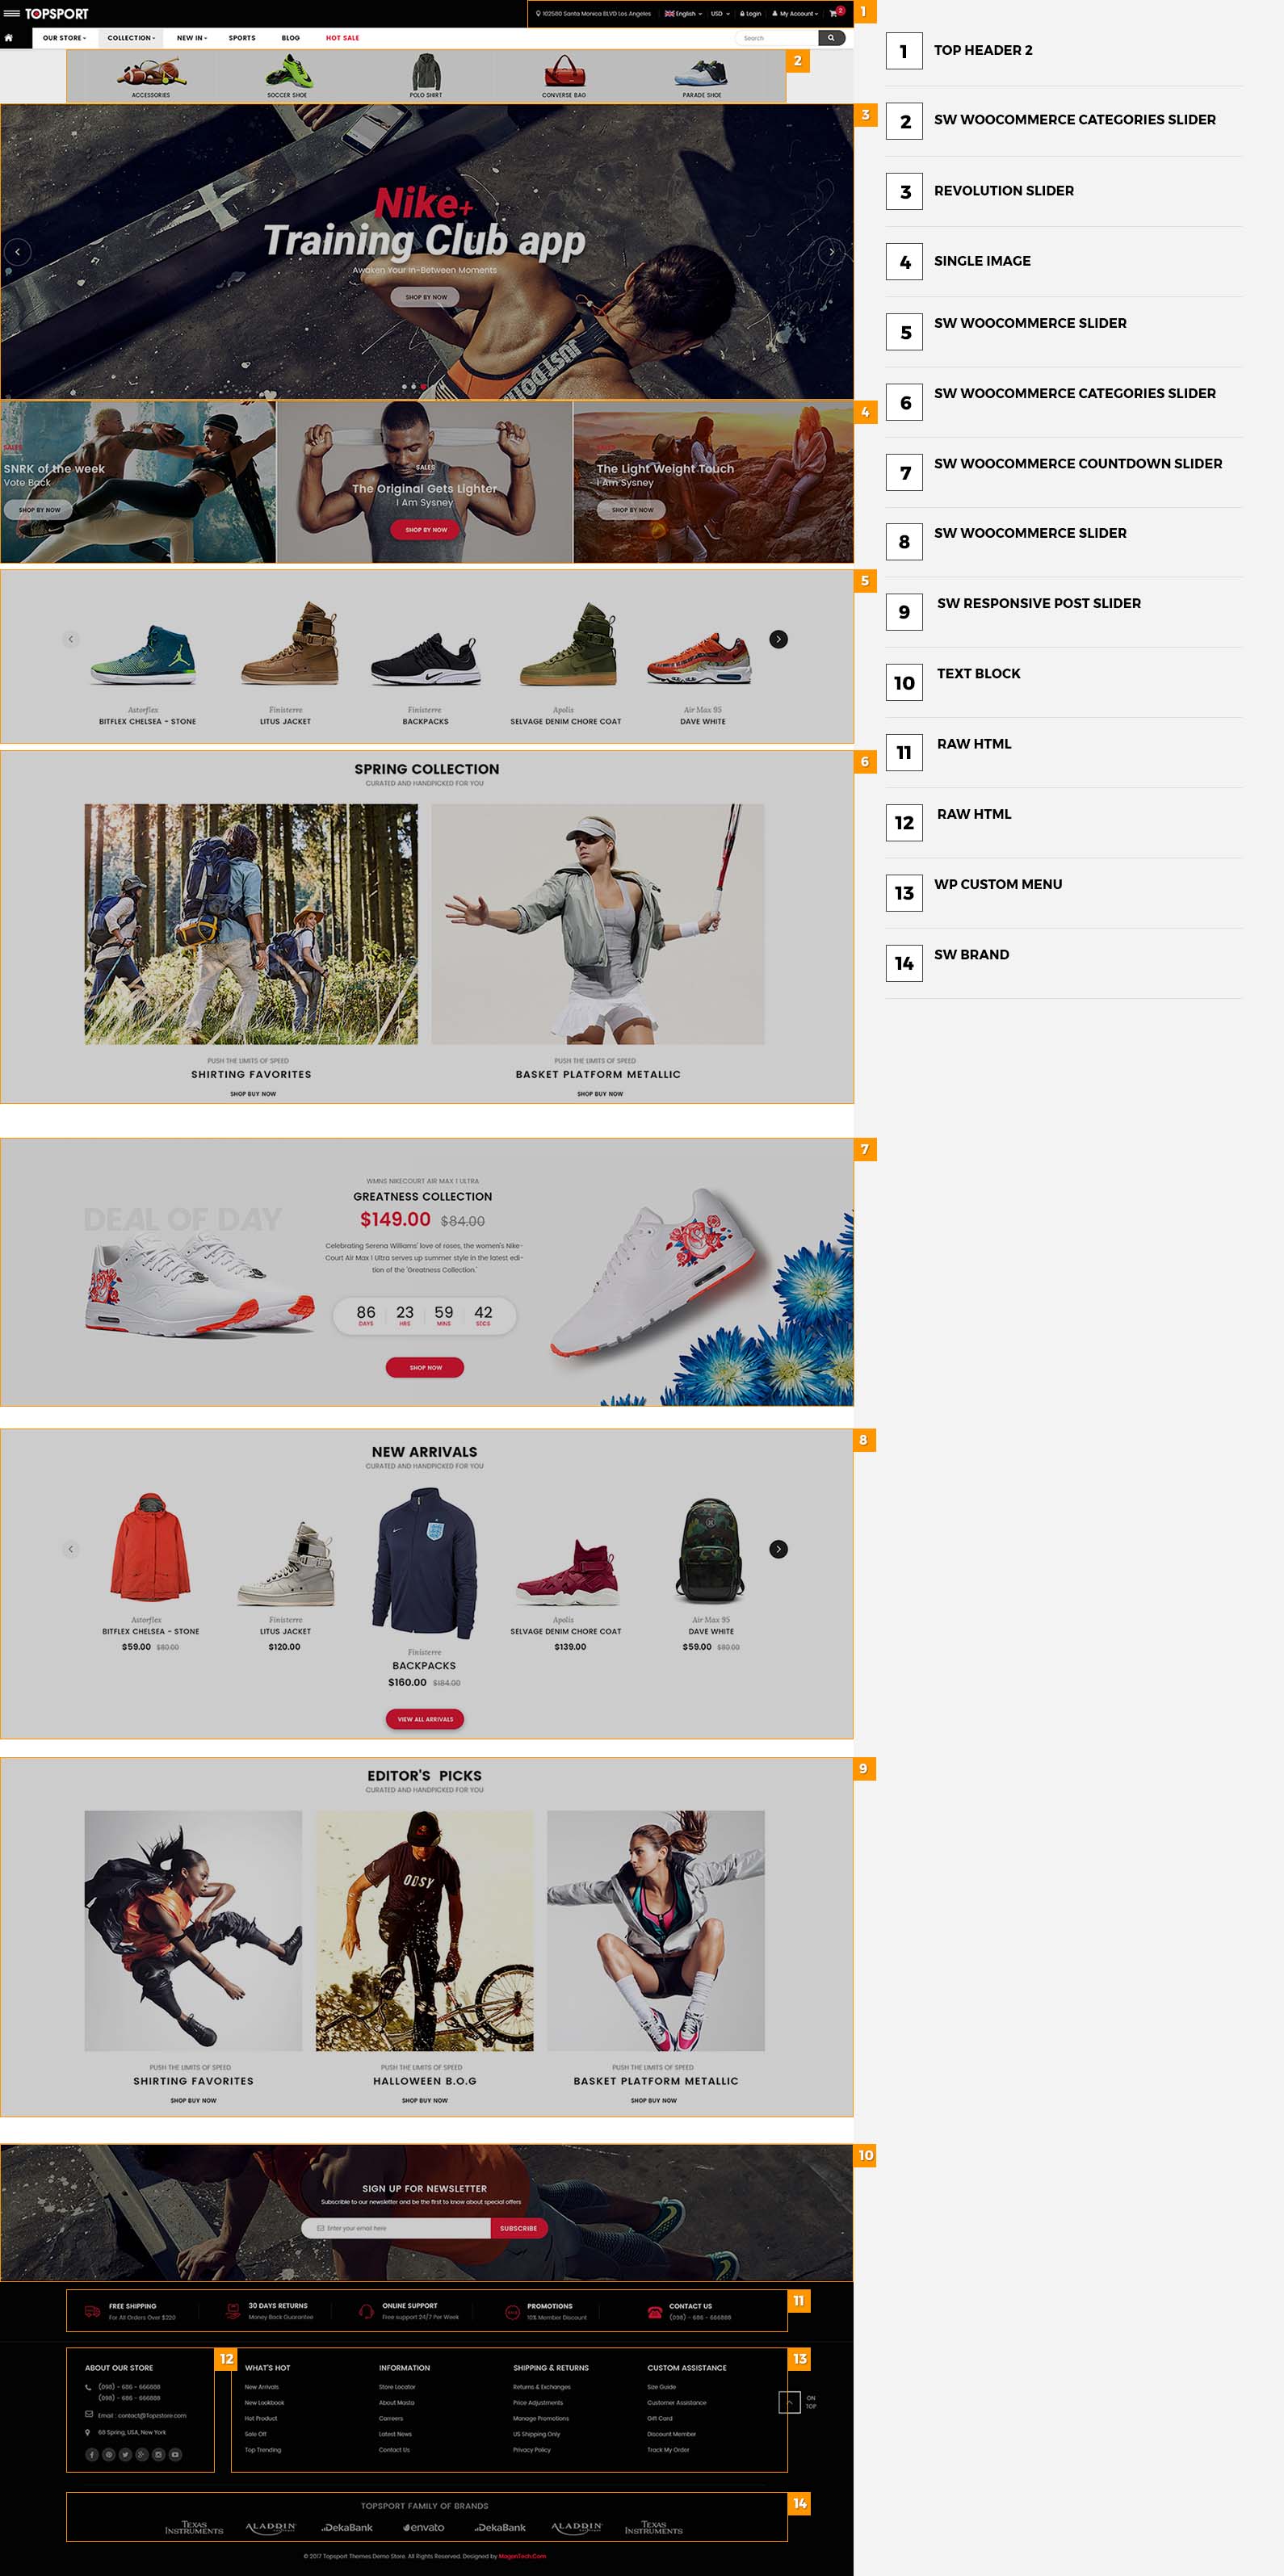
10.1 SW TopZ Home Page 1
Note:
In the Admin Panel, please navigate to Page >> All Page >> Home Page to custom this home page’s settings.
- Backend Setting: Please click Here for more detail about the setting of this page.
- Page Metabox: This section give you a chance to custom this homepage here. The setting fields will know which settings your page will handle.
Please note that, if you do not have any special idea here, this page settings will be set as in the Theme Options section. You can custom your page in the Backend Settings.- This home page uses Header and Footer Style 1 and Copyright Footer Style 1
10.1.0 [Video] SW TopZ Page Settings
First of all, please see the video about row, column and image settings in this page from the front end when editing with Visual Composer.
Please pay attention to the Extra class name and Design Options including margin, padding for each block.
10.1.1 Top Header

In your Administrator Page, please go to Appearance > Widgets and choose this one to configure as you want.
The Backend Settings: Please click Here to see more details.
You can copy & Paste the code into your editor:
* Text 1:
|
1 |
<div class="header-map"><i class="fa fa-map-marker" aria-hidden="true"></i>102580 Santa Monica BLVD Los Angeles</div> |
* Text 2:
|
1 2 3 4 5 6 7 8 9 10 11 12 13 14 15 16 17 18 19 20 21 22 23 |
<div id="lang_sel"> <ul class="nav"> <li> <a class="lang_sel_sel icl-en" href="#"> English </a> <ul> <li class="icl-en"> <a href="[get_url]&direction=ltr"> <img class="iclflag" title="English" alt="en" src="[bloginfo]/wp-content/themes/topz/assets/img/en.png" width="18" height="12"/> English </a> </li> <li class="icl-ar"> <a href="[get_url]&direction=rtl"> <img class="iclflag" title="Arabic" alt="ar" src="[bloginfo]/wp-content/themes/topz/assets/img/ar.png" width="18" height="12"/> Arabic </a> </li> </ul> </li> </ul> </div> |
10.1.2 Text Block
View Demo:

After opening the homepage with Visual Composer, click on “pencil” button  at center of this part to configure its backend settings.
The pop-up window will display the Backend Setting , then you can configure the item as you want.
- General Settings: Please click Here for more detail.
- Row Settings: Please click Here for more detail.
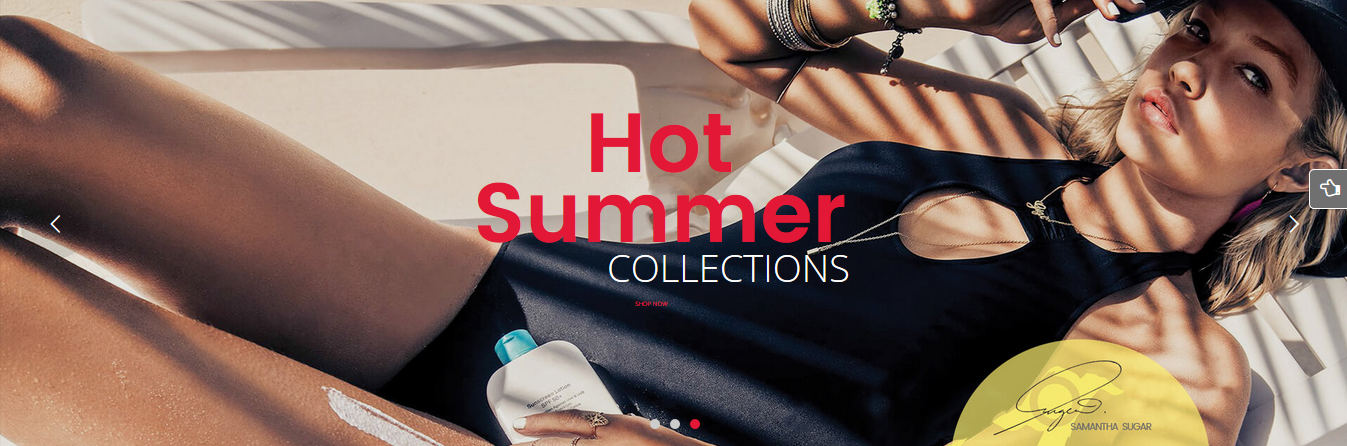
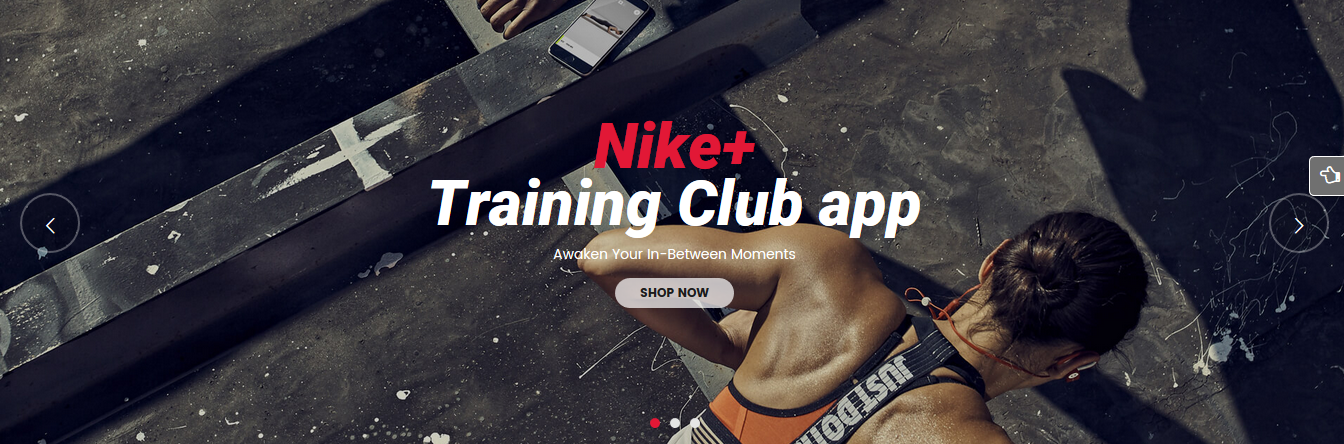
10.1.3 Revolution Slider
View Demo:
After opening the homepage with Visual Composer, click on “pencil” button at center of this part to configure its backend settings.
The pop-up window will display the Backend Setting , then you can configure the item as you want.
- General Settings: Please click Here for more detail.
To configure these slides in this page, you need to follow these steps:
- Step 1: In your Administrator Page, please go to Revolution Slider > Revolution Slider, click on “pencil” symbol

.
- Step 2: After opening Slide Editor Panel, you could configure your slides such as Images, Text and Animation.
Let’s see the Backend Settings for more details. - NOTE:
About this Slider Revolution plugin, you can refer to the Slider Revolution Documentation and Slider Revolution Tutorial Videos for more detail.
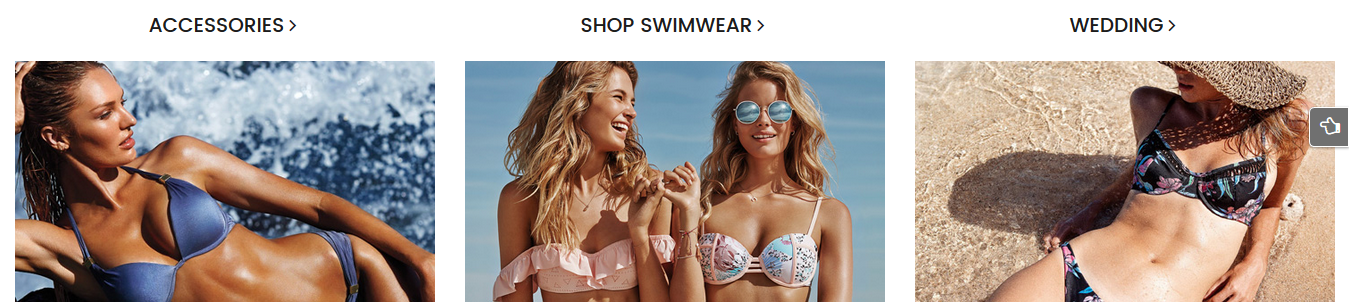
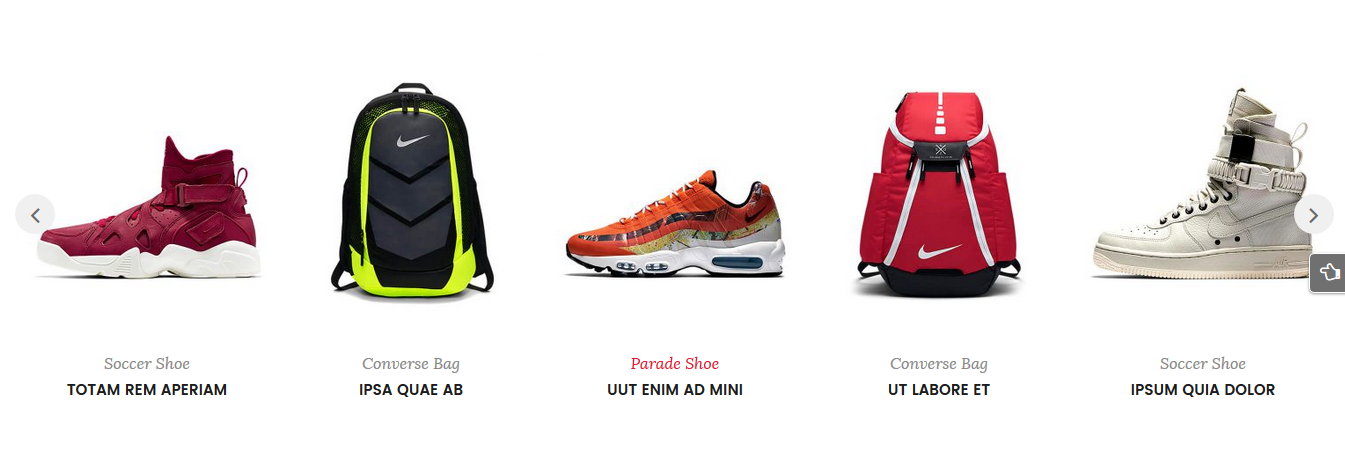
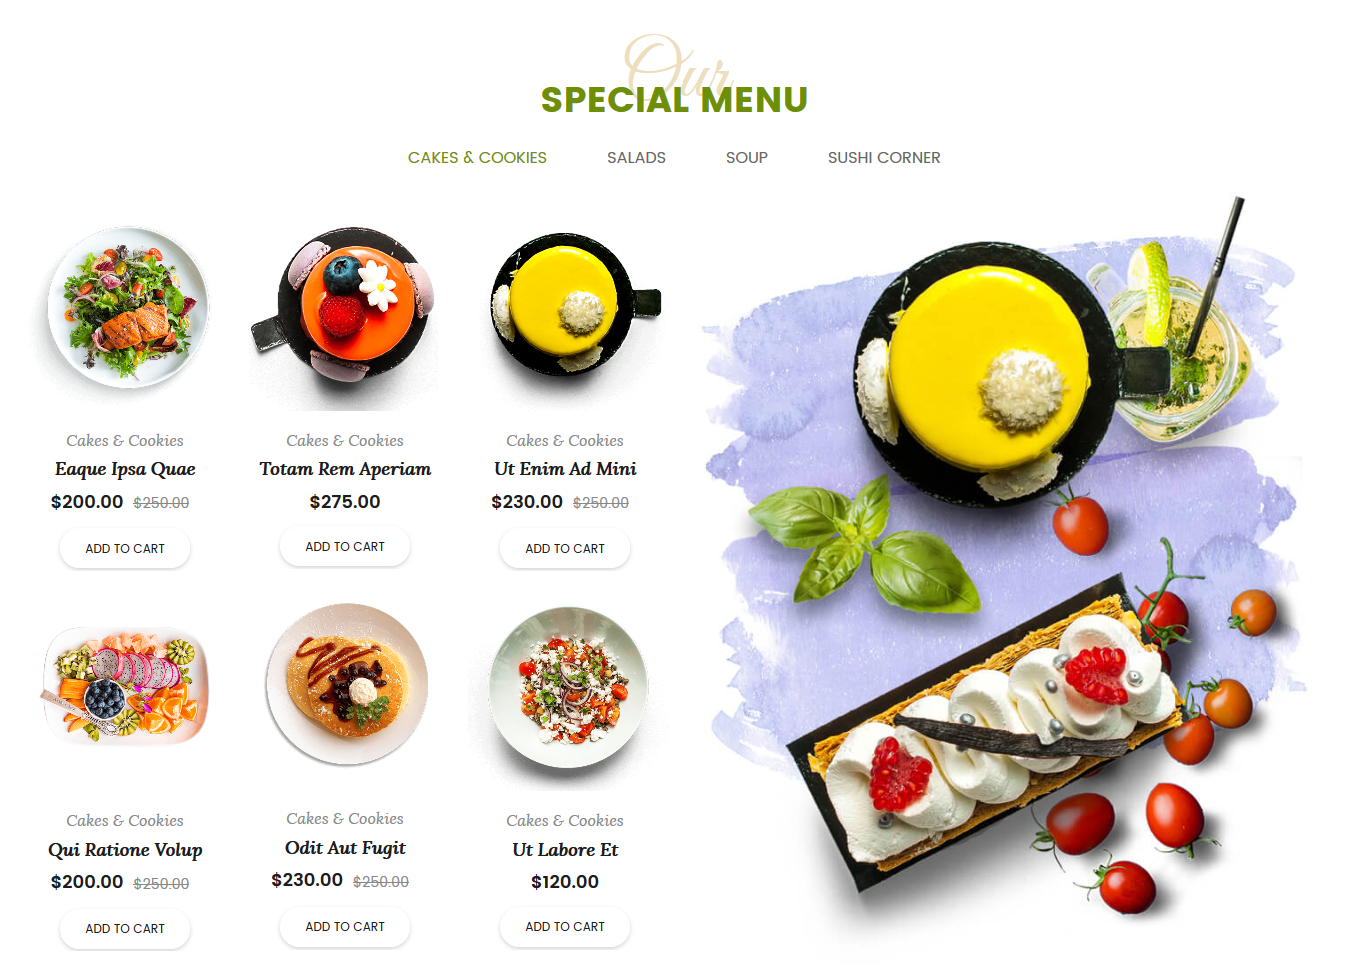
10.1.4 SW WooCommerce Categories Slider
View Demo:
After opening the homepage with Visual Composer, click on “pencil” button at center of this part to configure its backend settings.
The pop-up window will display the Backend Setting , then you can configure the item as you want.
- General Settings: Please click Here for more detail.
- Row Settings: Please click Here for more detail.
- Column Settings: Please click Here for more detail. The Extra class name
content-wrapshould be added to have the same style as in the demo.
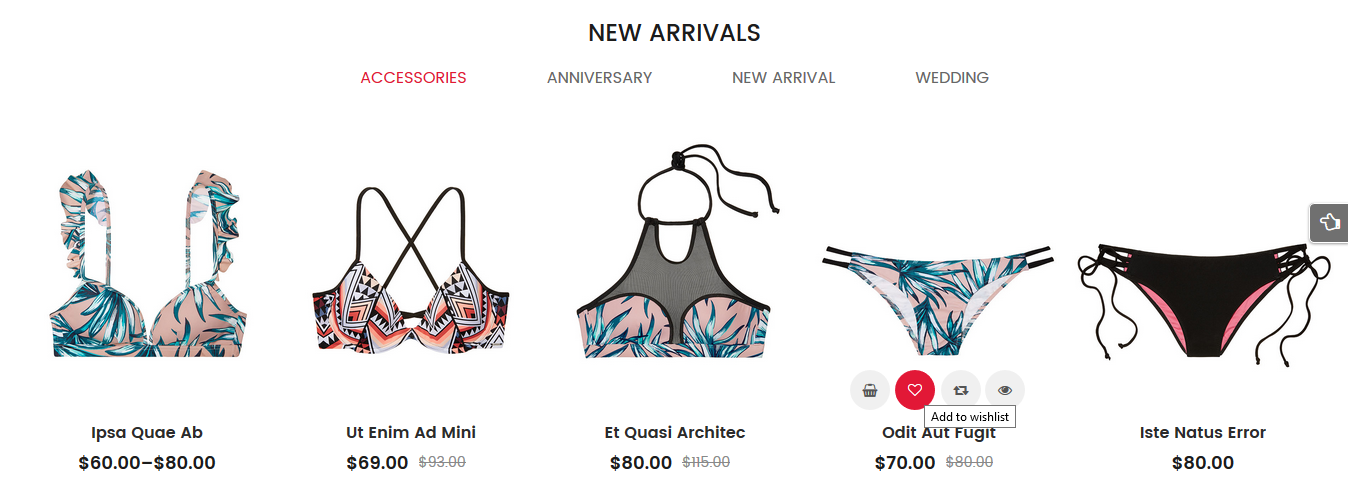
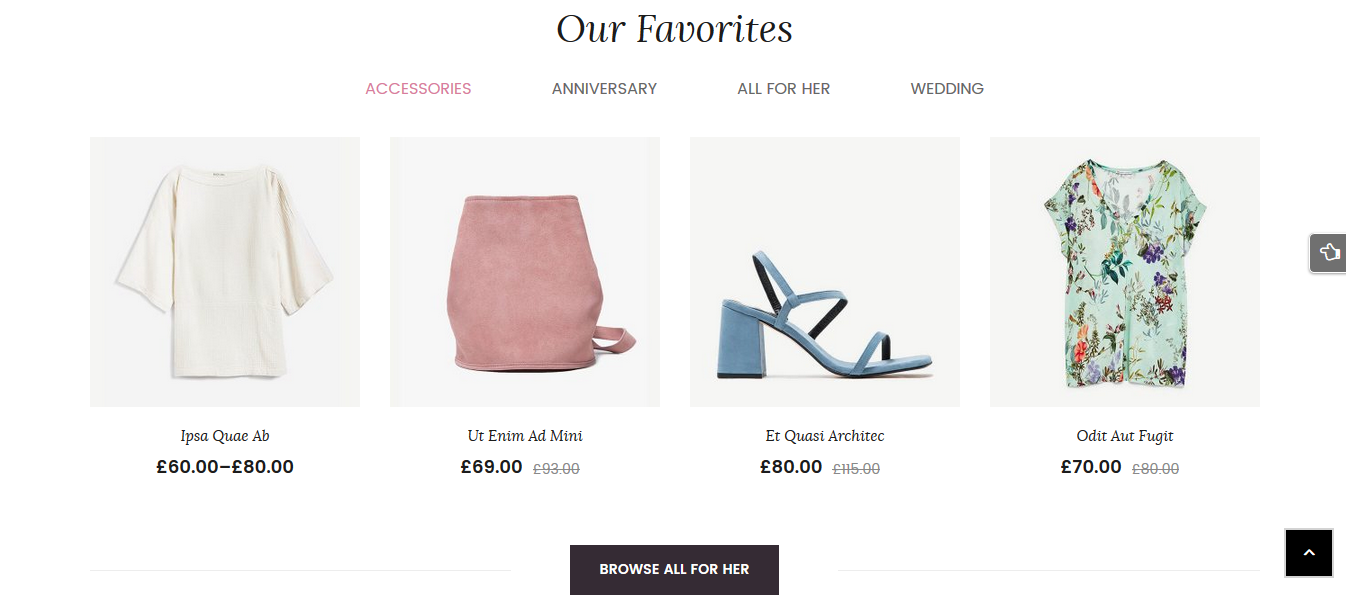
10.1.5 SW WooCommerce Tab Category Slider
View Demo:
After opening the homepage with Visual Composer, click on “pencil” button at center of this part to configure its backend settings
The pop-up window will display the backend settings, so you can configure the item as you want:
- General Settings: Please click Here for more detail.
- Row Settings: Please click Here for more detail.
- Column Settings: Please click Here for more detail. The Extra class name
content-wrapshould be added to have the same style as in the demo.
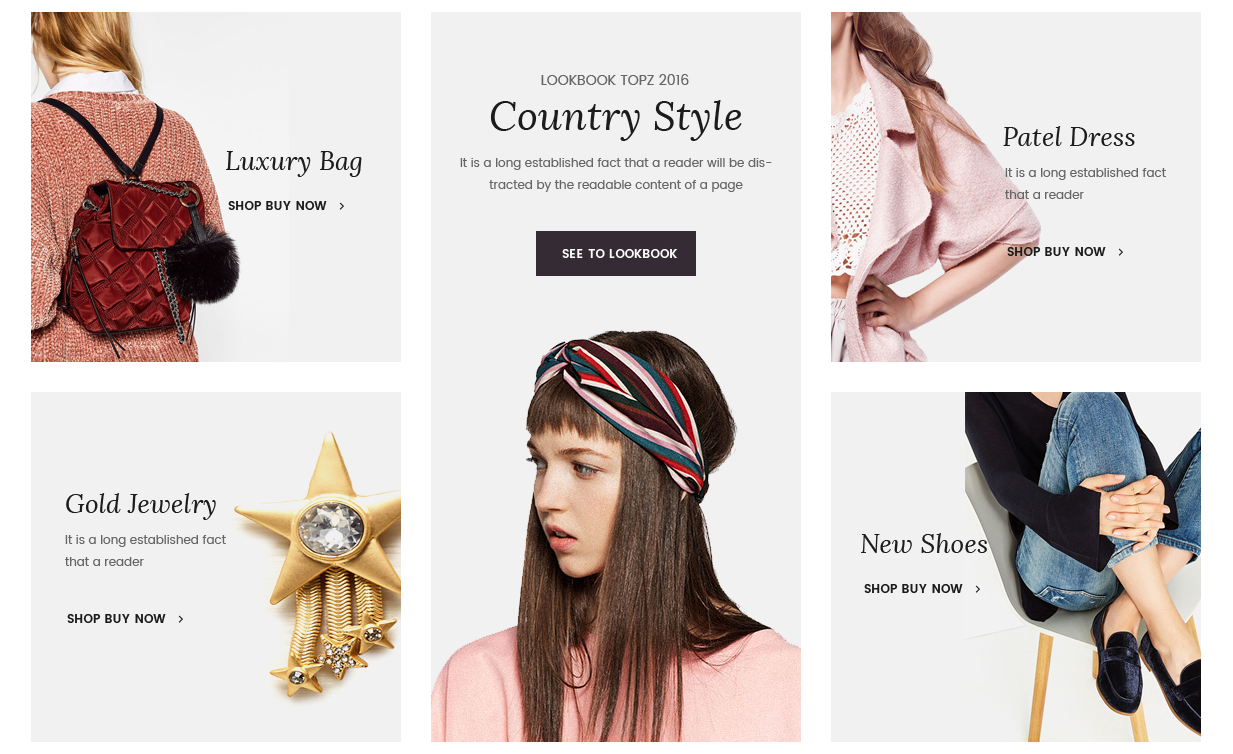
10.1.6 Single Image
View Demo:
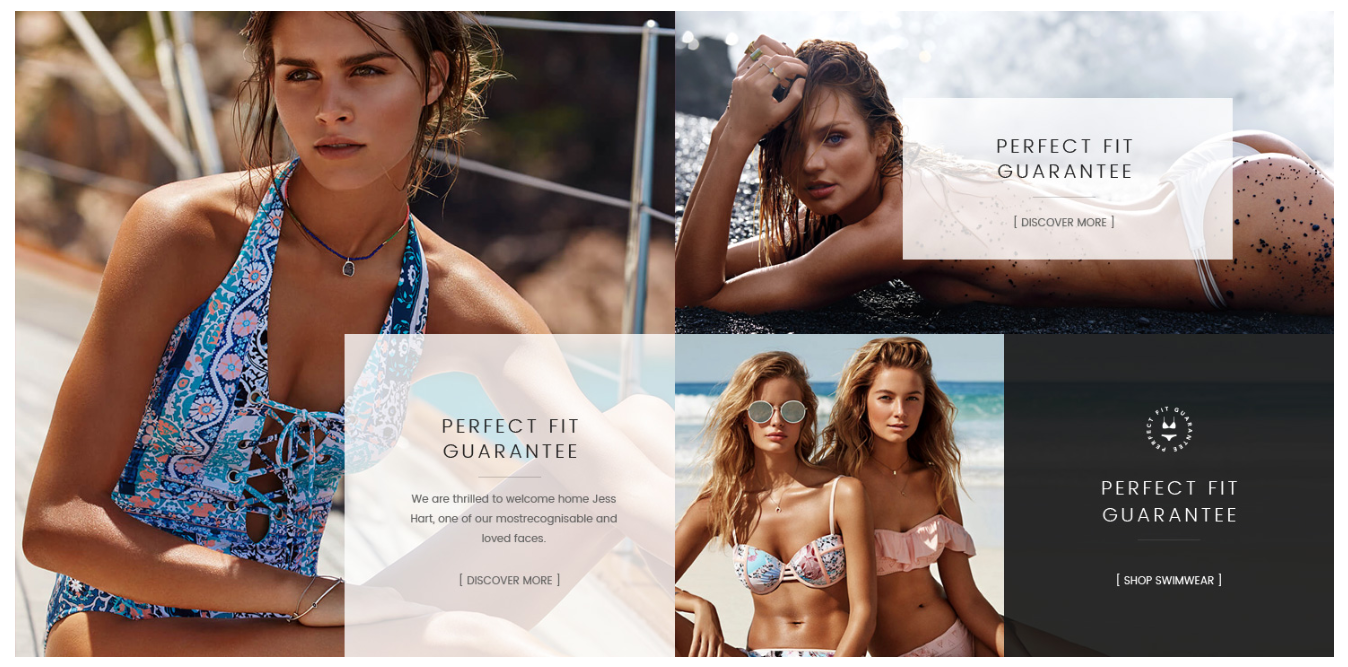
After opening the homepage with Visual Composer, click on “pencil” button at center of this part to configure its backend settings.
The pop-up window will display the backend settings, so you can configure the item as you want:
- General Settings: Please click Image 1, Image 2, Image 3 for more detail. The Extra class name
banner-sigle,banner-sigle,hidden-xs banner-sigleshould be added into Image 1, 2, 3 to have the same style as in the demo. - Row Settings: Please click Here for more detail.
- Inner Column 1 Settings: Please click Here for more detail. The Extra class name
hidden-xsshould be added to have the same style as in the demo.
10.1.7 Revolution Slider
View Demo:
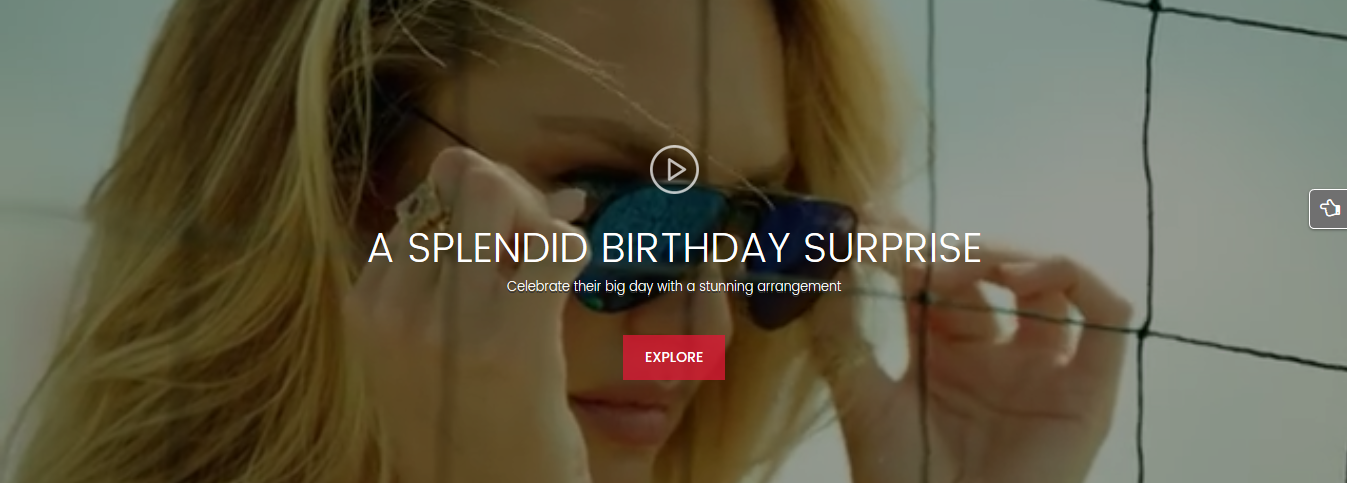
After opening the homepage with Visual Composer, click on “pencil” button at center of this part to configure its backend settings.
The pop-up window will display the backend settings, so you can configure the item as you want:
- General Settings: Please click Here for more detail.
- About Revolution Slider Configuration, you can refer to the one in Slider Home 1 for more detail.
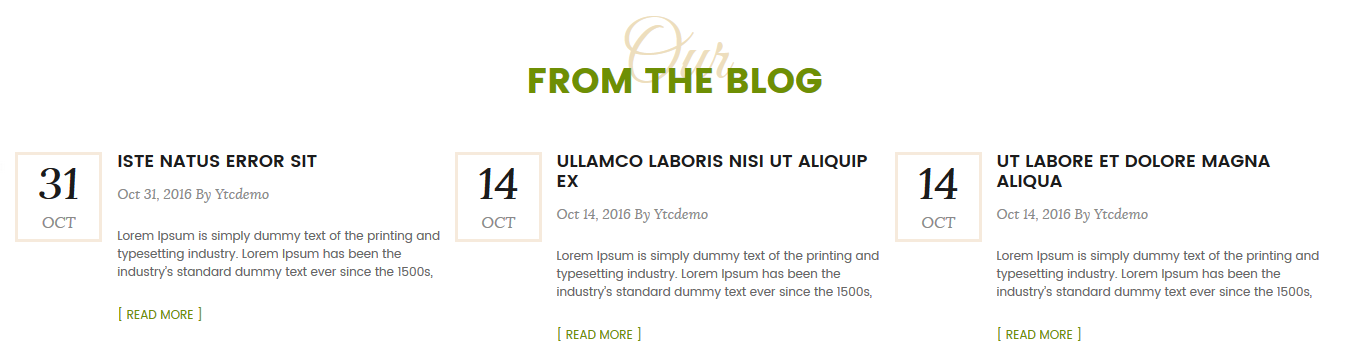
10.1.8 SW Responsive Post Slider
View Demo:

After opening the homepage with Visual Composer, click on “pencil” button at center of this part to configure its backend settings.
The pop-up window will display the backend settings, so you can configure the item as you want:
- General Settings: Please click Here for more detail.
- Row Settings: Please click Here for more detail.
10.1.9 SW WooCommerce Slider
View Demo:
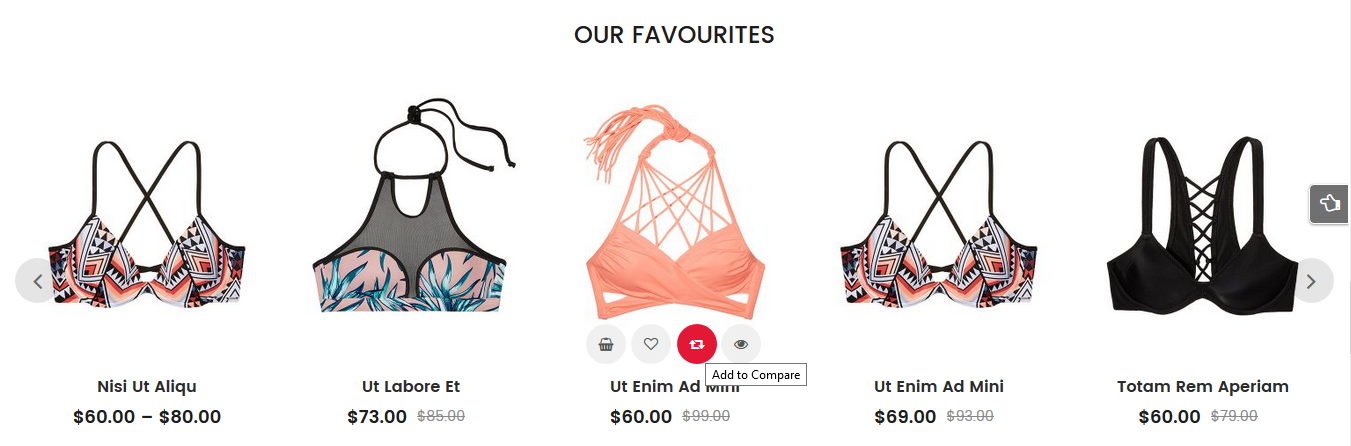
After opening the homepage with Visual Composer, click on “pencil” button at center of this part to configure its backend settings.
The pop-up window will display the backend settings, so you can configure the item as you want:
- General Settings: Please click Here for more detail.
- Row Settings: Please click Here for more detail.
- Column Settings: Please click Here for more detail. The Extra class name
content-wrapshould be added to have the same style as in the demo.
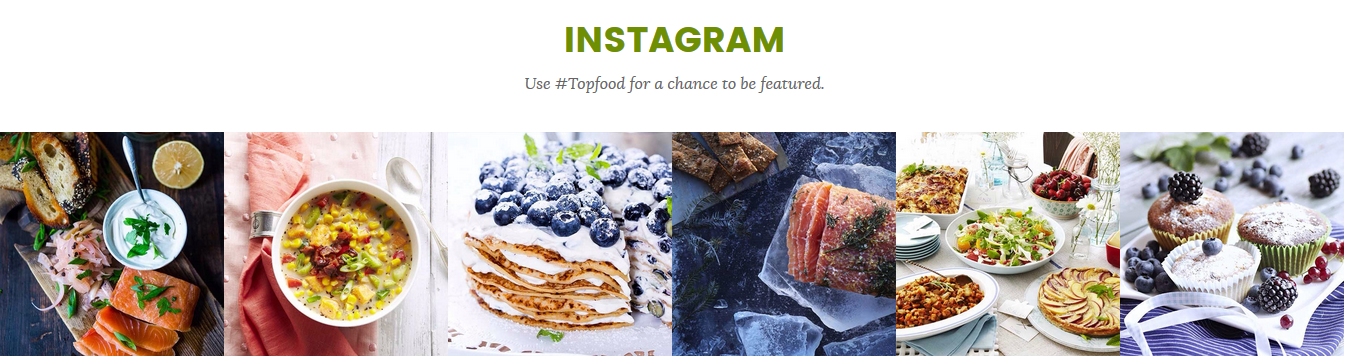
10.1.10 SW Instagram Gallery
View Demo:
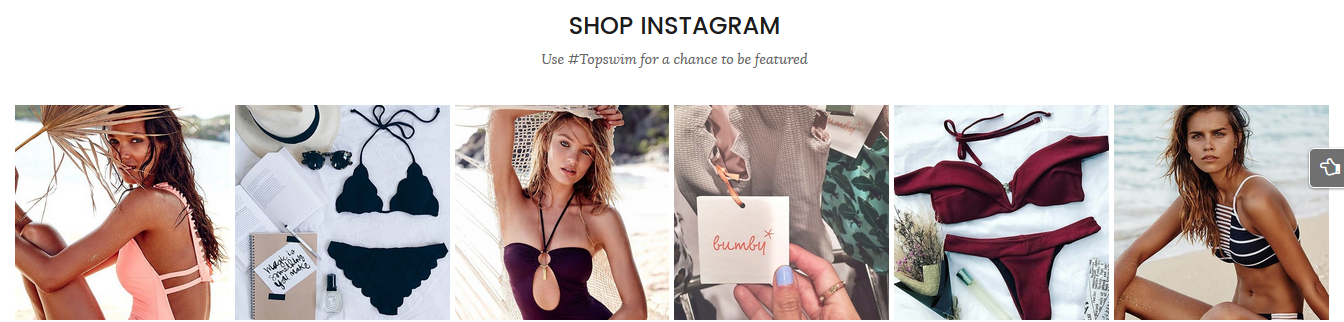
After opening the homepage with Visual Composer, click on “pencil” button at center of this part to configure its backend settings.
The pop-up window will display the backend settings, so you can configure the item as you want:
- General Settings: Please click Here for more detail. Please remember to insert your Instagram User ID and Access Token value.
- Row Settings: Please click Here for more detail.
- Column Settings: Please click Here for more detail. The Extra class name
content-wrapshould be added to have the same style as in the demo.
10.1.11 SW Text Block
View Demo:

After opening the homepage with Visual Composer, click on “pencil” button at center of this part to configure its backend settings.
The pop-up window will display the backend settings, so you can configure the item as you want:
- General Settings: Please click Here for more detail.
- Row Settings: Please click Here for more detail.
- Column Settings: Please click Here for more detail. The Extra class name
content-wrapshould be added to have the same style as in the demo.
10.1.12 Text Block
View Demo:

After opening the homepage with Visual Composer, click on “pencil” button at center of this part to configure its backend settings.
The pop-up window will display the backend settings, so you can configure the item as you want:
- General Settings: Please click Here for more detail.
- Rows Settings: Please click Here for more detail.
- Column Settings: Please click Here for more detail. The Extra class name
content-wrapshould be added to have the same style as in the demo.
Copy & Paste the code into your editor:
|
1 |
<div class="title-sign">SIGN UP TO OUR NEWSLETTER TO RECEIVE 10% OFF YOUR FIRST ORDER</div> |
10.1.13 Raw HTML
View Demo:

After opening the homepage with Visual Composer, click on “pencil” button at center of this part to configure its backend settings.
The pop-up window will display the backend settings, so you can configure the item as you want:
- General Settings: Please click Here for more detail.
Copy & Paste the code into your editor:
|
1 2 3 4 5 6 7 8 9 10 |
<div class="socials-footer"> <h3>Follow topswim</h3> <ul> <li><a href="https://www.facebook.com/wpthemego" title="Face Book"><span class="fa fa-facebook"></span></a></li> <li><a href="https://twitter.com/wpthemego" title="Twitter"><span class="fa fa-twitter"></span></a></li> <li><a href="https://www.pinterest.com/wpthemego/" title="pinterest"><span class="fa fa-pinterest"></span></a></li> <li><a href="#" title="Skype"><span class="fa fa-skype"></span></a></li> <li><a href="https://plus.google.com/u/0/117616422700848151321" title="Google Plus"><span class="fa fa-instagram"></span></a></li> </ul> </div> |
10.1.14 Text Block
View Demo:

This is a part in the footer of the page. This page uses Footer Style 1. To configure this one, please go to Pages >> Footer Style 1 to edit the element with Visual Composer.
- General Settings: Please click Here for more detail.
Copy & Paste the code into your editor:
|
1 2 3 4 |
<div class="newsletter-footer"> <h3>Receive the topswim newsletter</h3> <div class="form-newsletter">[mc4wp_form id="3508"]</div> </div> |
10.1.15 Raw HTML
View Demo:
After opening the homepage with Visual Composer, click on “pencil” button at center of this part to configure its backend settings.
The pop-up window will display the backend settings, so you can configure the item as you want:
- General Settings: Please click Here for more detail.
- Row Settings: Please click Here for more detail.
- Column Settings: Please click Here for more detail. The Extra class name
content-wrapshould be added to have the same style as in the demo.
Copy & Paste the code into your editor:
|
1 2 3 4 5 6 7 8 9 10 |
<div class="socials-footer"> <h3>Follow topswim</h3> <ul> <li><a href="https://www.facebook.com/wpthemego" title="Face Book"><span class="fa fa-facebook"></span></a></li> <li><a href="https://twitter.com/wpthemego" title="Twitter"><span class="fa fa-twitter"></span></a></li> <li><a href="https://www.pinterest.com/wpthemego/" title="pinterest"><span class="fa fa-pinterest"></span></a></li> <li><a href="#" title="Skype"><span class="fa fa-skype"></span></a></li> <li><a href="https://plus.google.com/u/0/117616422700848151321" title="Google Plus"><span class="fa fa-instagram"></span></a></li> </ul> </div> |
10.1.16 Footer Style 1
View Demo:

This is footer of the page. This page uses Footer Style 1. To configure this one, please go to Pages >> Footer Style 1 to edit the element with Visual Composer.
- General Settings: Please click Here for more detail.
You can Copy & Paste the code into your editor:
|
1 |
[vc_row el_class="footer-style1"][vc_column width="1/6"][vc_wp_custommenu title="Shop" nav_menu="93"][/vc_column][vc_column width="1/6"][vc_wp_custommenu title="Inspire Me" nav_menu="92"][/vc_column][vc_column width="1/6"][vc_wp_custommenu title="Help" nav_menu="94"][/vc_column][vc_column width="1/6"][vc_wp_custommenu title="Our Story" nav_menu="92"][/vc_column][vc_column width="1/6"][vc_wp_custommenu title="My Account" nav_menu="91"][/vc_column][vc_column width="1/6"][vc_wp_custommenu title="Customer Care" nav_menu="93"][/vc_column][/vc_row] |
10.1.17 Footer Copyright
View Demo:

In your Administrator Page, please go to Appearance > Widgets and choose this one to configure as you want.
- General Settings: Please click Here for more detail.
10.2 SW TopZ Home Page 2
Note:
In the Admin Panel, please navigate to Page >> All Page >> Home Page 2 to custom this home page’s settings.
- Backend Setting: Please click Here for more detail about the setting of this page.
- Page Metabox: This section give you a chance to custom this homepage here. The setting fields will know which settings your page will handle.
Please note that, if you do not have any special idea here, this page settings will be set as in the Theme Options section. You can custom your page in the Backend Settings.- This home page uses Header and Footer Style 2 and Copyright Footer Style 2
10.2.0 [Video] SW TopZ Page Settings
First of all, please see the video about row, column and image settings in this page from the front end when editing with Visual Composer.
Please pay attention to the Extra class name and Design Options including margin, padding for each block.
10.2.1 Top Header 2

In your Administrator Page, please go to Appearance > Widgets and choose this one to configure as you want.
The Backend Settings: Please click Here to see more details.
You can copy & Paste the code into your editor:
* Text 1:
|
1 2 3 4 5 6 7 8 9 10 11 12 13 14 15 16 17 18 19 20 21 22 23 |
<div id="lang_sel"> <ul class="nav"> <li> <a class="lang_sel_sel icl-en" href="#"> English </a> <ul> <li class="icl-en"> <a href="[get_url]&direction=ltr"> <img class="iclflag" title="English" alt="en" src="[bloginfo]/wp-content/themes/topz/assets/img/en.png" width="18" height="12"/> English </a> </li> <li class="icl-ar"> <a href="[get_url]&direction=rtl"> <img class="iclflag" title="Arabic" alt="ar" src="[bloginfo]/wp-content/themes/topz/assets/img/ar.png" width="18" height="12"/> Arabic </a> </li> </ul> </li> </ul> </div> |
* Text 2:
|
1 |
<div class="header-map"><i class="fa fa-map-marker" aria-hidden="true"></i>102580 Santa Monica BLVD Los Angeles</div> |
10.2.2 SW WooCommerce Categories Slider
View Demo:

After opening the homepage with Visual Composer, click on “pencil” button at center of this part to configure its backend settings.
The pop-up window will display the Backend Setting , then you can configure the item as you want.
- General Settings: Please click Here for more detail.
- Row Settings: Please click Here for more detail. The Extra class name
home2-catetopshould be added to have the same style as in the demo. - Column Settings: Please click Here for more detail. The Extra class name
content-wrapshould be added to have the same style as in the demo.
10.2.3 Revolution Slider
View Demo:
After opening the homepage with Visual Composer, click on “pencil” button at center of this part to configure its backend settings.
The pop-up window will display the Backend Setting , then you can configure the item as you want.
- General Settings: Please click Here for more detail.
- About Revolution Slider Configuration, you can refer to the one in Slider Home 1 for more detail.
10.2.4 Single Image
View Demo:

After opening the homepage with Visual Composer, click on “pencil” button at center of this part to configure its backend settings.
The pop-up window will display the Backend Setting , then you can configure the item as you want.
- General Settings: Please click Image 1, Image 2, Image 3 for more detail. The Extra class name
banner2-left,banner2-center,banner2-rightshould be added into Image 1, 2, 3 to have the same style as in the demo. - Row Settings: Please click Here for more detail.
10.2.5 SW WooCommerce Slider
View Demo:
After opening the homepage with Visual Composer, click on “pencil” button at center of this part to configure its backend settings
The pop-up window will display the backend settings, so you can configure the item as you want:
- General Settings: Please click Here for more detail.
- Row Settings: Please click Here for more detail.
- Column Settings: Please click Here for more detail. The Extra class name
content-wrapshould be added to have the same style as in the demo.
10.2.6 SW WooCommerce Categories Slider
View Demo:
After opening the homepage with Visual Composer, click on “pencil” button at center of this part to configure its backend settings.
The pop-up window will display the backend settings, so you can configure the item as you want:
- General Settings: Please click Here for more detail.
- Row Settings: Please click Here for more detail.
- Column Settings: Please click Here for more detail. The Extra class name
content-wrapshould be added to have the same style as in the demo.
10.2.7 SW WooCommerce Countdown Slider
View Demo:
After opening the homepage with Visual Composer, click on “pencil” button at center of this part to configure its backend settings.
The pop-up window will display the backend settings, so you can configure the item as you want:
- General Settings: Please click Here for more detail.
- Row Settings: Please click Here for more detail.
- Column Settings: Please click Here for more detail. The Extra class name
content-wrapshould be added to have the same style as in the demo.
10.2.8 SW WooCommerce Slider
View Demo:
After opening the homepage with Visual Composer, click on “pencil” button at center of this part to configure its backend settings.
The pop-up window will display the backend settings, so you can configure the item as you want:
- General Settings: Please click Here for more detail.
- Row Settings: Please click Here for more detail.
- Column Settings: Please click Here for more detail. The Extra class name
content-wrapshould be added to have the same style as in the demo.
10.2.9 SW Responsive Post Slider
View Demo:
After opening the homepage with Visual Composer, click on “pencil” button at center of this part to configure its backend settings.
The pop-up window will display the backend settings, so you can configure the item as you want:
- General Settings: Please click Here for more detail.
- Row Settings: Please click Here for more detail.
- Column Settings: Please click Here for more detail. The Extra class name
content-wrapshould be added to have the same style as in the demo.
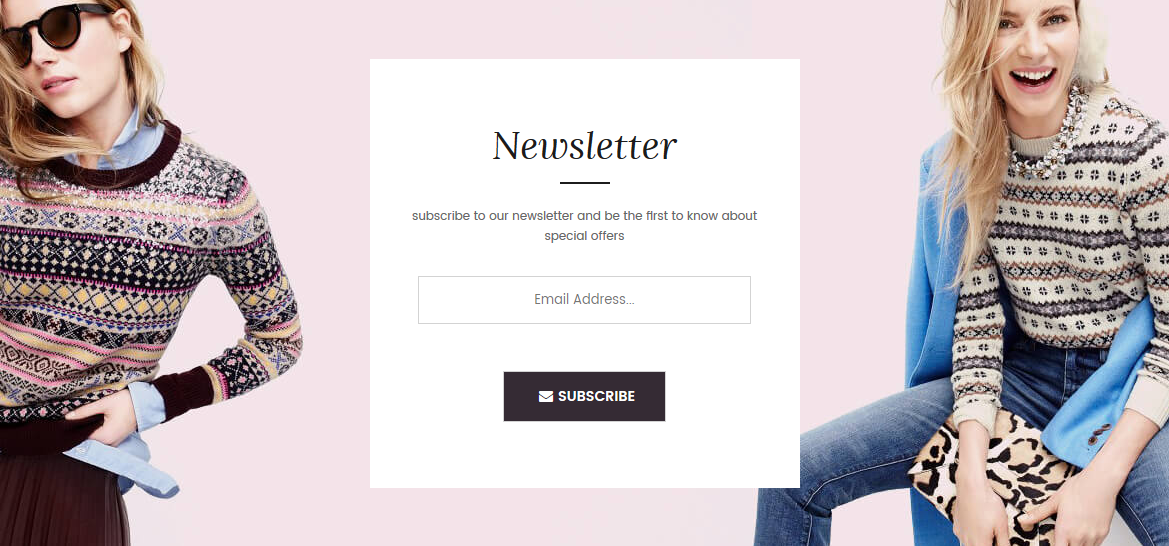
10.2.10 Text Block
View Demo:
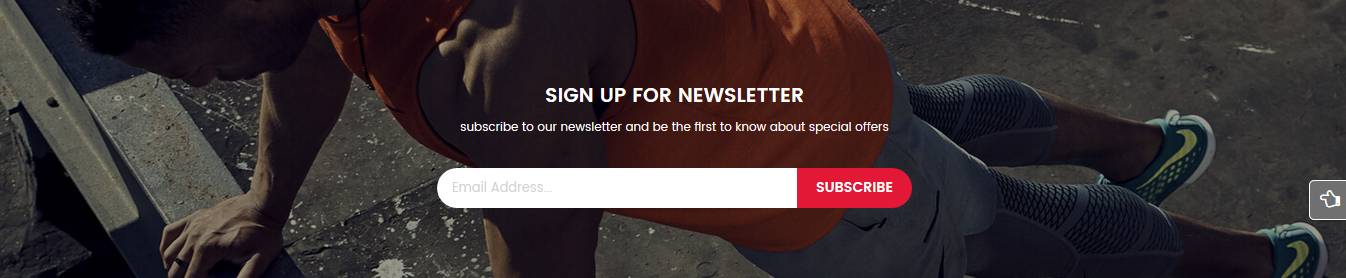
After opening the homepage with Visual Composer, click on “pencil” button at center of this part to configure its backend settings.
The pop-up window will display the backend settings, so you can configure the item as you want:
- General Settings: Please click Here for more detail.
- Row Settings: Please click Here for more detail.
Copy & Paste the code into your editor:
|
1 2 3 4 5 |
<div class="newsletter-footer2"> <h3>Sign up for newsletter</h3> subscribe to our newsletter and be the first to know about special offers <div class="form-newsletter">[mc4wp_form id="3508"]</div> </div> |
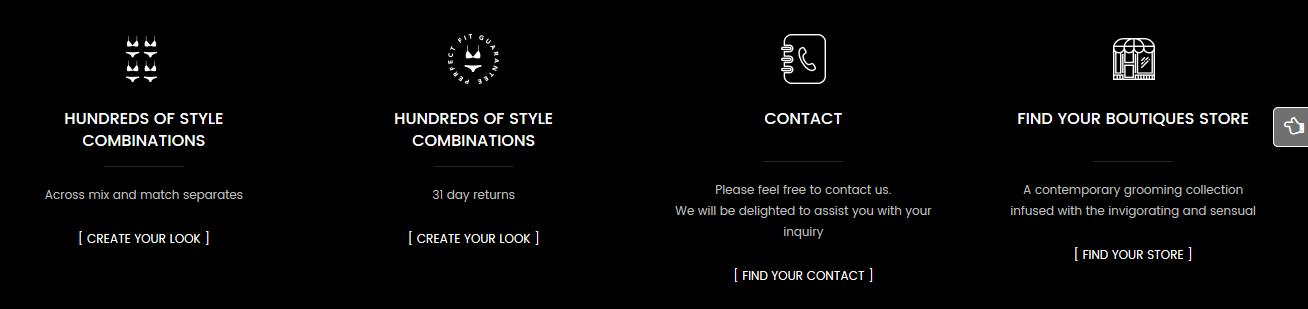
10.2.11 Footer Style 2
View Demo:
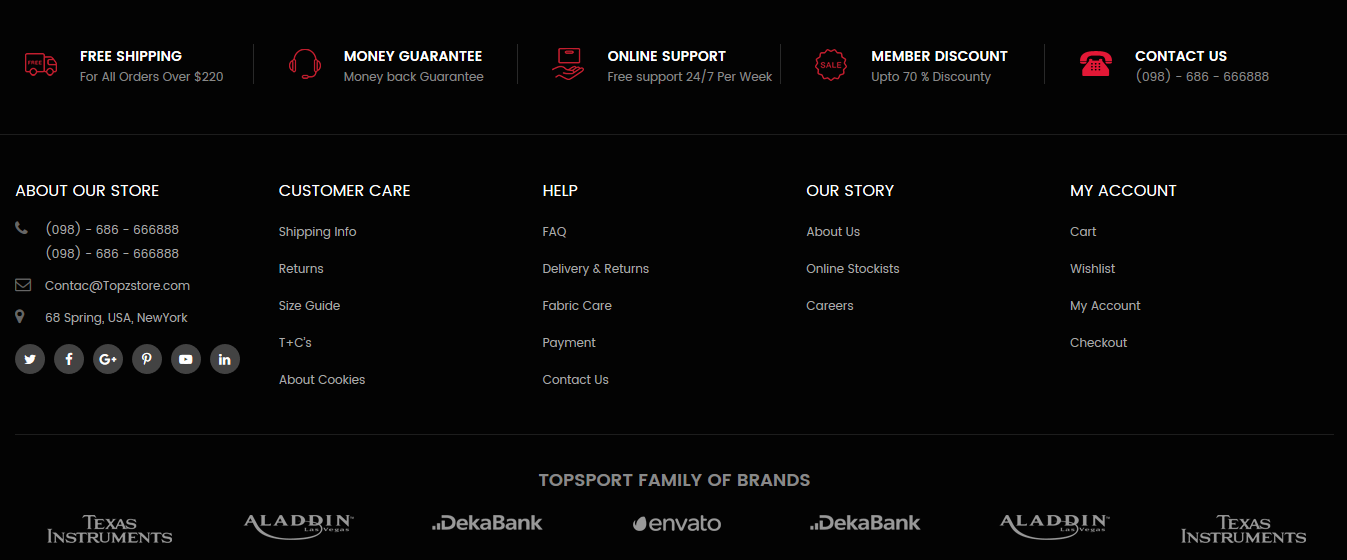
This is footer of the page. This page uses Footer Style 2. To configure this one, please go to Pages >> Footer Style 2 to edit the element with Visual Composer.
- General Settings: Please click Here for more detail.
You can Copy & Paste the code into your editor:
|
1 |
[vc_row full_width="stretch_row_content_no_spaces" el_class="footer-style2-top"][vc_column el_class="content-wrap"][vc_raw_html el_class="wrap-margin"]JTNDZGl2JTIwY2xhc3MlM0QlMjJ3cmFwLXF1ZXN0LXN0eWxlMSUyMiUzRSUwQSUwOSUzQ2RpdiUyMGNsYXNzJTNEJTIyaXRlbSUyMGl0ZW0tMSUyMGNvbC1sZy00JTIwY29sLW1kLTQlMjBjb2wtc20tNCUyMGNvbC14cy0xMiUyMiUzRSUwQSUwOSUwOSUzQ2ElMjBocmVmJTNEJTIyJTIzJTIyJTIwY2xhc3MlM0QlMjJ3cmFwJTIyJTNFJTBBJTA5JTA5JTA5JTNDZGl2JTIwY2xhc3MlM0QlMjJpY29uJTIyJTNFaWNvbjElM0MlMkZkaXYlM0UlMEElMDklMDklMDklM0NkaXYlMjBjbGFzcyUzRCUyMmNvbnRlbnQlMjIlM0UlMEElMDklMDklMDklMDklM0NoMyUzRUZyZWUlMjBTaGlwcGluZyUzQyUyRmgzJTNFJTBBJTA5JTA5JTA5JTA5JTNDcCUzRUZvciUyMEFsbCUyME9yZGVycyUyME92ZXIlMjAlMjQyMjAlM0MlMkZwJTNFJTBBJTA5JTA5JTA5JTNDJTJGZGl2JTNFJTBBJTA5JTA5JTNDJTJGYSUzRSUwQSUwOSUzQyUyRmRpdiUzRSUwQSUwOSUzQ2RpdiUyMGNsYXNzJTNEJTIyaXRlbSUyMGl0ZW0tMiUyMGNvbC1sZy0zJTIwY29sLW1kLTMlMjIlM0UlMEElMDklMDklM0NhJTIwaHJlZiUzRCUyMiUyMyUyMiUyMGNsYXNzJTNEJTIyd3JhcCUyMiUzRSUwQSUwOSUwOSUwOSUzQ2RpdiUyMGNsYXNzJTNEJTIyaWNvbiUyMiUzRWljb24yJTNDJTJGZGl2JTNFJTBBJTA5JTA5JTA5JTNDZGl2JTIwY2xhc3MlM0QlMjJjb250ZW50JTIyJTNFJTBBJTA5JTA5JTA5JTA5JTNDaDMlM0VNb25leSUyMEd1YXJhbnRlZSUzQyUyRmgzJTNFJTBBJTA5JTA5JTA5JTA5JTNDcCUzRU1vbmV5JTIwYmFjayUyMEd1YXJhbnRlZSUzQyUyRnAlM0UlMEElMDklMDklMDklM0MlMkZkaXYlM0UlMjAlMEElMDklMDklM0MlMkZhJTNFJTBBJTA5JTNDJTJGZGl2JTNFJTBBJTA5JTNDZGl2JTIwY2xhc3MlM0QlMjJpdGVtJTIwaXRlbS0zJTIwY29sLWxnLTMlMjBjb2wtbWQtMyUyMiUzRSUwQSUwOSUwOSUzQ2ElMjBocmVmJTNEJTIyJTIzJTIyJTIwY2xhc3MlM0QlMjJ3cmFwJTIyJTNFJTBBJTA5JTA5JTA5JTNDZGl2JTIwY2xhc3MlM0QlMjJpY29uJTIyJTNFaWNvbjMlM0MlMkZkaXYlM0UlMEElMDklMDklMDklM0NkaXYlMjBjbGFzcyUzRCUyMmNvbnRlbnQlMjIlM0UlMEElMDklMDklMDklMDklM0NoMyUzRU9ubGluZSUyMFN1cHBvcnQlM0MlMkZoMyUzRSUwQSUwOSUwOSUwOSUwOSUzQ3AlM0VGcmVlJTIwc3VwcG9ydCUyMDI0JTJGNyUyMFBlciUyMFdlZWslM0MlMkZwJTNFJTBBJTA5JTA5JTA5JTNDJTJGZGl2JTNFJTBBJTA5JTA5JTNDJTJGYSUzRSUwQSUwOSUzQyUyRmRpdiUzRSUwQSUwOSUzQ2RpdiUyMGNsYXNzJTNEJTIyaXRlbSUyMGl0ZW0tNCUyMGNvbC1sZy0zJTIwY29sLW1kLTMlMjIlM0UlMEElMDklMDklM0NhJTIwaHJlZiUzRCUyMiUyMyUyMiUyMGNsYXNzJTNEJTIyd3JhcCUyMiUzRSUwQSUwOSUwOSUwOSUzQ2RpdiUyMGNsYXNzJTNEJTIyaWNvbiUyMiUzRWljb24zJTNDJTJGZGl2JTNFJTBBJTA5JTA5JTA5JTNDZGl2JTIwY2xhc3MlM0QlMjJjb250ZW50JTIyJTNFJTBBJTA5JTA5JTA5JTA5JTNDaDMlM0VNZW1iZXIlMjBEaXNjb3VudCUzQyUyRmgzJTNFJTBBJTA5JTA5JTA5JTA5JTNDcCUzRVVwdG8lMjA3MCUyMCUyNSUyMERpc2NvdW50eSUzQyUyRnAlM0UlMEElMDklMDklMDklM0MlMkZkaXYlM0UlMEElMDklMDklM0MlMkZhJTNFJTBBJTA5JTNDJTJGZGl2JTNFJTBBJTA5JTNDZGl2JTIwY2xhc3MlM0QlMjJpdGVtJTIwaXRlbS01JTIwY29sLWxnLTMlMjBjb2wtbWQtMyUyMiUzRSUwQSUwOSUwOSUzQ2ElMjBocmVmJTNEJTIyJTIzJTIyJTIwY2xhc3MlM0QlMjJ3cmFwJTIyJTNFJTBBJTA5JTA5JTA5JTNDZGl2JTIwY2xhc3MlM0QlMjJpY29uJTIyJTNFaWNvbjMlM0MlMkZkaXYlM0UlMEElMDklMDklMDklM0NkaXYlMjBjbGFzcyUzRCUyMmNvbnRlbnQlMjIlM0UlMEElMDklMDklMDklMDklM0NoMyUzRUNvbnRhY3QlMjBVcyUzQyUyRmgzJTNFJTBBJTA5JTA5JTA5JTA5JTNDcCUzRSUyODA5OCUyOSUyMC0lMjA2ODYlMjAtJTIwNjY2ODg4JTNDJTJGcCUzRSUwQSUwOSUwOSUwOSUzQyUyRmRpdiUzRSUwQSUwOSUwOSUzQyUyRmElM0UlMEElMDklM0MlMkZkaXYlM0UlMEElM0MlMkZkaXYlM0U=[/vc_raw_html][/vc_column][/vc_row][vc_row full_width="stretch_row_content_no_spaces" el_class="footer-style2 footer-style2-bot"][vc_column el_class="content-wrap"][vc_row_inner][vc_column_inner el_class="item-wpcustom" width="1/4"][vc_raw_html]JTNDZGl2JTIwY2xhc3MlM0QlMjJpbmZvLWZvb3RlciUyMiUzRSUwQSUwOSUzQ2gzJTNFQWJvdXQlMjBvdXIlMjBzdG9yZSUzQyUyRmgzJTNFJTBBJTA5JTNDdWwlMjBjbGFzcyUzRCUyMmluZm8tZm9vdGVyLWFkcmVzJTIyJTNFJTBBJTA5JTA5JTNDbGklMjBjbGFzcyUzRCUyMnBob25lJTIyJTNFJTBBJTA5JTA5JTA5JTNDaSUyMGNsYXNzJTNEJTIyZmElMjBmYS1waG9uZSUyMiUyMGFyaWEtaGlkZGVuJTNEJTIydHJ1ZSUyMiUzRSUzQyUyRmklM0UlM0NzcGFuJTNFJTI4MDk4JTI5JTIwLSUyMDY4NiUyMC0lMjA2NjY4ODglM0NiciUzRSUyODA5OCUyOSUyMC0lMjA2ODYlMjAtJTIwNjY2ODg4JTNDJTJGc3BhbiUzRSUwQSUwOSUwOSUzQyUyRmxpJTNFJTBBJTA5JTA5JTNDbGklMjBjbGFzcyUzRCUyMmVtYWlsJTIyJTNFJTBBJTA5JTA5JTA5JTNDaSUyMGNsYXNzJTNEJTIyZmElMjBmYS1lbnZlbG9wZS1vJTIyJTIwYXJpYS1oaWRkZW4lM0QlMjJ0cnVlJTIyJTNFJTNDJTJGaSUzRSUzQ2ElMjBocmVmJTNEJTIybWFpbHRvJTNBY29udGFjJTQwVG9wenN0b3JlLmNvbSUyMiUzRWNvbnRhYyU0MFRvcHpzdG9yZS5jb20lM0MlMkZhJTNFJTBBJTA5JTA5JTNDJTJGbGklM0UlMEElMDklMDklM0NsaSUyMGNsYXNzJTNEJTIyYWRyZXMlMjIlM0UlMEElMDklMDklMDklM0NpJTIwY2xhc3MlM0QlMjJmYSUyMGZhLW1hcC1tYXJrZXIlMjIlMjBhcmlhLWhpZGRlbiUzRCUyMnRydWUlMjIlM0UlM0MlMkZpJTNFJTNDc3BhbiUzRTY4JTIwU3ByaW5nJTJDJTIwVVNBJTJDJTIwTmV3WW9yayUzQyUyRmxhYmVsJTNFJTBBJTA5JTA5JTNDJTJGbGklM0UlMEElMDklM0MlMkZ1bCUzRSUwQSUwOSUzQ3VsJTIwY2xhc3MlM0QlMjJpbmZvLWZvb3Rlci1zb2NpYWwlMjIlM0UlMEElMDklMDklM0NsaSUzRSUzQ2ElMjBocmVmJTNEJTIyaHR0cHMlM0ElMkYlMkZ0d2l0dGVyLmNvbSUyRndwdGhlbWVnbyUyMiUzRSUzQ2klMjBjbGFzcyUzRCUyMmZhJTIwZmEtdHdpdHRlciUyMiUyMGFyaWEtaGlkZGVuJTNEJTIydHJ1ZSUyMiUzRSUzQyUyRmklM0UlM0MlMkZhJTNFJTNDJTJGbGklM0UlMEElMDklMDklM0NsaSUzRSUzQ2ElMjBocmVmJTNEJTIyaHR0cHMlM0ElMkYlMkZ3d3cuZmFjZWJvb2suY29tJTJGd3B0aGVtZWdvJTIyJTNFJTNDaSUyMGNsYXNzJTNEJTIyZmElMjBmYS1mYWNlYm9vayUyMiUyMGFyaWEtaGlkZGVuJTNEJTIydHJ1ZSUyMiUzRSUzQyUyRmklM0UlM0MlMkZhJTNFJTNDJTJGbGklM0UlMEElMDklMDklM0NsaSUzRSUzQ2ElMjBocmVmJTNEJTIyaHR0cHMlM0ElMkYlMkZwbHVzLmdvb2dsZS5jb20lMkZ1JTJGMCUyRjExNzYxNjQyMjcwMDg0ODE1MTMyMSUyMiUzRSUzQ2klMjBjbGFzcyUzRCUyMmZhJTIwZmEtZ29vZ2xlLXBsdXMlMjIlMjBhcmlhLWhpZGRlbiUzRCUyMnRydWUlMjIlM0UlM0MlMkZpJTNFJTNDJTJGYSUzRSUzQyUyRmxpJTNFJTBBJTA5JTA5JTNDbGklM0UlM0NhJTIwaHJlZiUzRCUyMmh0dHBzJTNBJTJGJTJGd3d3LnBpbnRlcmVzdC5jb20lMkZ3cHRoZW1lZ28lMkYlMjIlM0UlM0NpJTIwY2xhc3MlM0QlMjJmYSUyMGZhLXBpbnRlcmVzdC1wJTIyJTIwYXJpYS1oaWRkZW4lM0QlMjJ0cnVlJTIyJTNFJTNDJTJGaSUzRSUzQyUyRmElM0UlM0MlMkZsaSUzRSUwQSUwOSUwOSUzQ2xpJTNFJTNDYSUyMGhyZWYlM0QlMjIlMjMlMjIlM0UlM0NpJTIwY2xhc3MlM0QlMjJmYSUyMGZhLXlvdXR1YmUtcGxheSUyMiUyMGFyaWEtaGlkZGVuJTNEJTIydHJ1ZSUyMiUzRSUzQyUyRmklM0UlM0MlMkZhJTNFJTNDJTJGbGklM0UlMEElMDklMDklM0NsaSUzRSUzQ2ElMjBocmVmJTNEJTIyJTIzJTIyJTNFJTNDaSUyMGNsYXNzJTNEJTIyZmElMjBmYS1saW5rZWRpbiUyMiUyMGFyaWEtaGlkZGVuJTNEJTIydHJ1ZSUyMiUzRSUzQyUyRmklM0UlM0MlMkZhJTNFJTNDJTJGbGklM0UlMEElMDklM0MlMkZ1bCUzRSUwQSUzQyUyRmRpdiUzRQ==[/vc_raw_html][/vc_column_inner][vc_column_inner el_class="item-wpcustom" width="1/6"][vc_wp_custommenu title="Customer Care" nav_menu="93"][/vc_column_inner][vc_column_inner el_class="item-wpcustom" width="1/6"][vc_wp_custommenu title="Help" nav_menu="94"][/vc_column_inner][vc_column_inner el_class="item-wpcustom" width="1/6"][vc_wp_custommenu title="Our Story" nav_menu="92"][/vc_column_inner][vc_column_inner el_class="item-wpcustom" width="1/4"][vc_wp_custommenu nav_menu="91" title="My Account"][/vc_column_inner][/vc_row_inner][vc_row_inner][vc_column_inner][sw_brand title1="Topsport family of brands" category="bran1,bran2,bran3,bran4,bran5,bran6,bran7" numberposts="7" item_row="1" columns="7" columns1="5" columns2="3" columns3="2" columns4="1" speed="1000" interval="5000" scroll="1"][/vc_column_inner][/vc_row_inner][/vc_column][/vc_row] |
10.3 SW TopZ Home Page 3
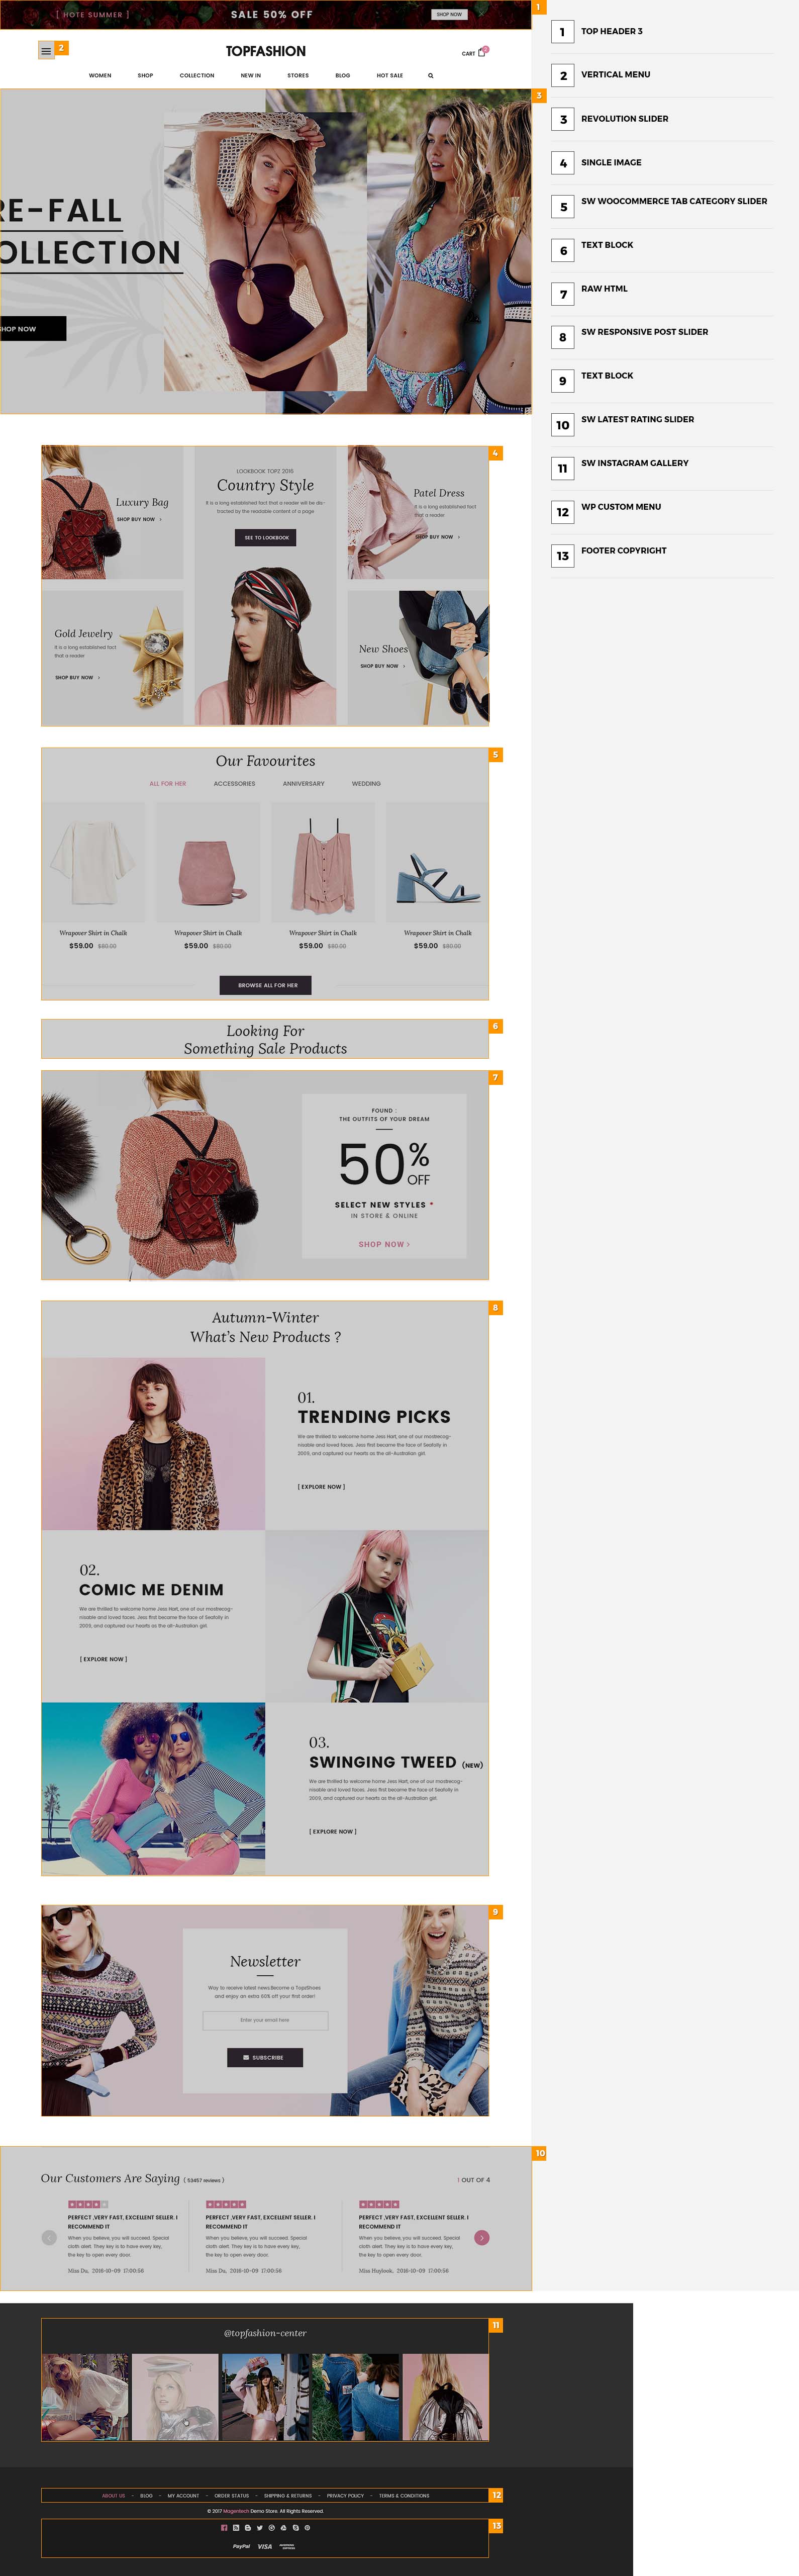
Note:
In the Admin Panel, please navigate to Page >> All Page >> Home Page 3 to custom this home page’s settings.
- Backend Setting: Please click Here for more detail about the setting of this page.
- Page Metabox: This section give you a chance to custom this homepage here. The setting fields will know which settings your page will handle.
Please note that, if you do not have any special idea here, this page settings will be set as in the Theme Options section. You can custom your page in the Backend Settings.- This home page uses Header and Footer Style 3 and Copyright Style 3
10.3.0 [Video] SW TopZ Page Settings
First of all, please see the video about row, column and image settings in this page from the front end when editing with Visual Composer.
Please pay attention to the Extra class name and Design Options including margin, padding for each block.
10.3.1 Top Header 3

In your Administrator Page, please go to Appearance > Widgets and choose this one to configure as you want.
The Backend Settings: Please click Here to see more details.
>>> To change the background image, you can replace the file /wp-content/themes/topz/assets/img/banner-head.jpg
10.3.2 Vertical Menu
View Demo:
To have this menu, you need to create Vertical Menu. You can check the Here for more detail.
10.3.3 Revolution Slider
View Demo:
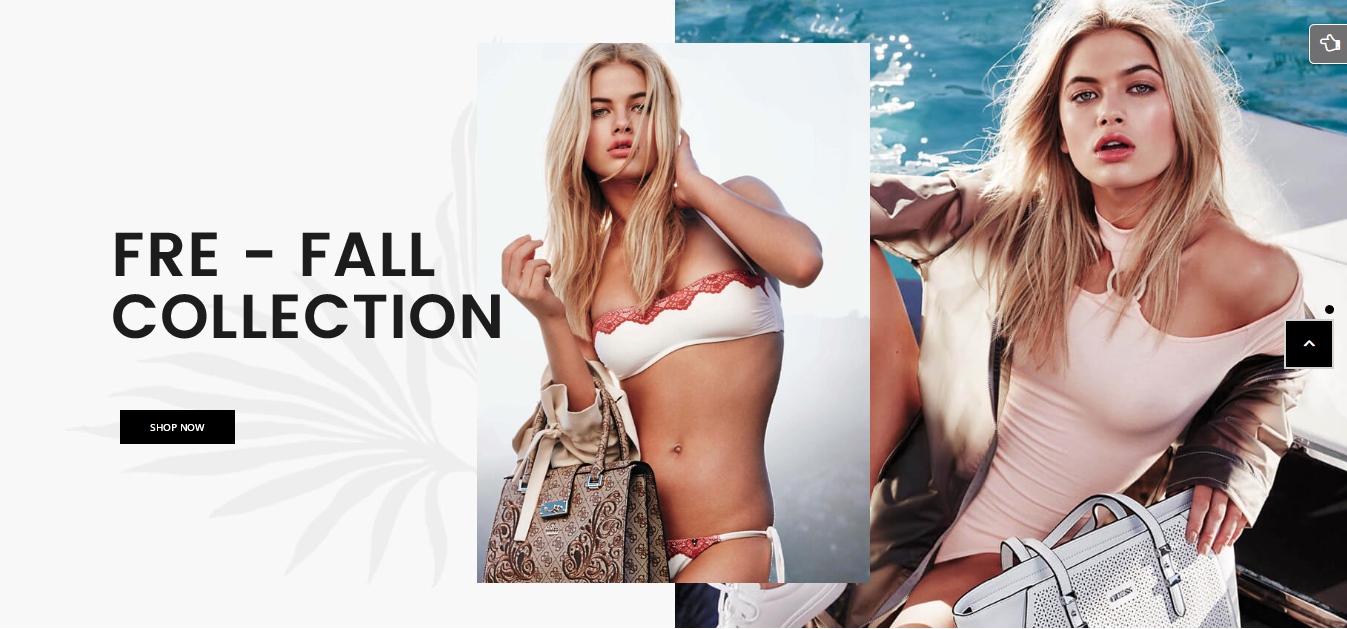
After opening the homepage with Visual Composer, click on “pencil” button at center of this part to configure its backend settings.
The pop-up window will display the Backend Setting , then you can configure the item as you want.
- General Settings: Please click Here for more detail.
- Row Settings: Please click Here for more detail.
- Column Settings: Please click Here for more detail. The Extra class name
content2-wrapshould be added to have the same style as in the demo. - About Revolution Slider Configuration, you can refer to the one in Slider Home 1 for more detail.
10.3.4 Single Image
View Demo:
After opening the homepage with Visual Composer, click on “pencil” button at center of this part to configure its backend settings.
The pop-up window will display the Backend Setting , then you can configure the item as you want.
- General Settings: Please click Image 1, Image 2, Image 3, Image 4, Image 5 for more detail. The Extra class name
banner-sigle2 banner3-top,banner-sigle2,banner-sigle2,banner-sigle2 banner3-top,banner-sigle2should be added into Image 1, 2, 3, 4, 5 respectively to have the same style as in the demo. - Row Settings: Please click Here for more detail. The Extra class name
banner-resshould be added to have the same style as in the demo.
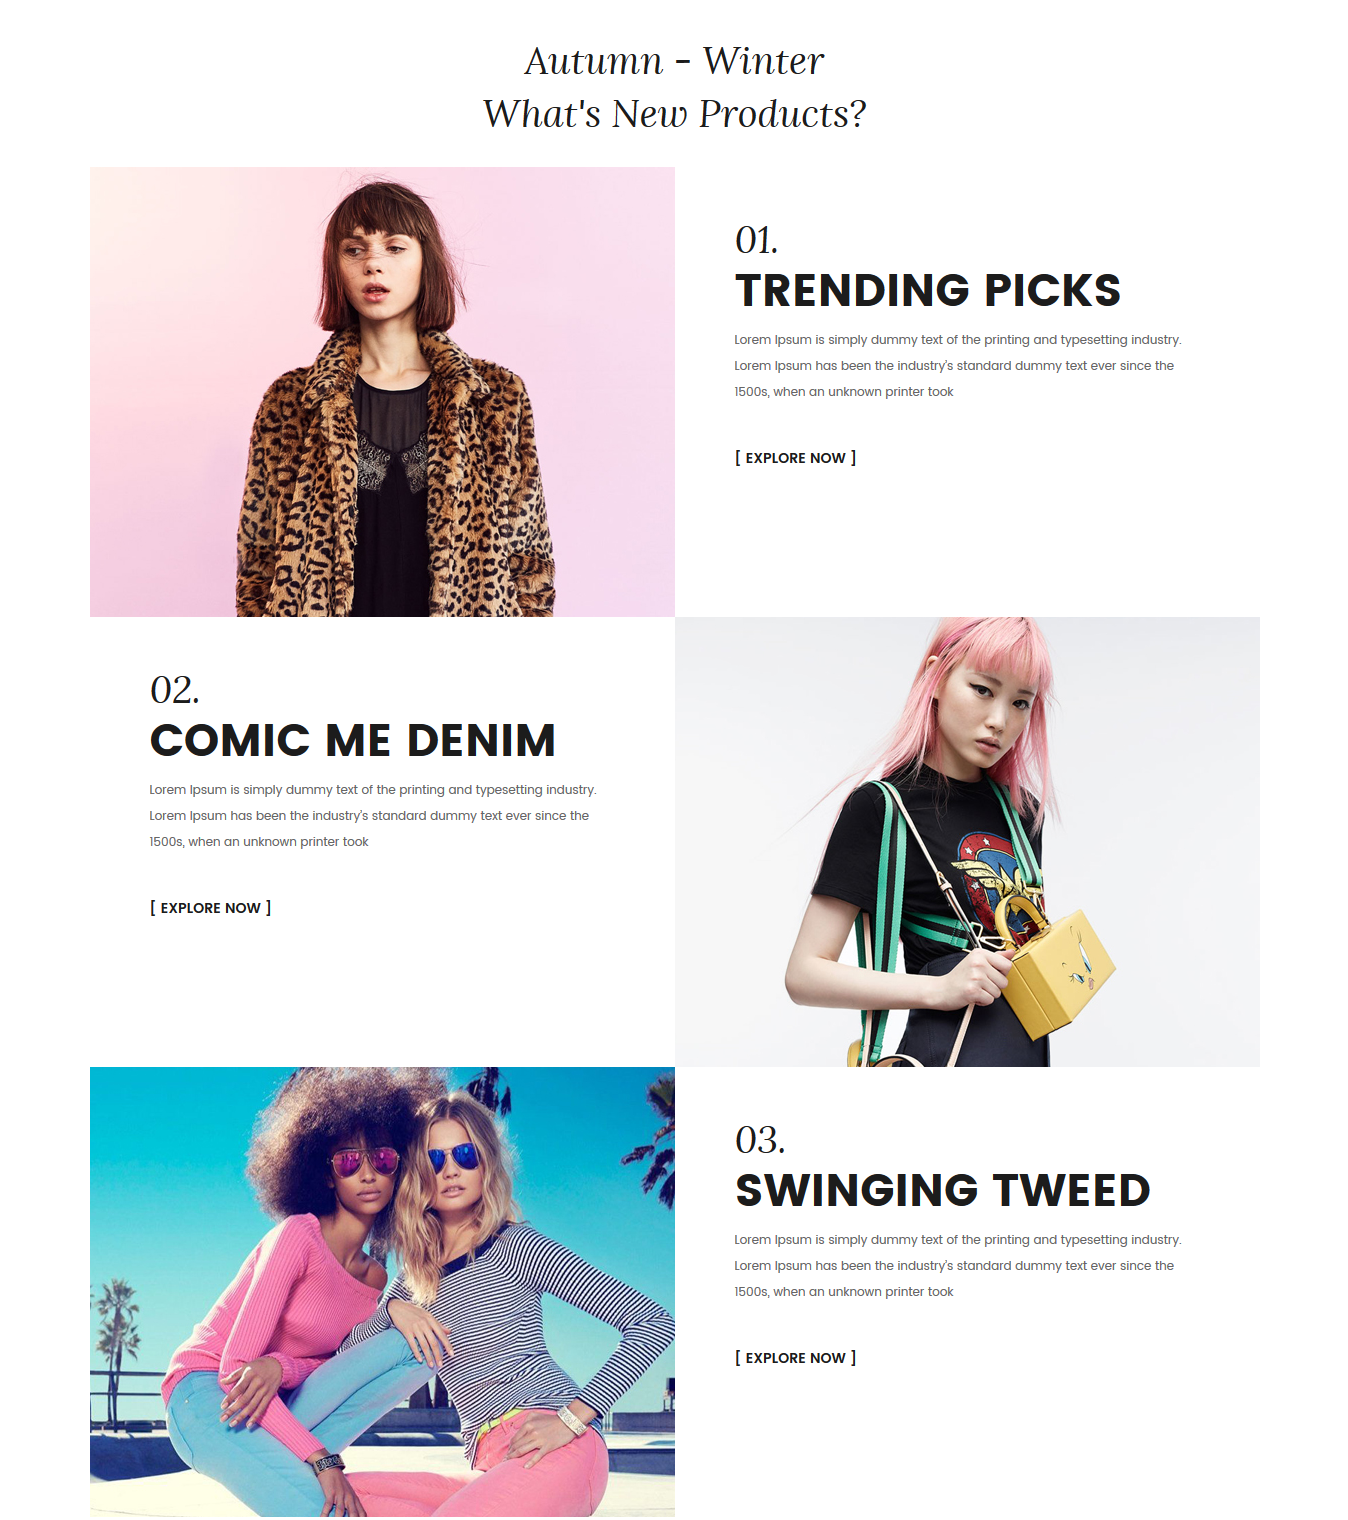
10.3.5 SW WooCommerce Tab Category Slider
View Demo:
After opening the homepage with Visual Composer, click on “pencil” button at center of this part to configure its backend settings
The pop-up window will display the backend settings, so you can configure the item as you want:
- General Settings: Please click Here for more detail.
- Row Settings: Please click Here for more detail.
10.3.6 Text Block
View Demo:

After opening the homepage with Visual Composer, click on “pencil” button at center of this part to configure its backend settings.
The pop-up window will display the backend settings, so you can configure the item as you want:
- General Settings: Please click Here for more detail.
- Row Settings: Please click Here for more detail. The Extra class name
banner-resshould be added to have the same style as in the demo.
Copy & Paste the code into your editor:
|
1 2 |
<h3 class="title-pag">looking for something sale products</h3> |
10.3.7 Raw HTML
View Demo:
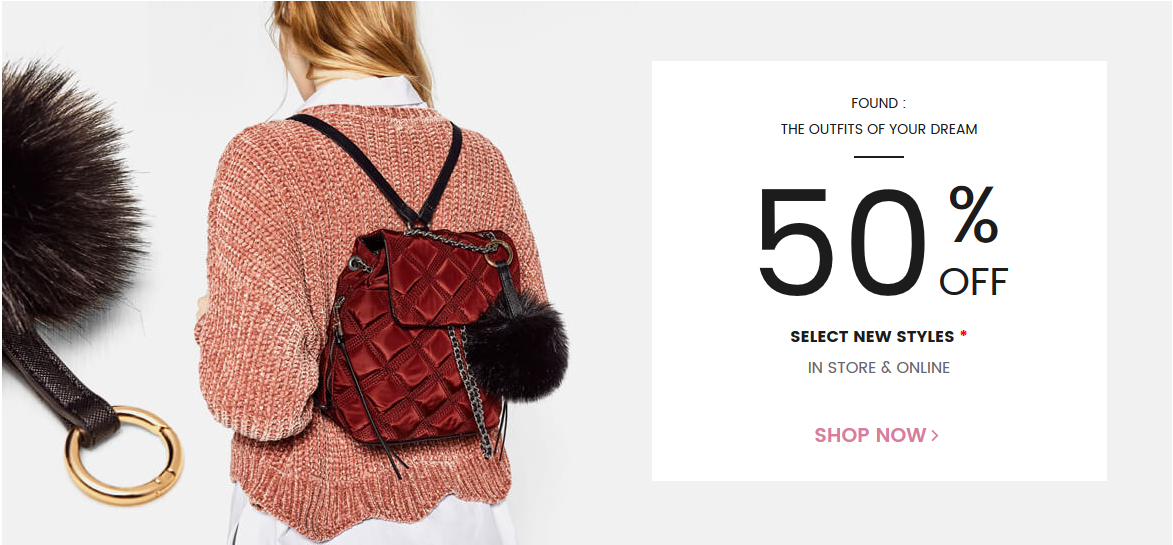
After opening the homepage with Visual Composer, click on “pencil” button at center of this part to configure its backend settings.
The pop-up window will display the backend settings, so you can configure the item as you want:
- General Settings: Please click Here for more detail.
- Row Settings: Please click Here for more detail. The Extra class name
banner-resshould be added to have the same style as in the demo.
Copy & Paste the code into your editor:
|
1 2 3 4 5 6 7 8 9 10 11 12 13 |
<div class="banner-info"> <p class="found">found :<br>the outfits of your dream</p> <div class="banner-shop clearfix"> <span>50</span> <div class="banner-shop-right"> <label>%</label> <span>off</span> </div> </div> <h3>select new styles <span>*</span></h3> <p class="store">in store & online</p> <a href="#">shop now</a> </div> |
10.3.8 SW Responsive Post Slider
View Demo:
After opening the homepage with Visual Composer, click on “pencil” button at center of this part to configure its backend settings.
The pop-up window will display the backend settings, so you can configure the item as you want:
- General Settings: Please click Here for more detail.
- Row Settings: Please click Here for more detail.
10.3.9 Text Block
View Demo:
After opening the homepage with Visual Composer, click on “pencil” button at center of this part to configure its backend settings.
The pop-up window will display the backend settings, so you can configure the item as you want:
- General Settings: Please click Here for more detail.
- Row Settings: Please click Here for more detail.
Copy & Paste the code into your editor:
|
1 2 3 4 5 |
<div class="newsletter-footer3"> <h3>Newsletter</h3> subscribe to our newsletter and be the first to know about special offers <div class="form-newsletter">[mc4wp_form id="3508"]</div> </div> |
10.3.10 SW Latest Rating Slider
View Demo:
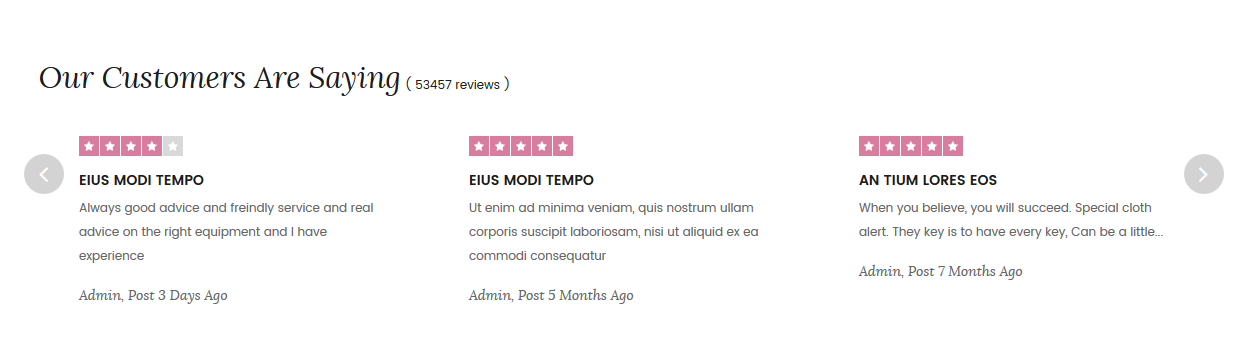
After opening the homepage with Visual Composer, click on “pencil” button at center of this part to configure its backend settings.
The pop-up window will display the backend settings, so you can configure the item as you want:
- General Settings: Please click Here for more detail.
- Row Settings: Please click Here for more detail.
Copy & Paste the code into your editor:
|
1 2 3 4 5 |
<div class="newsletter-footer2"> <h3>Sign up for newsletter</h3> subscribe to our newsletter and be the first to know about special offers <div class="form-newsletter">[mc4wp_form id="3508"]</div> </div> |
10.3.11 SW Instagram Gallery
View Demo:
After opening the homepage with Visual Composer, click on “pencil” button at center of this part to configure its backend settings.
The pop-up window will display the backend settings, so you can configure the item as you want:
- General Settings: Please click Here for more detail. You should replace the Instagram User ID and Valid Token.
- Row Settings: Please click Here for more detail.
10.3.12 WP Custom Menu
View Demo:

This is footer of the page. This page uses Footer Style 3. To configure this one, please go to Pages >> Footer Style 3 to edit the element with Visual Composer.
- General Settings: Please click Here for more detail.
You can Copy & Paste the code into your editor:
|
1 |
[vc_row full_width="stretch_row" el_class="footer-style3"][vc_column][vc_wp_custommenu nav_menu="51" el_class="footer-menu3"][/vc_column][/vc_row] |
10.3.13 Footer Copyright
View Demo:

In your Administrator Page, please go to Appearance > Widgets and choose this one to configure as you want.
- General Settings: Please click Here for more detail.
Copy & Paste the code into your text editor:
|
1 2 3 4 5 6 7 8 |
<div class="social"> <a href="https://www.facebook.com/wpthemego"><i class="fa fa-facebook-official" aria-hidden="true"></i></a> <a href="https://twitter.com/wpthemego"><i class="fa fa-twitter" aria-hidden="true"></i></a> <a href="https://plus.google.com/u/0/117616422700848151321"><i class="fa fa-google" aria-hidden="true"></i></a> <a href="#"><i class="fa fa-vimeo-square" aria-hidden="true"></i></a> <a href="#"><i class="fa fa-skype" aria-hidden="true"></i></a> <a href="https://www.pinterest.com/wpthemego/"><i class="fa fa-pinterest" aria-hidden="true"></i></a> </div> |
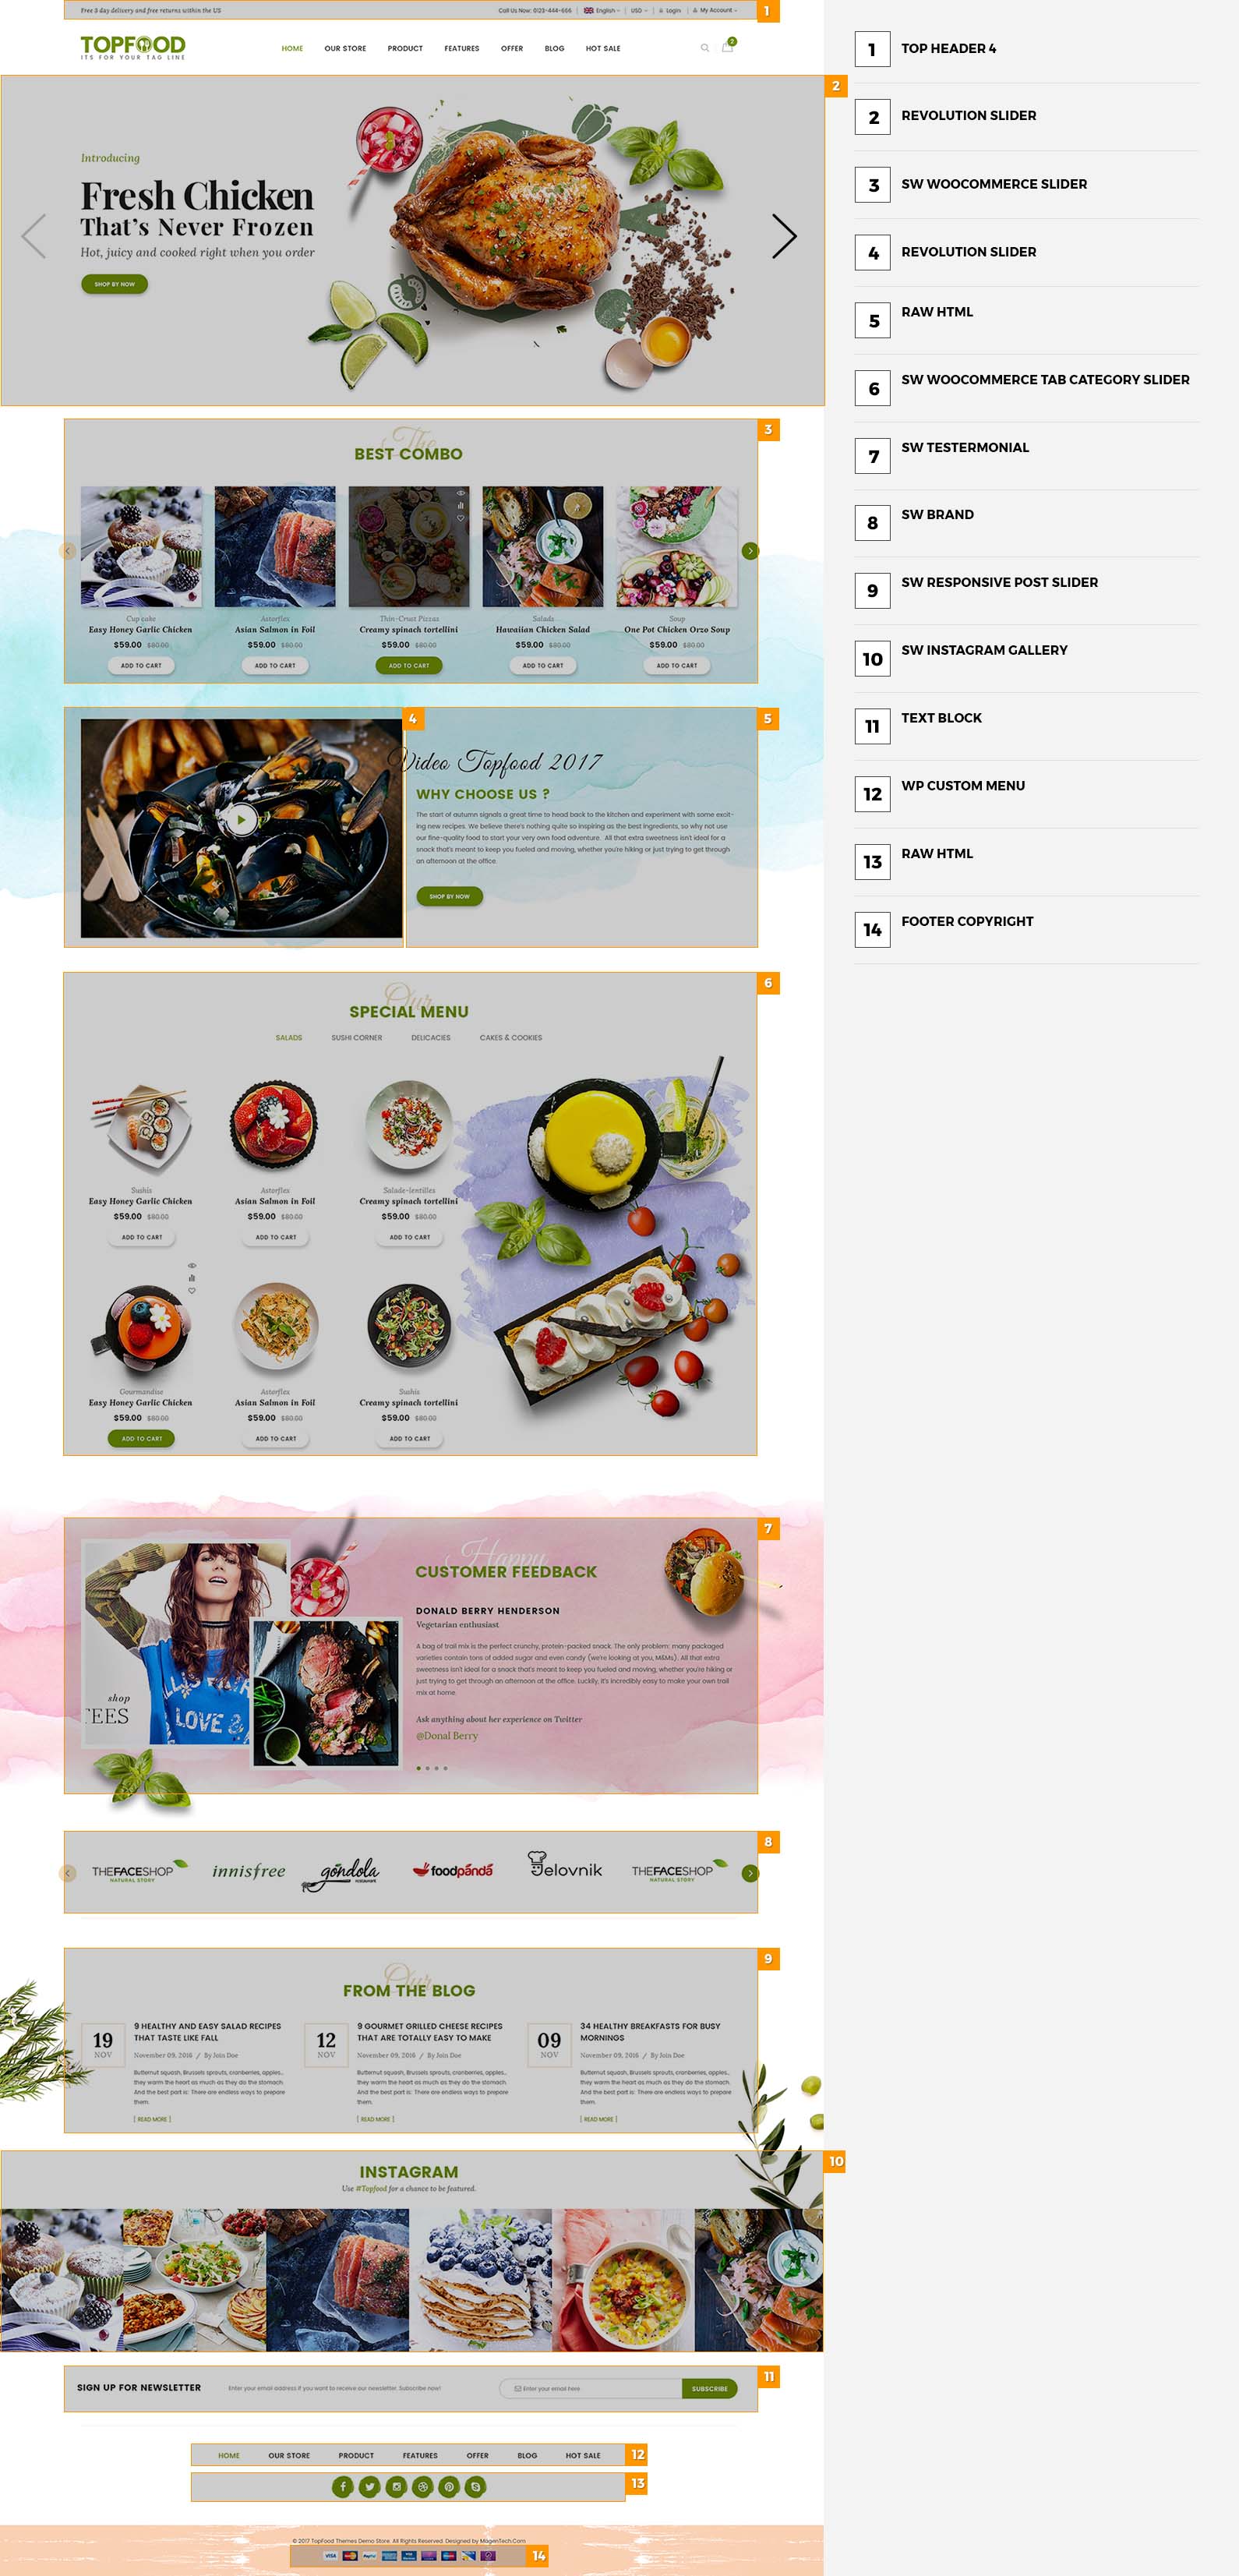
10.4 SW TopZ Home Page 4
Note:
In the Admin Panel, please navigate to Page >> All Page >> Home Page 4 to custom this home page’s settings.
- Backend Setting: Please click Here for more detail about the setting of this page.
- Page Metabox: This section give you a chance to custom this homepage here. The setting fields will know which settings your page will handle.
Please note that, if you do not have any special idea here, this page settings will be set as in the Theme Options section. You can custom your page in the Backend Settings.- This home page uses Header and Footer Style 4 and Copyright Style 4
- Background Image: To change the background image in this page, please pay attention to the Row Setting of block SW WooCommerce Slider and SW Testermonial.
10.4.1 Top Header 4

In your Administrator Page, please go to Appearance > Widgets and choose this one to configure as you want.
The Backend Settings: Please click Here to see more details.
Copy & Paste the code into your editor:
*Text 1:
|
1 |
<div class="header-map2">Free 3 day delivery and free returns within the US</div> |
*Text 2:
|
1 2 3 4 5 6 7 8 9 10 11 12 13 14 15 16 17 18 |
<div id="lang_sel"> <ul class="nav"> <li><a class="lang_sel_sel icl-en" href="#"> English </a> <ul> <li class="icl-en"><a href="[get_url]&direction=ltr"> <img class="iclflag" title="English" src="[bloginfo]/wp-content/themes/topz/assets/img/en.png" alt="en" width="18" height="12" /> English </a></li> <li class="icl-ar"><a href="[get_url]&direction=rtl"> <img class="iclflag" title="Arabic" src="[bloginfo]/wp-content/themes/topz/assets/img/ar.png" alt="ar" width="18" height="12" /> Arabic </a></li> </ul> </li> </ul> </div> |
*Text 3:
|
1 |
<div class="header-map">Call Us Now: 0123 - 444 - 666</div> |
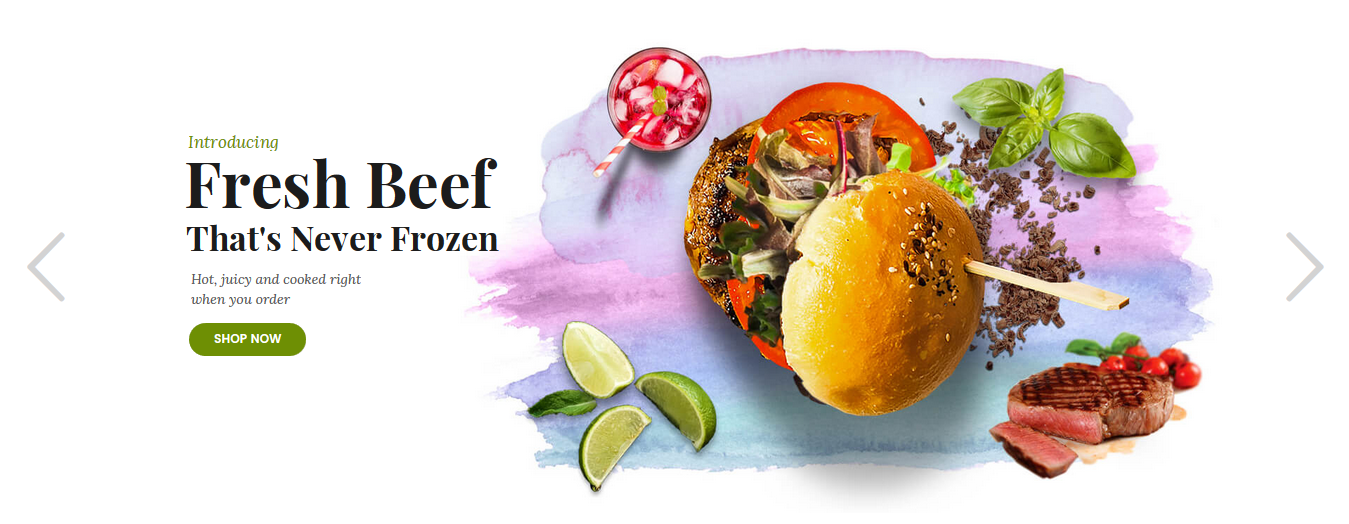
10.4.2 Revolution Slider
View Demo:
After opening the homepage with Visual Composer, click on “pencil” button at center of this part to configure its backend settings.
The pop-up window will display the Backend Setting , then you can configure the item as you want.
- General Settings: Please click Here for more detail.
- Row Settings: Please click Here for more detail. The Extra class name
slider-home4should be added to have the same style as in the demo. - About Revolution Slider Configuration, you can refer to the one in Slider Home 1 for more detail.
10.4.3 SW WooCommerce Slider
View Demo:
After opening the homepage with Visual Composer, click on “pencil” button at center of this part to configure its backend settings.
The pop-up window will display the Backend Setting , then you can configure the item as you want.
- General Settings: Please click Here for more detail.
- Row Settings: Please click Here for more detail.
- Column Settings: Please click Here for more detail. The Extra class name
content-wrapshould be added to have the same style as in the demo.
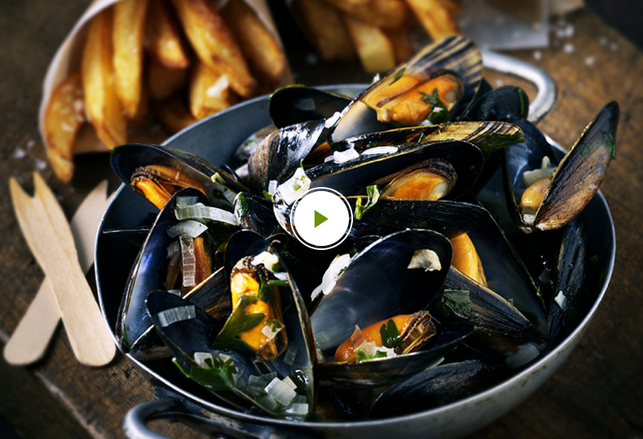
10.4.4 Revolution Slider
View Demo:
After opening the homepage with Visual Composer, click on “pencil” button at center of this part to configure its backend settings.
The pop-up window will display the Backend Setting , then you can configure the item as you want.
- General Settings: Please click Here for more detail.
- Inner Row Settings: Please click Here for more detail. The Extra class name
content-wrapshould be added to have the same style as in the demo. - About Revolution Slider Configuration, you can refer to the one in Slider Home 1 for more detail.
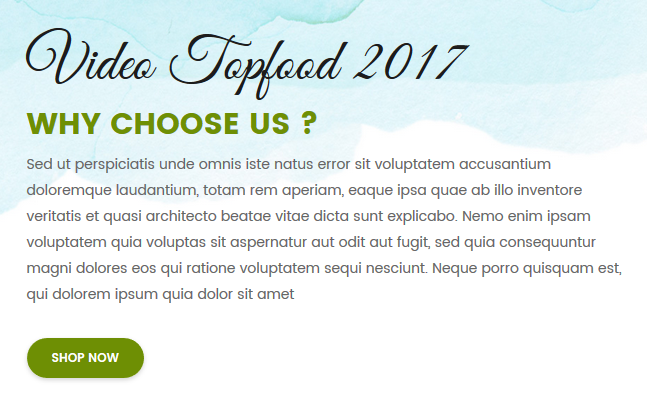
10.4.5 Raw HTML
View Demo:
After opening the homepage with Visual Composer, click on “pencil” button at center of this part to configure its backend settings
The pop-up window will display the backend settings, so you can configure the item as you want:
- General Settings: Please click Here for more detail.
- Inner Row Settings: Please click Here for more detail. The Extra class name
content-wrapshould be added to have the same style as in the demo.
Copy & Paste the code into your editor:
|
1 2 3 4 5 6 |
<div class="video-topfood"> <h2>Video Topfood 2017</h2> <h3>WHY CHOOSE US ?</h3> <p>Sed ut perspiciatis unde omnis iste natus error sit voluptatem accusantium doloremque laudantium, totam rem aperiam, eaque ipsa quae ab illo inventore veritatis et quasi architecto beatae vitae dicta sunt explicabo. Nemo enim ipsam voluptatem quia voluptas sit aspernatur aut odit aut fugit, sed quia consequuntur magni dolores eos qui ratione voluptatem sequi nesciunt. Neque porro quisquam est, qui dolorem ipsum quia dolor sit amet</p> <a href="#">shop now</a> </div> |
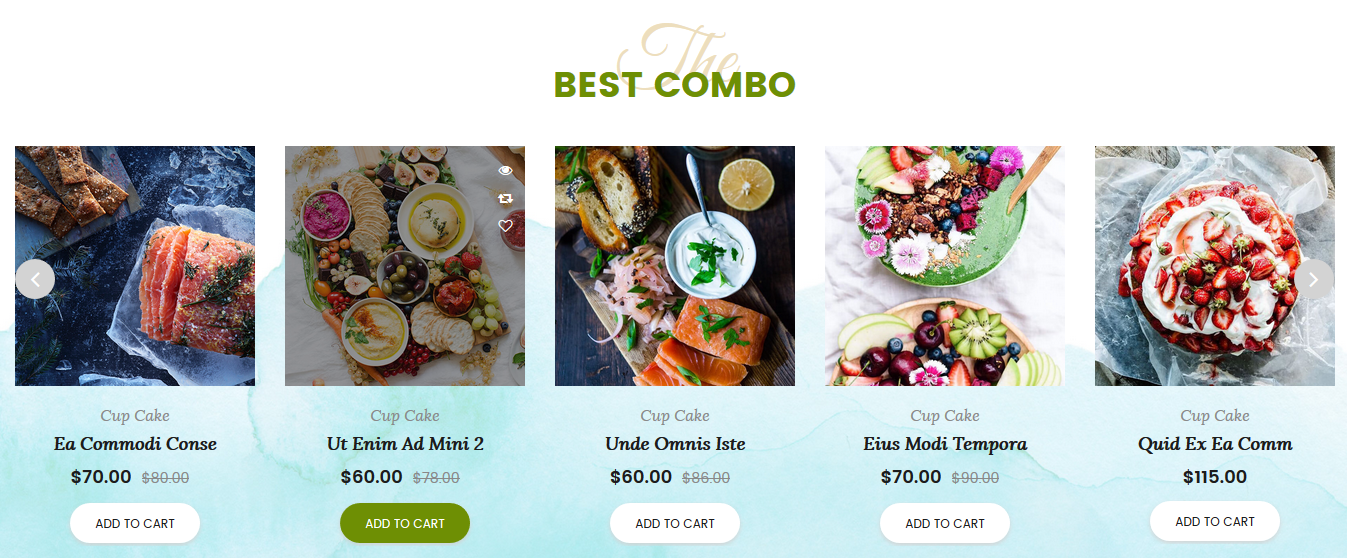
10.4.6 SW WooCommerce Tab Category Slider
View Demo:
After opening the homepage with Visual Composer, click on “pencil” button at center of this part to configure its backend settings.
The pop-up window will display the backend settings, so you can configure the item as you want:
- General Settings: Please click Here for more detail.
- Column Settings: Please click Here for more detail. The Extra class name
content-wrapshould be added to have the same style as in the demo.
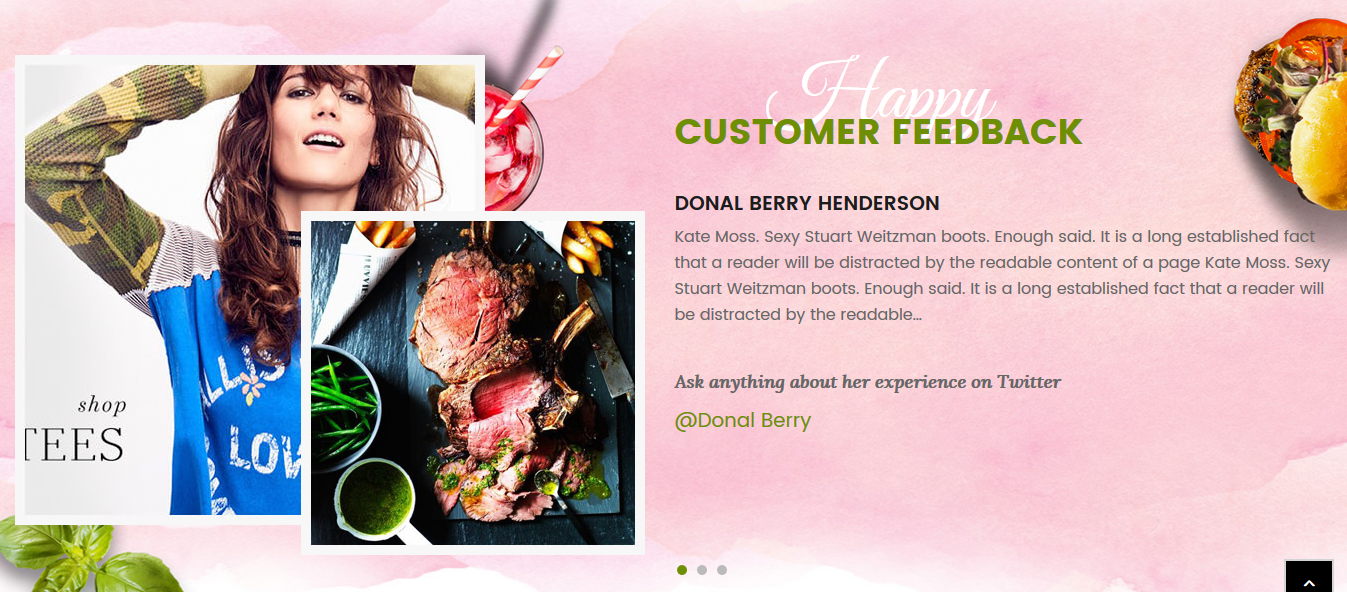
10.4.7 SW Testermonial
View Demo:
After opening the homepage with Visual Composer, click on “pencil” button at center of this part to configure its backend settings.
The pop-up window will display the backend settings, so you can configure the item as you want:
- General Settings: Please click Here for more detail.
- Row Settings: Please click Here for more detail.
- Column Settings: Please click Here for more detail. The Extra class name
content-wrapshould be added to have the same style as in the demo.
10.4.8 SW Brand
View Demo:

After opening the homepage with Visual Composer, click on “pencil” button at center of this part to configure its backend settings.
The pop-up window will display the backend settings, so you can configure the item as you want:
- General Settings: Please click Here for more detail.
- Column Settings: Please click Here for more detail. The Extra class name
content-wrapshould be added to have the same style as in the demo.
10.4.9 SW Responsive Post Slider
View Demo:
After opening the homepage with Visual Composer, click on “pencil” button at center of this part to configure its backend settings.
The pop-up window will display the backend settings, so you can configure the item as you want:
- General Settings: Please click Here for more detail.
- Row Settings: You need to upload the Cover Photo in tab Design Options. Please click Here for more detail. The Extra class name
bg-blog4should be added to have the same style as in the demo. - Inner Column Settings: Please click Here for more detail. The Extra class name
content-wrapshould be added to have the same style as in the demo.
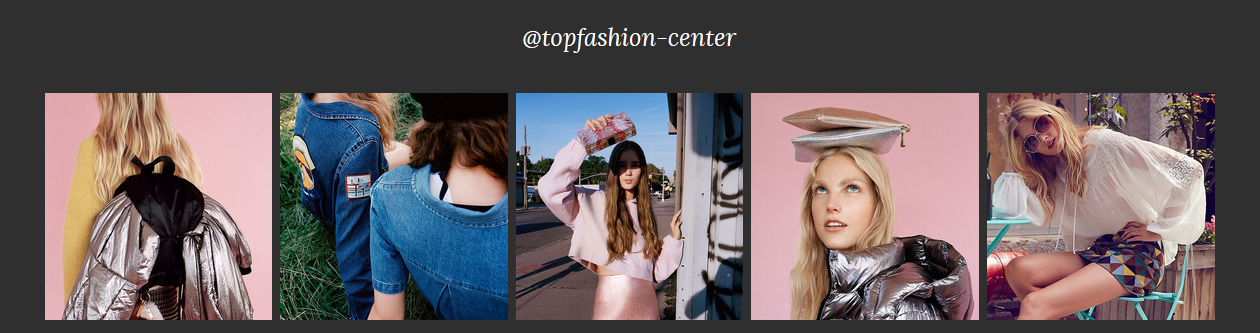
10.4.10 SW Instagram Gallery
View Demo:
After opening the homepage with Visual Composer, click on “pencil” button at center of this part to configure its backend settings.
The pop-up window will display the backend settings, so you can configure the item as you want:
- General Settings: You need to add the Instagram User ID and Access Token. Please click Here for more detail.
10.4.11 Text Block
View Demo:

After opening the homepage with Visual Composer, click on “pencil” button at center of this part to configure its backend settings.
The pop-up window will display the backend settings, so you can configure the item as you want:
- General Settings: Please click Here for more detail.
- Column Settings: Please click Here for more detail. The Extra class name
content-wrapshould be added to have the same style as in the demo.
You can Copy & Paste the code into your editor:
|
1 2 3 4 5 |
<div class="newsletter-footer4"> <h3>Sign up for newsletter</h3> Subscribe to our newsletter and be the first to know about special offers <div class="form-newsletter">[mc4wp_form id="3508"]</div> </div> |
10.4.12 Footer Home 4
View Demo:

This is footer of the page. This page uses Footer Style 4. To configure this one, please go to Pages >> Footer Style 4 to edit the element with Visual Composer.
- General Settings: Please click Here for more detail.
You can Copy & Paste the code into your editor:
|
1 |
[vc_row el_class="footer-style4"][vc_column][vc_wp_custommenu nav_menu="102"][vc_raw_html]JTNDZGl2JTIwY2xhc3MlM0QlMjJzb2NpYWwlMjIlM0UlMEElM0NhJTIwaHJlZiUzRCUyMmh0dHBzJTNBJTJGJTJGd3d3LmZhY2Vib29rLmNvbSUyRndwdGhlbWVnbyUyMiUzRSUzQ2klMjBjbGFzcyUzRCUyMmZhJTIwZmEtZmFjZWJvb2stb2ZmaWNpYWwlMjIlMjBhcmlhLWhpZGRlbiUzRCUyMnRydWUlMjIlM0UlM0MlMkZpJTNFJTNDJTJGYSUzRSUwQSUzQ2ElMjBocmVmJTNEJTIyaHR0cHMlM0ElMkYlMkZ0d2l0dGVyLmNvbSUyRndwdGhlbWVnbyUyMiUzRSUzQ2klMjBjbGFzcyUzRCUyMmZhJTIwZmEtdHdpdHRlciUyMiUyMGFyaWEtaGlkZGVuJTNEJTIydHJ1ZSUyMiUzRSUzQyUyRmklM0UlM0MlMkZhJTNFJTBBJTNDYSUyMGhyZWYlM0QlMjJodHRwcyUzQSUyRiUyRnBsdXMuZ29vZ2xlLmNvbSUyRnUlMkYwJTJGMTE3NjE2NDIyNzAwODQ4MTUxMzIxJTIyJTNFJTNDaSUyMGNsYXNzJTNEJTIyZmElMjBmYS1nb29nbGUlMjIlMjBhcmlhLWhpZGRlbiUzRCUyMnRydWUlMjIlM0UlM0MlMkZpJTNFJTNDJTJGYSUzRSUwQSUzQ2ElMjBocmVmJTNEJTIyJTIzJTIyJTNFJTNDaSUyMGNsYXNzJTNEJTIyZmElMjBmYS12aW1lby1zcXVhcmUlMjIlMjBhcmlhLWhpZGRlbiUzRCUyMnRydWUlMjIlM0UlM0MlMkZpJTNFJTNDJTJGYSUzRSUwQSUzQ2ElMjBocmVmJTNEJTIyJTIzJTIyJTNFJTNDaSUyMGNsYXNzJTNEJTIyZmElMjBmYS1za3lwZSUyMiUyMGFyaWEtaGlkZGVuJTNEJTIydHJ1ZSUyMiUzRSUzQyUyRmklM0UlM0MlMkZhJTNFJTBBJTNDYSUyMGhyZWYlM0QlMjJodHRwcyUzQSUyRiUyRnd3dy5waW50ZXJlc3QuY29tJTJGd3B0aGVtZWdvJTJGJTIyJTNFJTNDaSUyMGNsYXNzJTNEJTIyZmElMjBmYS1waW50ZXJlc3QlMjIlMjBhcmlhLWhpZGRlbiUzRCUyMnRydWUlMjIlM0UlM0MlMkZpJTNFJTNDJTJGYSUzRSUwQSUzQyUyRmRpdiUzRQ==[/vc_raw_html][/vc_column][/vc_row] |
10.4.13 Footer Copyright
View Demo:

In your Administrator Page, please go to Appearance > Widgets and choose this one to configure as you want.
- General Settings: Please click Here for more detail.
- Background Image: To change the background image of this Footer Copyright, you can replace it with the image with same name in path file
wp-content/themes/topz/assets/img/bg-foot.jpg.
11RECOMMENDATION
11.1 WooCommerce
SW TopZ Theme is fully compatible with WooCommerce 3.0.7 plugin. WooCommerce is external plugin and all info about this awesome plugin you can find plugin’s author page.
Firstly, please have a look at the WooCommerce Documentation to see the this plugin’s Installation and Settings and other basic knowledge.
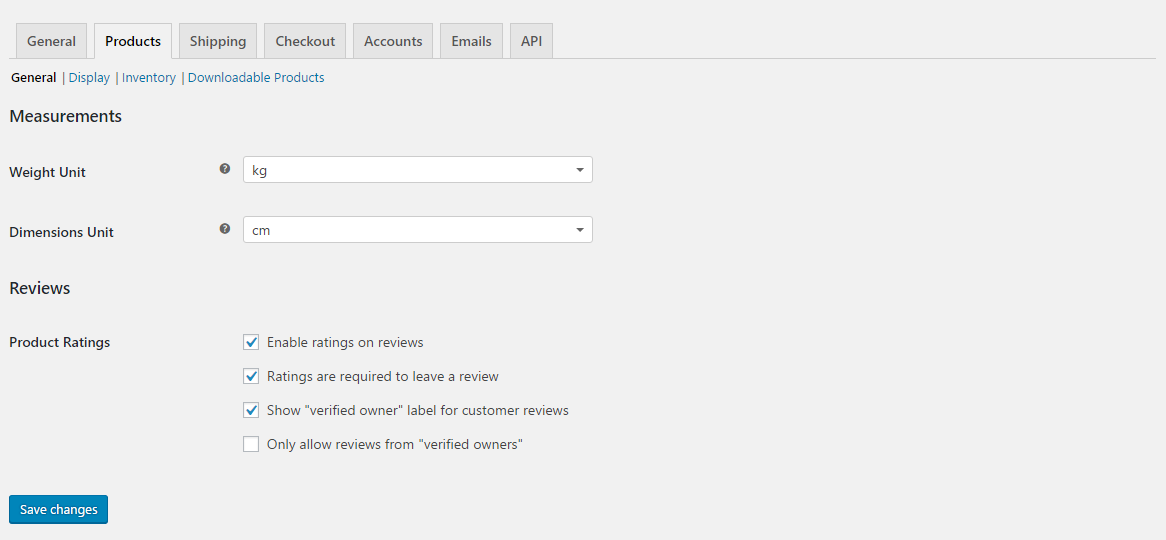
After installing the WooCommerce and having some products in your WordPress website, please go to Woocommerce > Settings > Products to custom your product settings to meet this SW TopZ theme. Please remember to click Save Changes button after the change you make.
- To change the General Settings, please go to “Woocommerce > Settings > Products > General” section.
- To change the Image Size, please go to “Woocommerce > Settings > Products > Display” section.
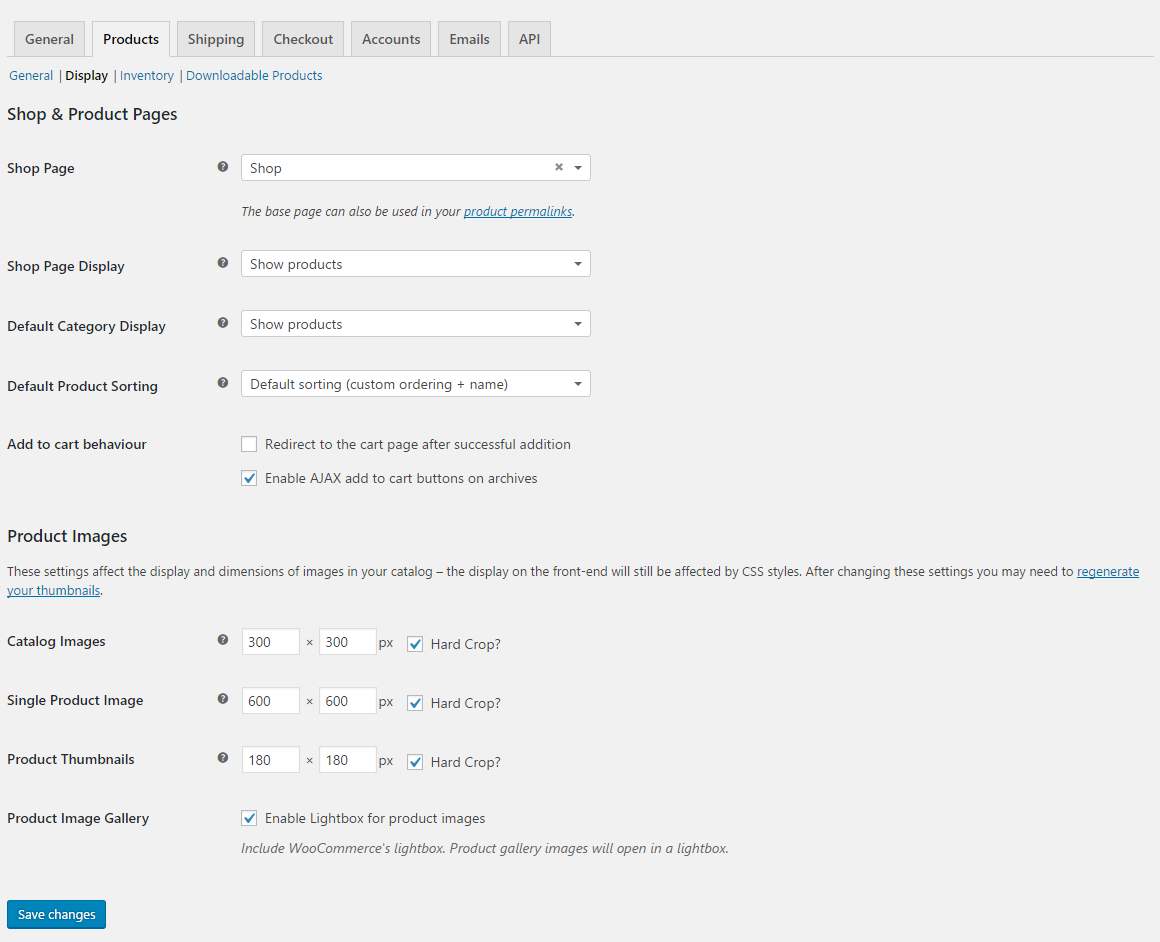
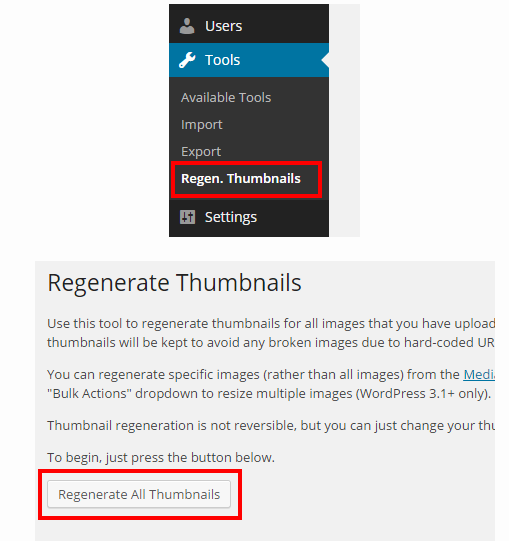
- Before changing the Images Sizes, firstly please regenerate all the thumbnails. For this one, you should install and activate “Regenerate Thumbnails” plugin in your site.
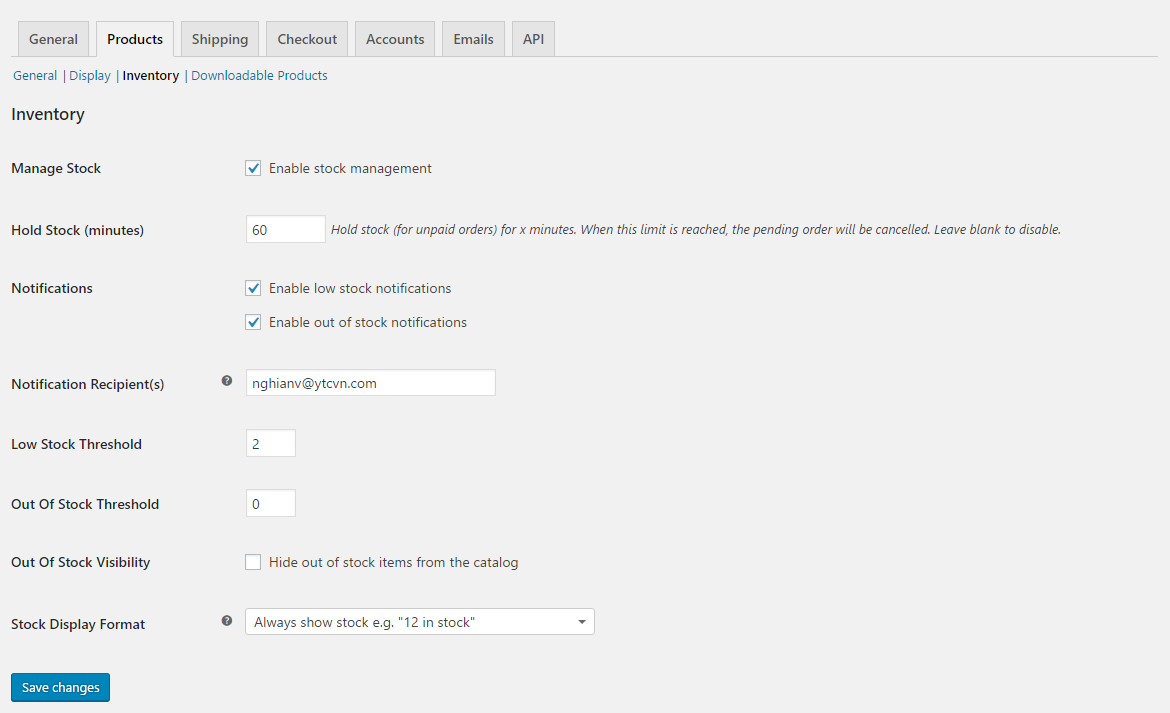
- To change the Inventory Settings, please go to “Woocommerce > Settings > Products > Inventory” section.
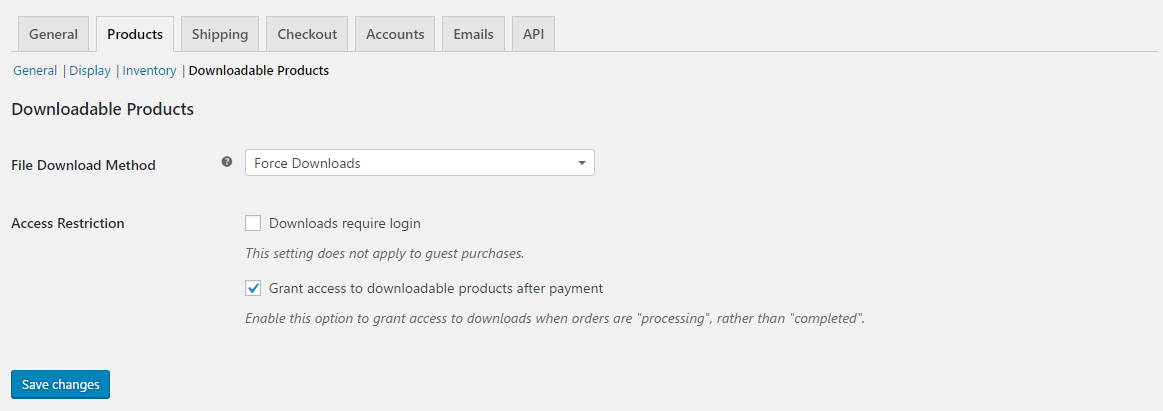
- To change the settings of Downloadable Products, please go to “Woocommerce > Settings > Products > Downloadable Products” section.
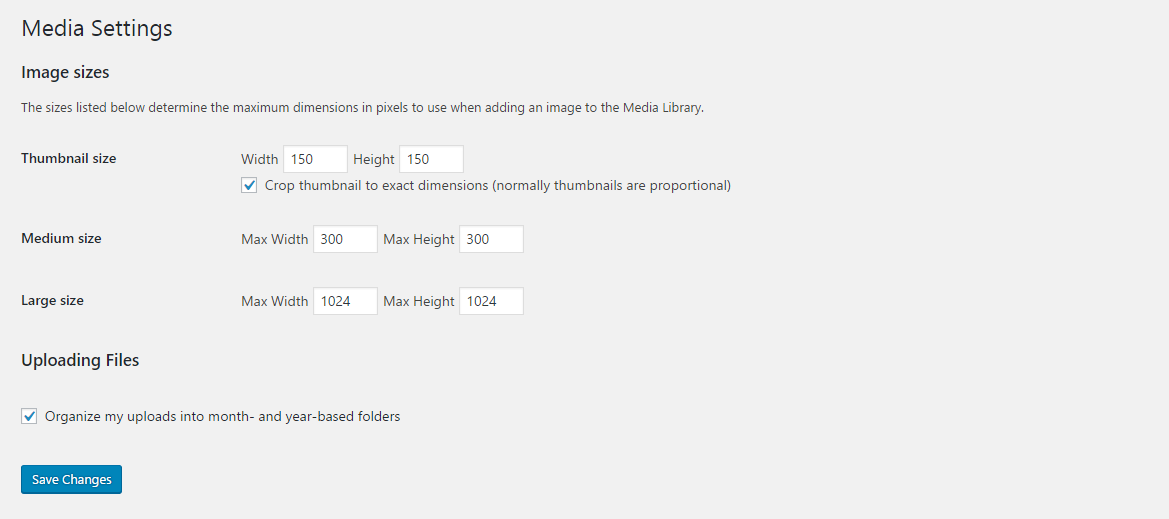
11.2 Image Dimensions In Posts
For SW TopZ theme, we recommend using some dimensions for your image in posts. Please go to Settings >> Media and set up these dimensions:
11.3 Product Image Size
For SW TopZ theme, we recommend using the dimensions for your product image in the following page:
- Home Page 1 : 600 x 700 pixels
- Home Page 2 : 600 x 700 pixels
- Shop: 600 x 700 pixels
11.4 Visual Composer
The SW TopZ Theme uses the Visual Composer 5.1.1. This is a really powerful page buider plugin that let you customize your pages in the frontend and backend and save you tons of time working on the site content. You will be able to take full control over your WordPress site, build any layout you can imagine without any code changing. Moreover, now you can choose either work on a backend or move your page building process to frontend and instantly see the changes you make.
You can see some Tutorial Videos or Tutorials for Beginner to get more details about this plugin.
11.5 Translation
This theme is compatible with WPML plugin.
WPML is the most popular plugin for multi language support. Below you will find documentation their team created for using WPML plugin. If you’ve purchased WPML and have any questions or issues, please check the links below.
- WPML Plugin – The highly recommended plugin to manage multi-lingual sites
- WPML Forum Support – If you bought WPML then you get free support from their amazing team
- Translating Widgets – Tutorial recommended by wpml team for translating widgets
12SUPPORT
- SUPPORT: If there is any questions that are beyond the scope of this help file, please feel free to contact our team via: Support Tickets System to get help.
- FAQs: Besides, you can check the Frequently Asked Questions about our products and services.