This is tutorial article for how to install Quickstart package for WordPress 4.7.x by WPTheme Go. Thanks for your reading!
1. About Quickstart Package?
Quickstart Package is the one that allows users to install the WordPress Theme demo data in few steps. After this installation, you will have both WordPress, the theme and demo content ready in your site.
>> Due to the policy, the quickstart file will be NOT included in the theme package on Themeforest. You can contact us via our Support Page for more detail about it.
2. Requirements
Before the installation, your site and server should meet some basic requirements of the WordPress as well as the theme.
- PHP version 5.6 or later
- MySQL version 5 or later
- You can refer to WordPress Requirements for more info.
Also, you need to pay attention to some settings related to your host server. If there is any problem related to these values, you should contact your host to get support.
max_execution_time 360memory_limit 128Mpost_max_size 32Mupload_max_filesize 32M
3. Quickstart Installation
Step 1: Download the quickstart package that you want to install. If you purchase the theme on Themeforest, please contact us via our Support Page for more detail about this.
Step 2: Upload and Extract the whole Quickstart package to your server. It could be a folder in xampp >> htdocs if you install on your localhost. In Quickstart folder you will see all sample data of your desire theme.
Step 3: If there is no database available for your new site, please Create a Database for it. You can refer How to Create the Database and a User for more detail. The Database info should be noted then you can use it later.
Step 4: Navigate to the URL where you install the quickstart and to load the WordPress Installer.
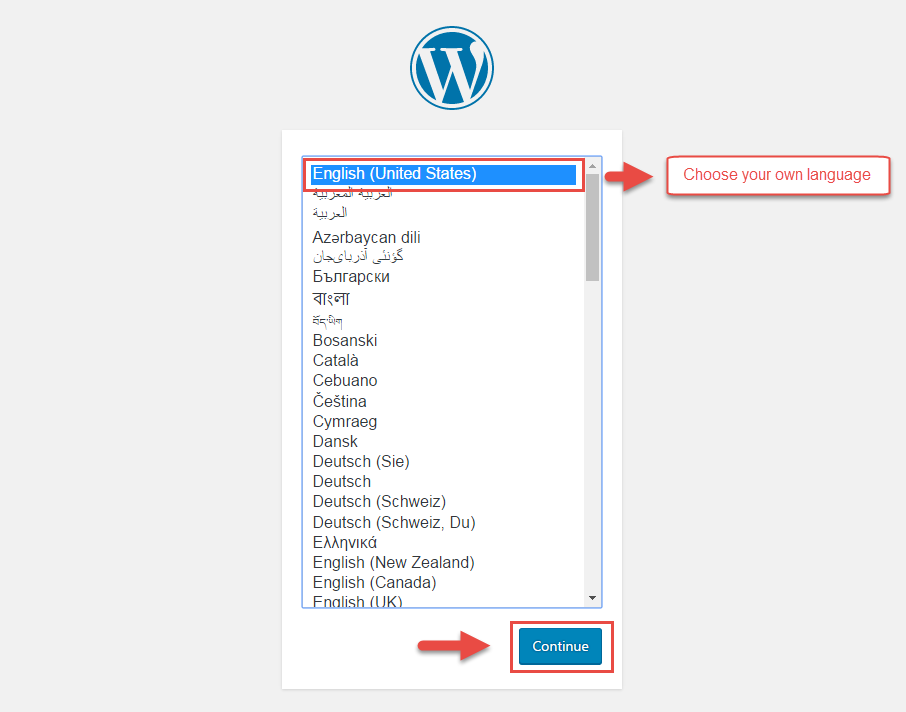
At first, you will see the Language Setting window. Please choose the one you want. It also can be changed after in your site.
Click on the Continue button to go to next step.
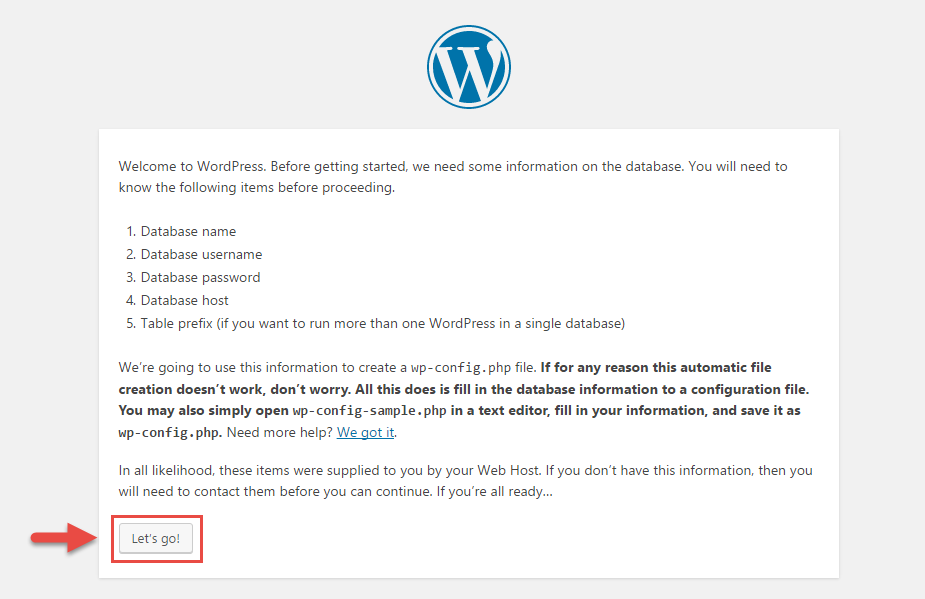
Step 5: Now, you will see what is required information for the next step. They includes Database info, Table prefix and some other notes.
Please click on the Let’s go button to continue.
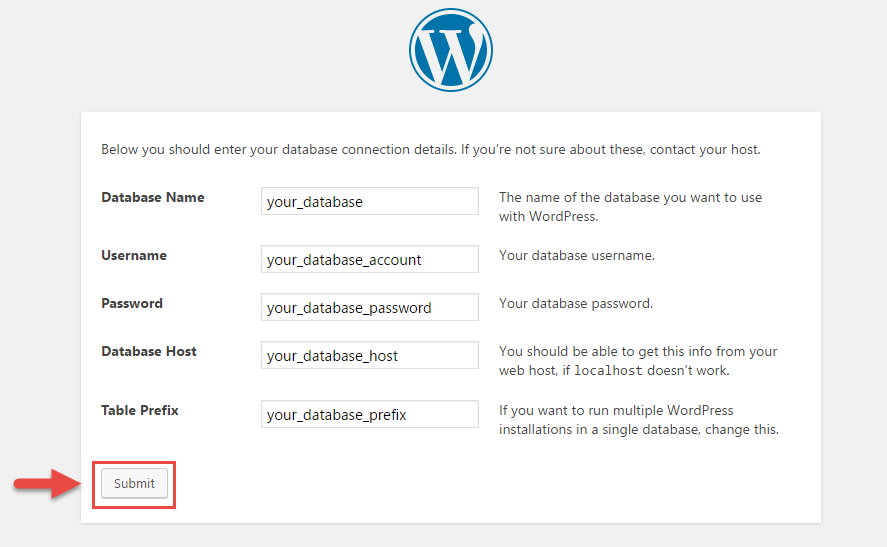
Step 6: In this step, you need to enter the Database Name, Username, Password, Database Host and Table Prefix then click Submit button to go to next step.
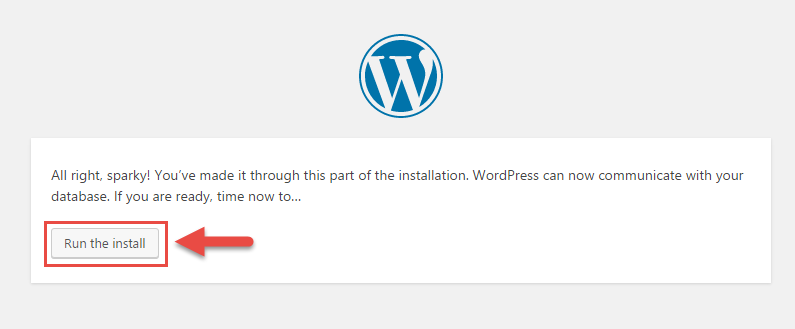
Step 7: WordPress now connect to your database and show you a success message.
Please click on Run the Install button to continue.
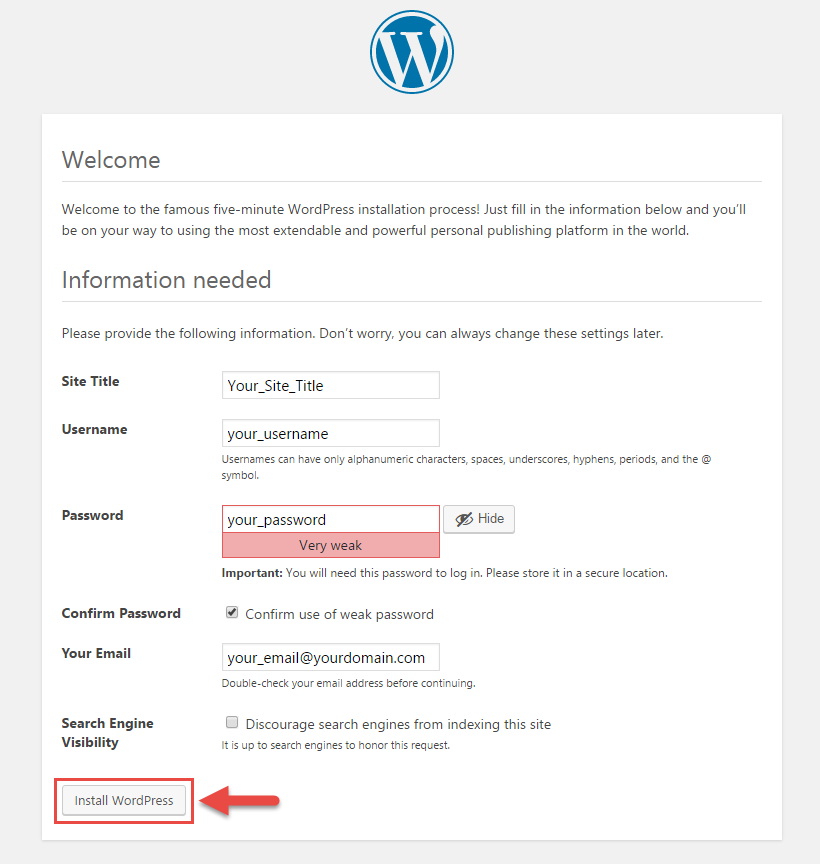
Step 8: Now you need to provide some information for WordPress site. This includes Site Title, Username, Password, Your Email and other information. After that, let’s click Install WordPress to install your site.
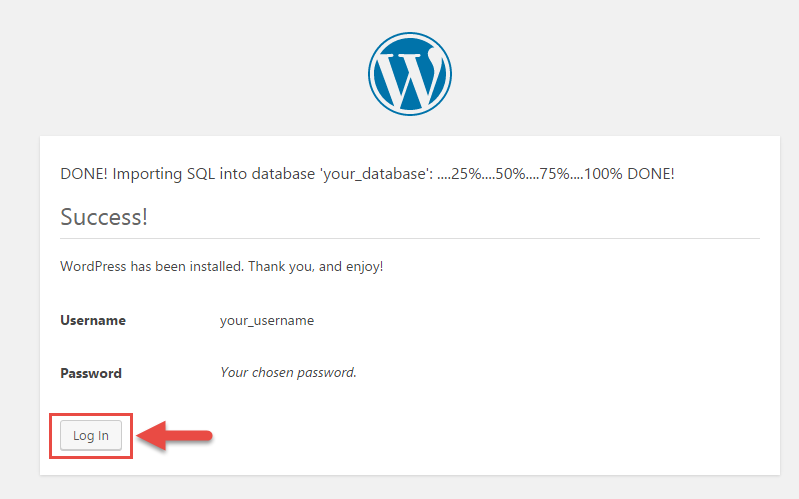
Step 9: Now, you will see a success message Success! WordPress has been installed.. Let’s Log in and enjoy your new site now.
Step 10: Now you will see the Admin Login Screen to enter Admin Credentials to login your site. It will open Admin Panel after successful authentication.
Here is video guide:
4. Get Support from WPTheme Go
- SUPPORT – If you have any questions that are beyond the scope of this documentation, please feel free to send us via: Our Support Page to get help in 24 hours.
- FAQs – You can also refer to the FAQs for more details about the Frequently Asked Questions.
